

Your bedroom needs a focal point, and a worn or outdated headboard often drags the whole room down. You do not need to buy expensive new furniture to fix this issue. Learning how to paint a bed headboard allows you to create a custom, high-end statement piece for a fraction of the cost.
This guide details the professional process used by furniture flippers to achieve flawless results. You will discover the exact products, safety steps, and spraying techniques required for a durable finish. Follow these instructions to transform your thrift store find or old frame into a showpiece that lasts for years.
Clean and Sand the Surface for Maximum Adhesion

Paint failure usually happens because the surface was not clean enough before application. Skin oils, dust, and old polish create a barrier that prevents paint from bonding to the wood. You must remove every trace of grime to ensure your new finish stays put.
Degrease With a TSP-Based Cleaner
Start by spraying the entire headboard with a TSP-based degreaser like White Lightning by Dixie Belle. This product cuts through years of accumulated body oils and cleaning residue.
* Mix the granules directly into a spray bottle for easy application.
* Spray the solution generously onto the wood.
* Let it sit for one minute to break down grease.
* Wipe the surface clean with a fresh cloth.
Scuff Sand With 220-Grit Paper
Sanding creates “tooth” on the surface, giving the primer something to grip. You do not need to strip the wood down to bare material.
* Attach 220-grit sandpaper to a Surf Prep sander.
* Sand all visible areas, following the curves of the frame.
* Focus on edges and corners where wear is common.
* Wear an RZ mask to protect your lungs from fine dust particles.
Remove All Dust Particles
Even invisible dust can ruin a smooth spray finish by creating a gritty texture.
* Wipe the entire piece with a damp cloth.
* Inspect the surface under bright light for missed spots.
* Allow the wood to dry completely before proceeding.
* Work in a low-dust environment to prevent new particles from settling.
Repair Damage and Apply Stain-Blocking Primer
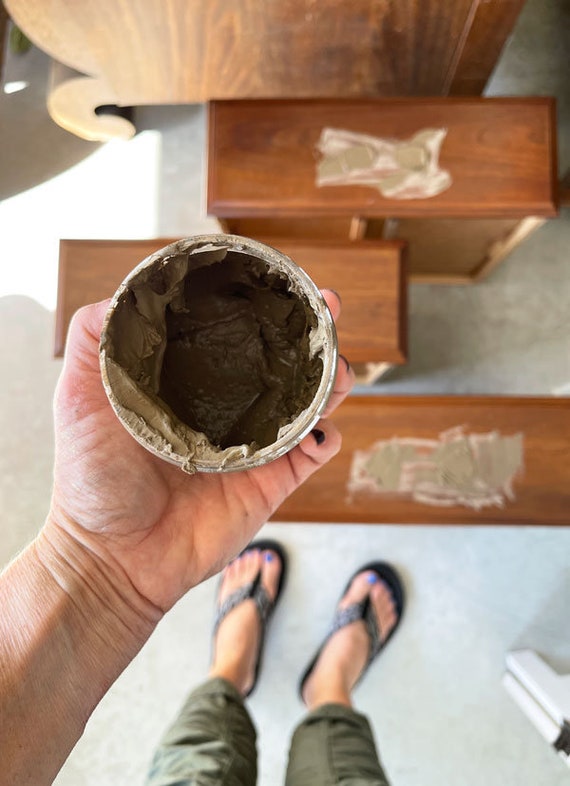
Skipping repairs or using the wrong primer leads to visible imperfections and stain bleed-through. A professional finish requires a perfectly smooth and sealed base. This step ensures your hard work does not get ruined by hidden flaws.
Fill Gouges and Screw Holes
Inspect the wood closely for dents, scratches, or empty screw holes near mounting brackets.
* Apply Dixie Mud wood filler into any voids using a putty knife.
* Press the filler firmly to ensure no air pockets remain.
* Wipe away excess material immediately.
* Let it dry for 1–2 hours, then sand smooth with 220-grit paper.
Prime With Boss Water-Based Formula
Boss by Dixie Belle is a water-based primer designed to block stains and reduce the number of paint coats needed.
* Stir the primer thoroughly without shaking to avoid bubbles.
* Strain the liquid through a paint strainer to remove lumps.
* Never add water to this product, as it weakens the seal.
* Spray an even coat over all surfaces and let it dry overnight.
Spray Two Coats of Chalk Paint for Full Coverage
Chalk paint offers excellent adhesion and a modern matte look, but application technique matters. Spraying provides a factory-like finish that brushes often cannot match on curved furniture. Two coats are essential for a solid, streak-free color.
Strain Paint Before Loading Sprayer
Debris in the paint can clog your sprayer nozzle and ruin the finish mid-job.
* Stir your Dixie Belle Cotton chalk paint well.
* Pour the paint through a strainer into your sprayer cup.
* Check that the consistency is smooth and ready to spray.
* Do not add water to thin the product.
Apply First Even Coat
Start at the top of the headboard and work your way down with steady, overlapping passes.
* Keep the sprayer moving to prevent drips or heavy spots.
* Cover all angles, edges, and detailed carvings.
* Allow the first coat to dry for 2–4 hours.
* Move the piece indoors if dust or cool weather threatens the wet paint.
Add Second Coat for Opacity
The second coat eliminates patchiness and ensures rich, uniform color depth.
* Apply the second layer using the same technique as the first.
* Inspect the surface under direct light for any thin spots.
* Let the paint dry completely for 4–6 hours.
* Ensure the room is well-ventilated during the drying process.
Seal With Durable Satin Top Coat
Unsealed chalk paint is porous and susceptible to stains from skin oils or cleaning products. A top coat locks in the color and adds necessary durability for daily use. This final layer gives your headboard a refined, professional sheen.
Use Dedicated Sprayer for Clear Coat
Color contamination is a major risk if you use the same equipment for paint and clear coat.
* Reserve a specific sprayer and nozzle only for clear top coats.
* Strain the Dixie Belle Satin top coat before loading.
* Test the spray pattern on cardboard to ensure no color tint appears.
* This prevents grayish tints from ruining your white or light paint.
Smooth the Final Finish
Proper application of the top coat results in a soft, subtle sheen with minimal luster.
* Spray one even coat over the entire surface.
* Allow it to dry completely according to package instructions.
* Lightly sand with a 320–400 grit sanding pad to remove dust nibs.
* Wipe clean with a damp cloth for a velvety smooth touch.
Complete Final Touch-Ups and Reassembly

The difference between a good job and a great one lies in the final details. Careful tape removal and touch-ups ensure crisp lines and a polished look. Proper curing time is vital before you reattach the headboard to your bed frame.
Remove Painter’s Tape Carefully
Timing is critical when removing tape to avoid peeling fresh paint.
* Wait until the top coat is dry but not fully cured, usually around 24 hours.
* Pull the tape back at a 45-degree angle slowly.
* Stop immediately if you see the paint lifting.
* Inspect the lines for any bleeding or uneven edges.
Touch Up Edges With Artist Brush
Small imperfections often appear along tape lines or in deep corners after the final sand.
* Use a small artist brush and leftover paint for precision.
* Dab gently to blend the touch-up with the surrounding area.
* Let these small spots dry completely.
* Re-sand lightly if the touch-up feels raised.
Reinstall After Full Cure
Rushing the reassembly can damage your new finish before it hardens completely.
* Wait at least 24–48 hours before attaching the headboard to the bed.
* Secure the hardware firmly but avoid overtightening.
* Step back and admire your transformed bedroom centerpiece.
* Enjoy a durable finish that resists daily wear and tear.
Frequently Asked Questions About Painting Headboards
Can I paint a headboard without sanding?
No, sanding is essential to create “tooth” for the paint to adhere properly. Skipping this step often leads to peeling, especially on high-contact furniture like headboards.
What type of paint works best for headboards?
Chalk paint, such as Dixie Belle Cotton, is ideal because it adheres well and provides a modern matte finish. It requires less prep than traditional paints and covers imperfections effectively.
Do I need to seal chalk paint on a headboard?
Yes, sealing is mandatory because chalk paint is porous. A satin top coat protects the surface from skin oils, stains, and daily wear, ensuring the finish lasts for years.
How many coats of paint are needed for full coverage?
Most headboards require two coats of chalk paint to achieve a solid, streak-free color. The first coat primes the color, while the second ensures uniform opacity and depth.
Can I use a brush instead of a sprayer?
While you can use a brush, spraying is recommended for curved surfaces to avoid brush marks. Spraying provides a smoother, factory-like finish that is difficult to achieve with a brush alone.
Key Takeaways for Painting Your Bed Headboard

Transforming your bedroom starts with proper preparation and the right materials. By cleaning with TSP, sanding with 220-grit paper, and using compatible primers and paints, you create a durable finish that looks professional. Remember that skipping steps like straining paint or sealing the top coat will compromise the longevity of your project.
Your next step is to gather your supplies, including a quality mask and dedicated sprayer, before beginning. Take your time during the prep phase, as this foundation determines the final quality. With patience and attention to detail, you can turn an outdated piece into a stunning focal point for your home.



