
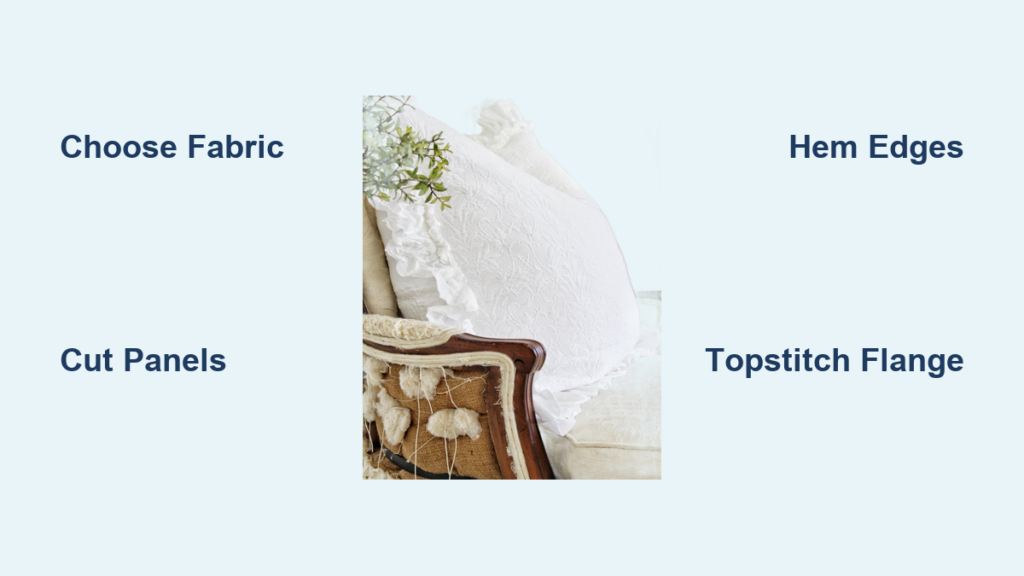
Tired of spending $30 to $80 on euro pillow covers that don’t match your bedroom style? You can create custom euro shams that look professionally made for a fraction of the retail cost. This guide walks you through every step, from selecting fabric to adding the perfect flange, using techniques that interior designers rely on for polished results.
By the end of this tutorial, you’ll know how to cut precise panels, create a hidden envelope closure, and finish with crisp topstitching that transforms basic fabric into a designer-worthy sham.
Choose the Right Fabric for Your Euro Sham
Selecting the appropriate fabric is the foundation of a professional-looking euro pillow cover. The fabric you choose affects durability, drape, and how well the finished sham holds its shape.
Best Fabrics for Euro Shams
These fabrics work well for euro pillow covers and are readily available at craft stores:
• Linen offers breathable comfort and elegant drape that softens beautifully over time, making it ideal for modern, coastal, or minimalist bedroom styles
• Cotton (quilting or decorator weight) provides durability and ease of sewing, perfect for beginners and everyday use
• Cotton-poly blends resist wrinkles and cost less than pure natural fibers, suited for high-traffic bedrooms
• Repurposed king fitted sheets deliver high thread count at minimal cost, and one sheet can yield 3 to 4 euro shams
• Drapery fabric creates a structured, luxurious look for formal accent shams
Fabrics to Avoid
Some materials create problems during construction or wear poorly:
• Stretchy knits pucker when sewn and are difficult to keep square
• Ultra-sheer or flimsy fabrics become transparent and tear easily
• Mismatched back fabrics should complement the front in weight and care requirements
Pro Tip: Always pre-wash fabric before cutting. Cotton and linen shrink significantly after their first wash, which could ruin your carefully measured dimensions.
Determine the Correct Euro Pillow Size
Euro pillows come in two standard sizes, and measuring your actual insert prevents fitting problems later. Manufactured inserts can vary by up to 1/2 inch from the listed size.
Standard Euro Pillow Dimensions
The most common sizes you’ll encounter are:
• 26 × 26 inches (66 × 66 cm) works with most queen and king beds and is the most widely available insert size
• 28 × 28 inches (71 × 71 cm) is less common and typically used for oversized or custom bedding
Calculate Your Cut Size
Your fabric cut must account for seam allowance and any flange width you want. For a 26-inch pillow with a 2.5-inch flange and 5/8-inch seam allowance, cut your front panel at 32.25 inches square. For no flange, cut 27.25 inches square. Add 2 inches to all dimensions when working with 28-inch pillows.
Warning: Always measure your specific pillow insert before cutting fabric. Size variations between manufacturers cause fit problems that are difficult to fix after sewing.
Cut Your Fabric Panels to Size

Precise cutting ensures your euro sham fits snugly and looks professional. Using the right tools makes this step faster and more accurate.
Tools You Need for Cutting
Gather these supplies before you start:
• Rotary cutter with a sharp blade
• Self-healing cutting mat
• Clear quilters ruler (at least 24 inches)
• Sharp fabric shears for trimming
• Cardboard template for repeated cuts
Cutting the Front Panel
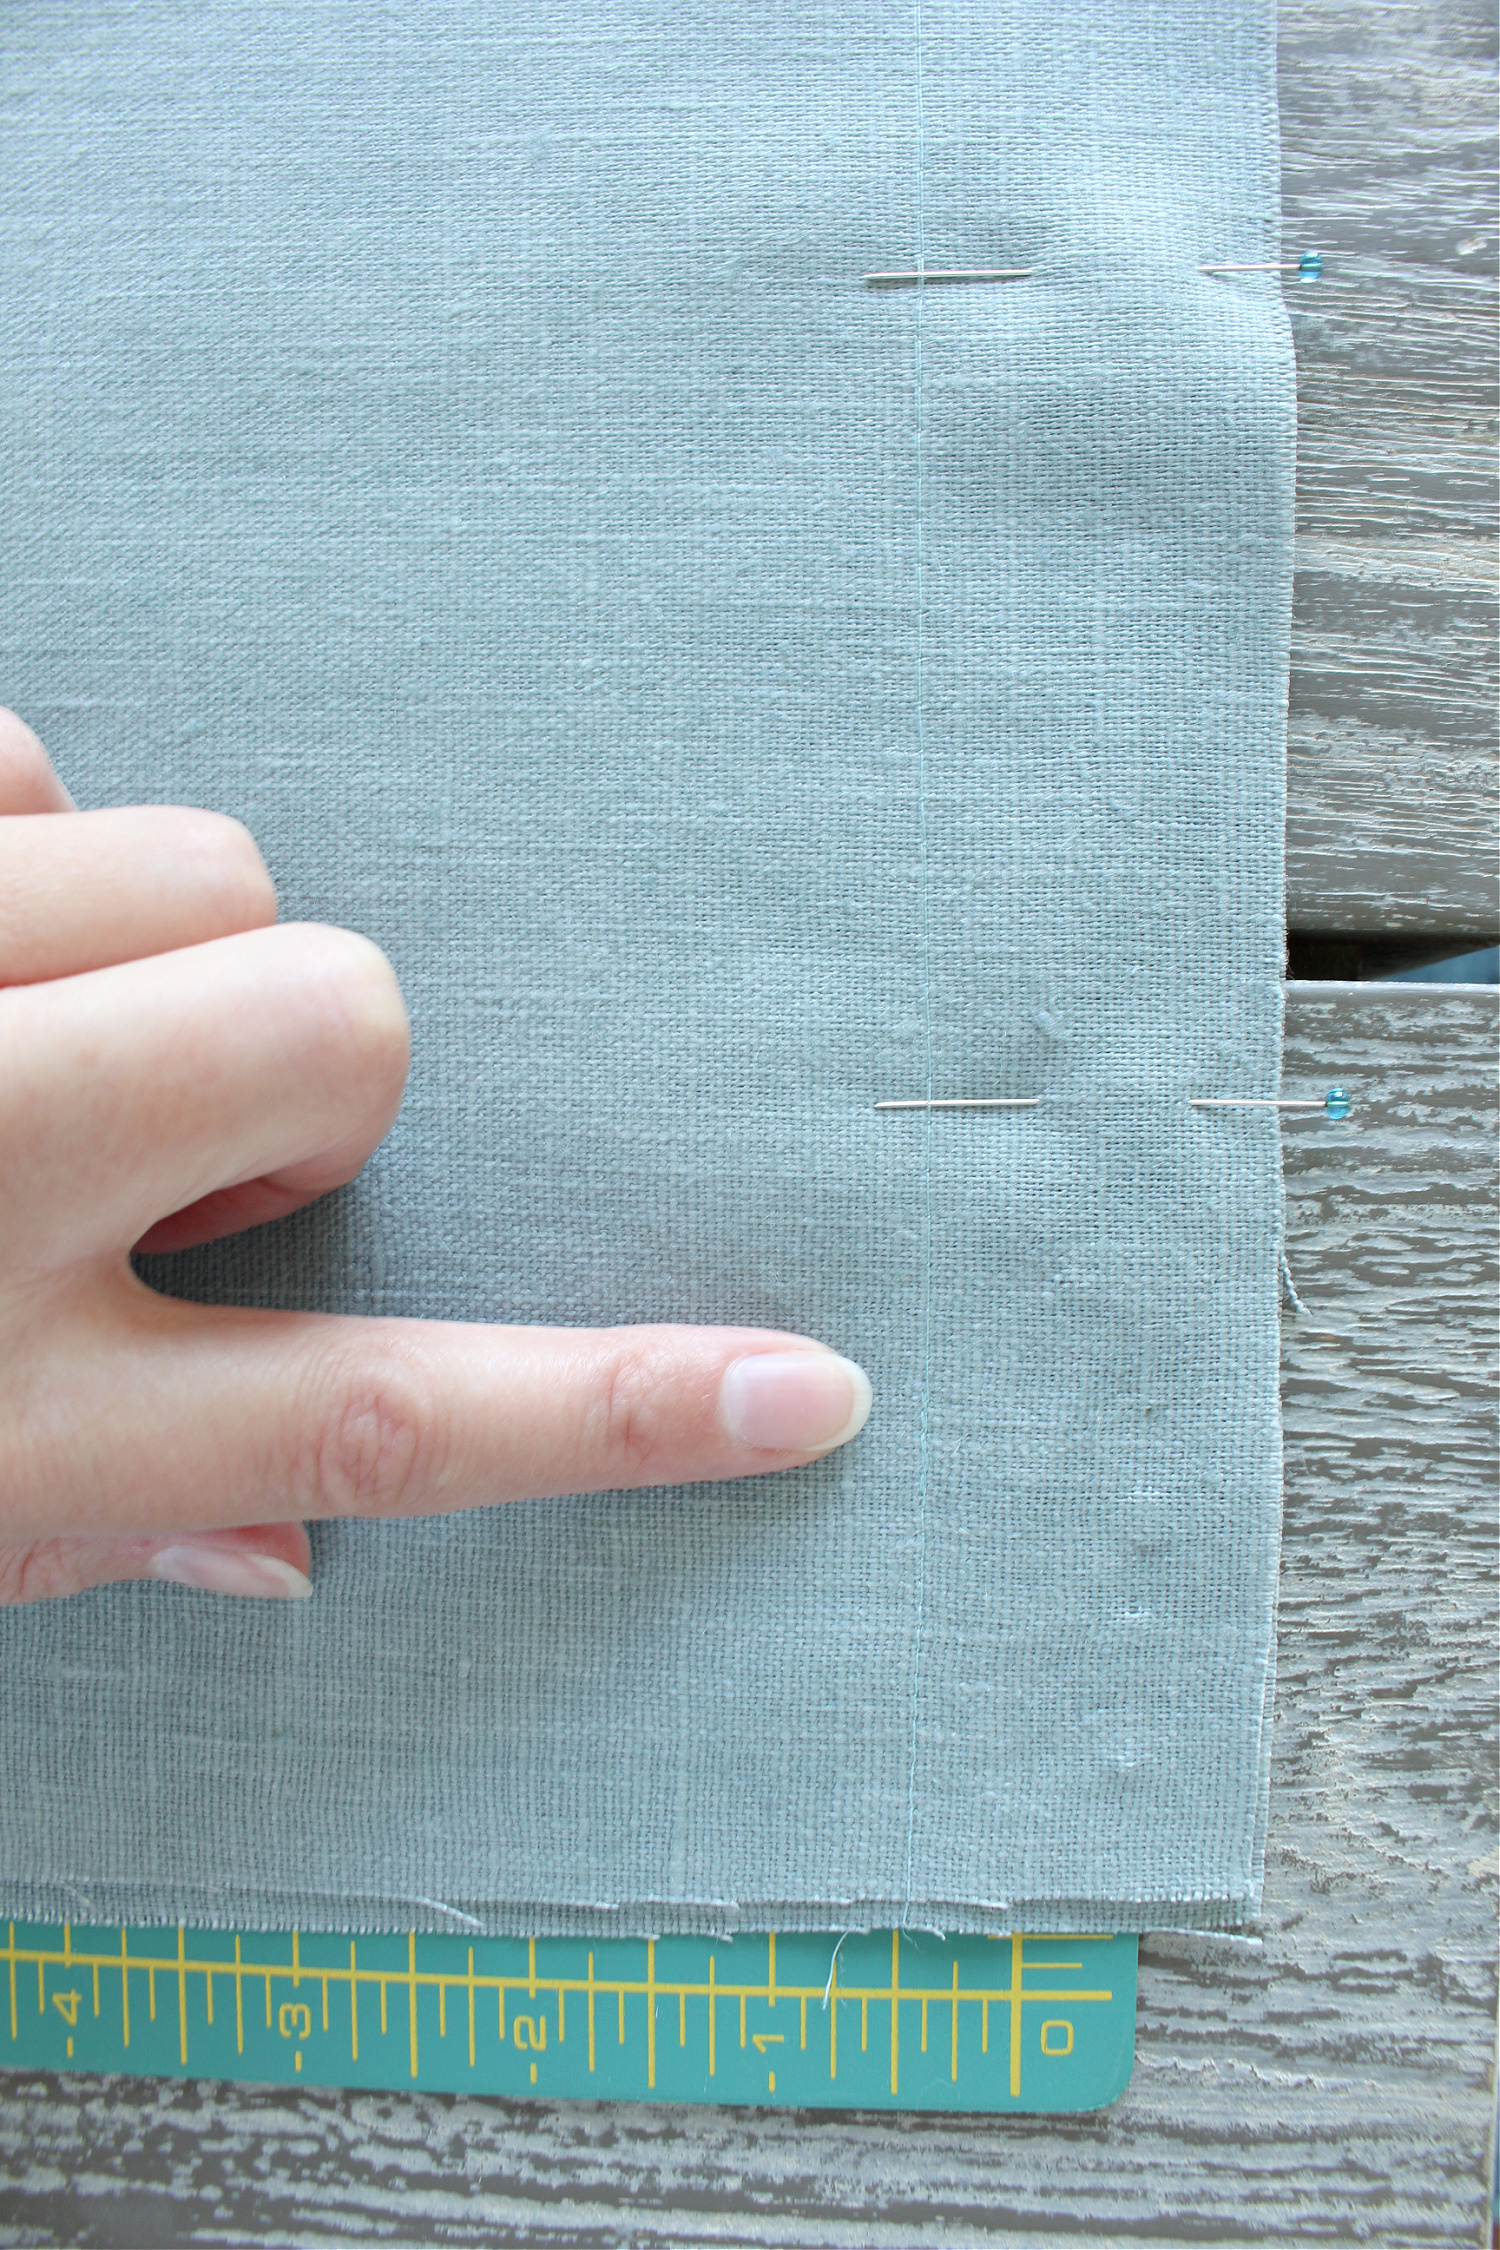
Place your fabric right side down on the cutting mat. Align the fabric grain carefully, ensuring the warp and weft run perpendicular to each other. Measure and mark your dimensions with tailor’s chalk or a fabric marker. Cut along your marked lines using the rotary cutter and ruler for perfectly straight edges. Label the wrong side of the fabric so you don’t confuse front and back during assembly.
Cutting the Back Panels
For an envelope back closure, you need two rectangular panels. The width matches your front panel. The height equals half the pillow width plus 2 inches plus the seam allowance. For a 26-inch pillow, this means 16 inches tall. Cut two rectangles at your calculated dimensions.
Expert Note: Create a cardboard template for the front panel if you plan to make multiple shams. This guarantees identical sizing and speeds up production.
Create an Envelope Back Closure
The envelope back is the easiest closure method and requires no special machine attachments. This style creates a clean front appearance while allowing easy pillow insertion and removal.
Hem the Back Panel Edges
Take one back panel and fold one long edge 1/2 inch toward the wrong side. Press with an iron. Fold again another 1/2 inch to enclose the raw edge completely. Press the fold flat. Pin or clip the hem in place. Topstitch 1/8 inch (about 3.5 mm) from the inner folded edge, backstitching at both ends to secure the stitches. Repeat this process for the second back panel.
Ensure Proper Overlap
The hemmed edges must overlap by 1.5 to 2 inches when the panels are placed together. This overlap prevents the pillow insert from showing through the closure and keeps the sham secure during use. If your panels don’t overlap enough, recalculate your height measurement.
Prevent Fraying on Raw Edges
Unfinished seams unravel during washing, especially with cotton and linen fabrics. Finishing edges before assembly extends the life of your euro sham.
Method 1: Overlock Stitch with Serger
If you have a serger, finish all raw edges of the front panel and both back panels using a 3-thread or 4-thread overlock stitch. This creates a clean, professional edge that resists fraying.
Method 2: Zigzag Stitch on Home Machine
Set your machine to a zigzag stitch with width at 2.5 mm and length at 2.0 mm. Stitch along all raw edges, then trim excess fabric close to the stitching without cutting the threads.
Critical: For thick fabrics like quilting cotton or linen, do not trim seam allowances after sewing. Instead, pivot carefully at corners to avoid cutting through the stitching.
Assemble Your Euro Sham
Now comes the actual construction. Layering the pieces correctly ensures the finished sham has the right side facing outward.
Layer the Components
Place the front panel right side up on a flat surface. Take the first back panel and place it on top, right side down, aligning it with the top, left, and bottom edges. The hemmed edge should face toward the center of the sham. Place the second back panel on the opposite side, right side down, aligning with the top, right, and bottom edges. The hemmed edge should overlap the first panel by 1.5 to 2 inches. Pin or clip all around the perimeter to hold the layers together.
Sew the Perimeter Seam
Using a 5/8-inch (or 1.5 cm) seam allowance, sew around all four sides of the sham. Backstitch at the beginning and end of each seam to secure the stitches. Use painter’s tape applied to your machine’s bed as a visual guide for maintaining consistent seam width. Leave the needle down when pivoting at corners for sharper turns.
Clip Corners and Turn
Cut diagonally across each corner, being careful not to cut through the stitching. This allows the fabric to turn cleanly and creates a crisp corner. Turn the sham right side out through the envelope opening in the back. Use a point turner or knitting needle to push out the corners fully. Press thoroughly with a hot iron, using a press cloth for delicate fabrics.
Finish with Professional Topstitching
Topstitching defines the flange and keeps the seam allowance secure. This step transforms a handmade item into something that looks store-bought.
Topstitch the Flange
Decide on your flange width (1.5 inches creates a structured look, while 2.5 inches offers softer drape). Using matching thread, stitch exactly that distance from the edge all around the sham. Backstitch at corners to secure. This topstitching also prevents the flange from flopping over time.
Pro Tip: Apply painter’s tape along the flange measurement to create a perfect stitching guide on your machine bed.
Troubleshoot Common Mistakes
Even experienced sewers encounter problems. Knowing how to fix these issues saves time and frustration.
Flange Won’t Stand Up
A flange that collapses rather than standing upright is usually caused by excessive width or lack of support. Reduce the flange to 1.5 inches or apply iron-on interfacing to the wrong side of the front panel edges before assembly.
Back Panels Don’t Overlap Enough
If the envelope flaps don’t meet in the middle, your back panel height is incorrect. Recalculate using the formula: (pillow width ÷ 2) + 2 inches + seam allowance. Adjust and recut if necessary.
Fabric Puckers During Sewing
Puckering occurs when fabric stretches unevenly under the presser foot. Pin more frequently throughout the seam, and use a consistent stitch length without pulling the fabric as you sew.
Corners Appear Rounded
Rounded corners result from incomplete turning or inaccurate seam allowance. Use a point turner to push corners out fully, and verify your 5/8-inch seam is consistent all around.
Add Custom Design Details
Once you’ve mastered the basic euro sham, personalize your creation with these enhancements.
Monogramming Options
Embroider initials using an embroidery machine or hand-stitch with a simple running stitch. Center the monogram on the front panel or place it in the corner for a subtle detail. Choose contrasting thread for visibility or tonal thread for understated elegance.
Creative Dye Techniques
Ice dyeing creates beautiful marbled patterns on natural fibers like cotton and linen. Place fabric in a colander, cover with ice, and sprinkle dye powder over the ice. Let melt and rinse after 24 hours.
Decorative Trims
Add contrast piping along the flange edge for a tailored look. Use braid, lace, or pom-pom trim for whimsy and visual interest. Test trim attachment on scrap fabric first to ensure your machine can handle the bulk.
Style Your Euro Shams Like a Designer
Knowing how to make a euro pillow cover is only half the battle. Proper styling maximizes visual impact.
How Many Euro Shams to Use
Queen beds typically look best with 2 euro shams, while king beds benefit from 3 for balanced coverage. Odd numbers create visual interest and fill the bed width appropriately.
Placement Techniques
Position euro shams at the back of the bed behind your sleeping pillows. Place them in front of the headboard for a layered look. Keep the square shape vertical rather than rotated to maintain the classic euro sham appearance.
Coordinate Your Bedding
Match euro shams to your duvet cover, curtains, or throw pillows for a cohesive look. Use a tonal color palette (such as navy, slate, and white) rather than mixing unrelated colors. Layer different textures (linen with waffle weave) rather than competing patterns.
Care for Your Handmade Euro Shams
Proper maintenance keeps your euro shams looking fresh and extends their lifespan.
Washing Instructions
Always remove the pillow insert before washing. Follow the fabric-specific care instructions on your chosen material. Linen benefits from cold water and gentle cycle with air drying or low heat. Cotton tolerates warm water and medium heat in the dryer. Iron after washing, particularly linen which wrinkles easily.
Storage Recommendations
Store shams flat or rolled to prevent deep creases from forming. Avoid plastic storage bins, which trap moisture and can cause mildew. Rotate seasonal shams (light colors for summer, dark for winter) to vary wear.
Key Takeaways for Making Euro Pillow Covers
Making a euro pillow cover is a rewarding project that delivers high-impact decor at a fraction of retail prices. The key success factors are selecting quality fabric that complements your bedroom style, measuring and cutting precisely to ensure a snug fit, and pressing every step for professional results.
Using an envelope back closure eliminates the need for special machine attachments, making this project accessible to beginners. The painter’s tape trick for topstitching guidance produces clean, consistent results that rival store-bought shams. With just 1 yard of fabric and 90 minutes of crafting time, you can create a designer-worthy euro sham that elevates your entire bed.
Start with one sham using a simple fabric, then expand to matching sets as your confidence grows. Your dream bedroom is just a few stitches away.
Frequently Asked Questions About Making Euro Pillow Covers
What is the standard size for a euro pillow cover?
The most common euro pillow size is 26 × 26 inches, though 28 × 28 inches is also used for oversized bedding. Your cover should be cut slightly larger to accommodate seam allowance and any desired flange width.
How much fabric do I need for one euro pillow cover?
One yard (0.91 meters) of fabric is typically sufficient for a single euro sham. If using a king-sized fitted sheet as your fabric source, one sheet can yield 3 to 4 euro shams after removing the elastic.
What is the easiest closure method for beginners?
The envelope back closure is the easiest method and requires no special machine attachments. It consists of two overlapping back panels that slide together like an envelope, allowing easy pillow insertion and removal.
How do I prevent my flange from flopping over?
Use a narrower flange (1.5 inches instead of 2.5 inches), apply iron-on interfacing to the wrong side of the fabric edges, or add topstitching through all layers at the flange width to hold it in position.
Can I use a regular pillow instead of a euro pillow insert?
Euro pillow inserts are specifically designed to be square and firm. Using a regular pillow may result in a poorly fitting cover that looks saggy or doesn’t fill the sham properly.


