
Tired of flat, limp throw pillows that lose shape after a week? A box pillow cover transforms your space with clean lines, structured depth, and a custom upholstery look, all while being fully removable and washable. Unlike standard pillowcases, box pillow covers wrap around a foam insert with vertical gusset sides, creating a tailored, furniture-grade finish perfect for window seats, benches, outdoor loungers, or statement couch cushions.
Whether you are refreshing an old pet bed or crafting bespoke meditation seating, this guide walks you through every step from measuring foam to stitching sharp corners. You will learn how to choose between zipper and envelope closures, cut fabric using foolproof formulas, install piping for a designer touch, and avoid the number one mistake that ruins zipper function.
Measure Foam & Plan Dimensions
Before touching fabric, start with precise measurements of your foam insert. Accuracy ensures a snug fit that stays secure while still allowing easy insertion.
Take Three Key Measurements
Use a steel ruler or tape measure to record your foam dimensions. You need the width (side to side across the top), the depth or length (front to back), and the thickness (height from top to bottom, which determines gusset depth). Record all three measurements before purchasing fabric.
For example, a rectangular foam insert might measure 20.5 inches wide by 15.5 inches deep by 3 inches thick. A square version could be 21 inches by 21 inches by 3 inches. Add one-half inch seam allowance per side (one inch total per dimension) to all panels when cutting fabric.
Choose Your Closure Style
Your closure affects both construction and usability. Consider how the pillow will be used before deciding.
Zipper closures work best for high use, outdoor applications, or tight fitting cushions. They provide full opening for easy foam insertion and removal. Envelope closures suit decorative pillows, infrequent use, or reversible designs. They require no zipper and are beginner friendly, though they need five to six inches extra length in the back for proper overlap.
Cut Fabric Using Proven Formulas
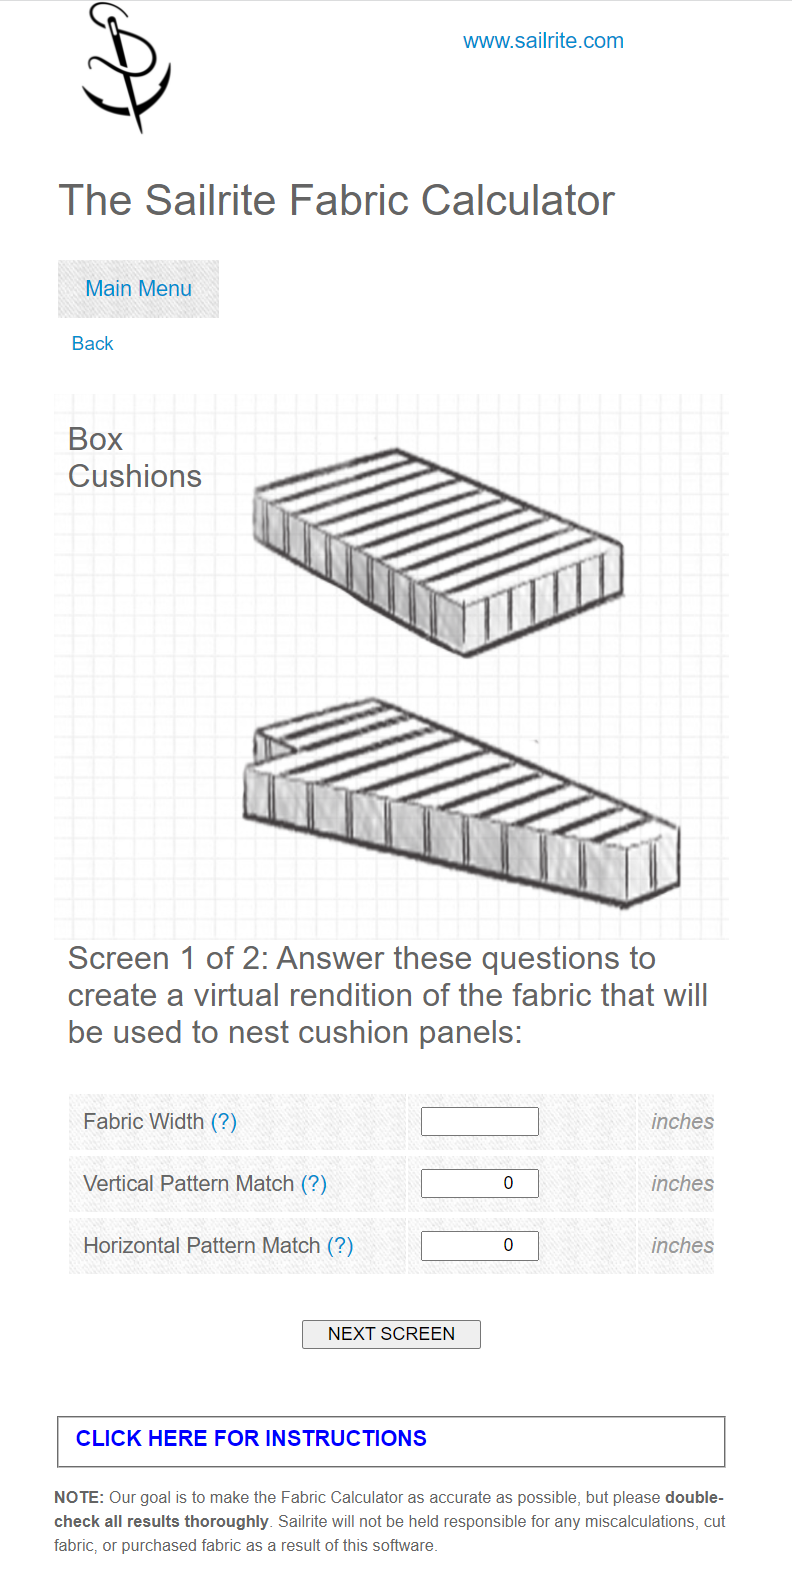
Use these calculation methods based on your chosen construction style. All assume one-half inch seam allowance unless noted.
Option One: Continuous Strip Method
This method works best for seamless, professional results with hidden zipper. The strip width equals foam thickness plus one inch. The strip length equals perimeter plus ten inches, calculated as two times width plus two times depth plus ten inches.
For example, for 21 inch by 21 inch by 3 inch foam, the width would be three plus one equals four inches. The length would be two times (21 plus 21) plus ten equals 94 inches. Cut a four inch by 94 inch strip.
Option Two: Separate Panel Method
This method works best for beginners and offers precise control. You will cut a top panel and bottom panel, each measuring width plus one inch by depth plus one inch. The boxing strip length equals perimeter minus zipper section plus one inch. The zipper casing measures width plus eight inches by thickness plus three inches.
For example, with 20.5 inch width, 15.5 inch depth, and 3 inch thickness, the perimeter is 72 inches. The boxing length would be 72 minus (20.5 plus 8) plus one equals 44.5 inches. Height would be three plus one equals four inches. Cut a 44.5 inch by 4 inch strip.
Prepare Foam with Dacron Wrap
Wrapping your foam in Dacron (polyester batting) adds softness, fills sharp edges, and protects the cover from abrasion. This step creates a plush, professional look.
Step-by-Step Dacron Application
Cut Dacron sheets to match foam top and bottom dimensions. You do not need to cover the sides. Lightly spray one side of the foam with spray adhesive (such as 3M Super 77). Press the Dacron evenly onto the foam, avoiding wrinkles or bunching. Repeat on the opposite side. Trim excess Dacron flush with foam edges using sharp scissors.
Never glue Dacron to the zipper edge side, as it can catch during foam insertion. Use one-fourth to one-half inch thick Dacron. Thicker batting creates a plusher look but requires slightly larger fabric cuts.
Make and Attach Welting (Optional)
Add piping (also called welting) for a high end, upholstered appearance. This optional step elevates your finished piece significantly.
Cut and Sew Piping Cord
Cut bias strips two inches wide from your main fabric or a contrasting fabric. Fold the strip in half lengthwise, right sides together. Insert one-fourth inch welting cord into the fold. Use a zipper or piping foot to stitch close to the cord.
Start at the center back and work outward to manage fullness. Pin the piping to the right side of the top panel, aligning raw edges. Stitch just beside the cord.
Miter Corners
At each corner, snip the fabric backing (not the cord) nearly to the stitching line. Fold and re-stitch to create a crisp 90 degree turn. Repeat for the bottom panel before assembling gussets.
Sew Zipper: Three Proven Methods
Choose the method that matches your skill level and tools. Each produces professional results when executed carefully.
Method A: Continuous Strip with Internal Zipper
This method creates the best seamless finish. First, with right sides together, sew the short ends of the continuous strip using a long stitch (4.0 mm). Press the seam open. Place the zipper face down over the seam. Pin or clip in place. Using the zipper foot, stitch both sides close to the teeth. Carefully rip out the original seam between the stitching lines to expose the zipper opening.
Always unzip before final sewing to avoid trapping the pillow inside.
Method B: Zipper Casing with Folded Edges
This is a clean, beginner friendly method. Cut fabric to measure width plus eight inches by thickness plus three inches. Fold one long edge under one inch and press. Attach one side of the zipper to the folded edge. Fold the other half over and attach the second side. Pin the casing ends to the boxing strip and sew with one-half inch seam to form a continuous loop.
Use clips instead of pins to avoid shifting.
Method C: Pre-Sewn Zipper Insert Panel
This method provides the most precise zipper placement. Fold the zipper panel lengthwise, right sides together. Sew down the center with nine-sixteenths inch seam. Cut open the seam and press flat. Fold over the zipper and stitch both sides. Sew one end of the panel to the boxing strip, then the opposite end. Trim excess fabric.
Attach Gussets to Top and Bottom
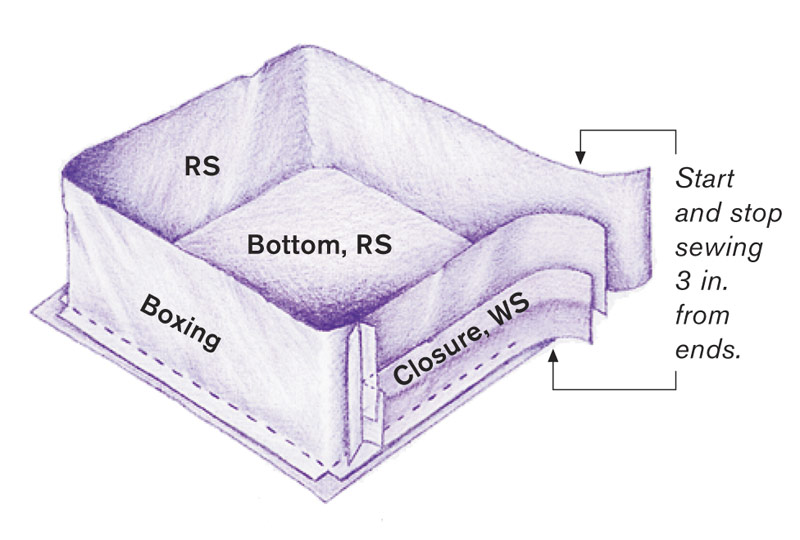
Now assemble the three-dimensional structure by joining the side (boxing) strip to the top and bottom panels.
Pin and Align Panels
With right sides together, pin the boxing strip to the top panel. Align the back center notch or zipper end as your starting point. Pin at corners and every four to six inches. Use fabric clips for thick layers, as pins can distort upholstery fabric.
Sew with Mitered Corners
Sew around the perimeter but stop one-half inch before each corner. To create sharp corners, lower the needle into the fabric, raise the presser foot, pivot the fabric 90 degrees, and resume sewing. Snip into the seam allowance of the boxing strip just before each corner to reduce bulk and prevent puckering.
Repeat for the bottom panel. Always leave the zipper open during final sewing.
Finish and Insert Foam
Final steps bring your pillow to life with a professional appearance.
Turn Right-Side Out
Unzip the zipper completely. Turn the cover right-side out through the zipper opening. Use a chopstick or blunt stick to push out corners gently. Never pull on seams, as this can stretch or distort them.
Insert Foam Insert
Try the burrito method with two people for easier insertion. Turn the cover inside out halfway. Slide the foam into the tube. Unroll the fabric over the foam like a burrito. This method works even for tight-fitting covers.
Secure and Inspect
Zip the closure closed. Check that corners are square and firm. Hand-stitch bar tacks at zipper ends for durability.
Envelope Closure (No Zipper)
For simple, reversible designs, envelope closures offer an alternative to zippers.
Cut Back Panels Longer
Cut the front panel to width plus one inch by depth plus one inch. Cut the back panel to width plus one inch by depth plus six inches. The extra five to six inches allows overlap like an envelope.
Create Overlapping Flaps
Sew the back panel to the long gusset piece. Cut the seam down the middle to split into two L-shaped flaps. Hem the inner edges with one-fourth inch double-fold hem. Sew short gussets and one long gusset into a U-shape. Attach the U to the front panel. Attach the L-shaped back flaps so they overlap centrally.
Turn right-side out and slide foam in through the back opening.
Reinforce Stress Points
Durability starts where strain concentrates. Reinforce these areas for a long-lasting cover.
Double-Stitch High-Tension Areas
Sew back and forth two to three times at zipper ends. Reinforce corners with cross-shaped stitching. Use longer stitch (3.5 to 4.0 mm) for flexibility on edging seams.
Add Bar Tacks
Hand-sew bar tacks at both ends of the zipper using heavy-duty thread. Stitch short, dense zigzags and knot securely on the back. This prevents the zipper pull from tearing under stress.
Troubleshoot Common Issues
Avoid these frequent problems with simple fixes.
Cover Too Tight
If the cover fits too tightly, the cause is likely no allowance for Dacron or thick fabric. Cut the foam one-half inch smaller than the cover, or stretch the fabric carefully during insertion.
Puckered Corners
If corners pucker, the seam allowance was not snipped. Always snip into the gusset fabric before pivoting at corners.
Zipper Will Not Open
If the zipper will not open, it was sewn closed or fabric caught in the teeth. Always leave the zipper open during final seam and backstitch ends only.
Foam Hard to Insert
If foam is difficult to insert, corners were not pushed out or the cover is too snug. Use the burrito method and turn the cover inside out first.
Lumpy Surface
If the surface feels lumpy, the Dacron overlaps or the glue was uneven. Trim batting flush and apply adhesive in light, even coats.
Care and Maintenance Tips
Extend the life of your box pillow cover with proper upkeep.
Washing Instructions
Remove the cover via zipper or envelope opening. Machine wash cold on gentle cycle with mild detergent. Air dry or tumble dry on low heat only. Never wash foam; spot clean with a damp cloth instead. Reinsert foam only when the cover is fully dry to prevent mold.
Storage Tips
Store off-season covers in breathable cotton bags. Avoid plastic, which traps moisture and degrades fabric. Keep covers away from direct sunlight to prevent fading.
Lifespan Expectations
With proper care, expect the cover to last three to seven years. High-density foam lasts five or more years, while low-density foam lasts one to three years. Replace Dacron wrap if it becomes compressed or stained.
Upgrade to Designer Finish
Take your cover from DIY to luxury with these professional touches.
Use Contrast Piping
Choose bold-colored welting for modern flair, or match fabric for subtle texture. Either approach adds visual interest.
Hidden vs. Exposed Zippers
An invisible zipper creates a seamless look but requires a special foot. An exposed nylon zipper is easier to install and adds industrial style. Choose contrast teeth (gold, red, or another bold color) for a design statement.
Pattern-Match Fabric
For large prints, mark the grain line and pattern repeat on each piece. Cut the top and bottom panels mirrored so the design aligns across the pillow. Use pins to hold alignment during sewing.
Frequently Asked Questions About Box Pillow Covers
What is the best fabric for box pillow covers?
Medium to heavy weight fabrics work best, including cotton duck, canvas, linen blends, Sunbrella, and polyester. Choose upholstery-grade fabric that can withstand daily use. Pre-wash fabric before cutting if shrinkage is a concern.
How much extra fabric should I add for seam allowance?
Add one-half inch seam allowance per side (one inch total per dimension) to all panels when cutting. For envelope closures, add an extra five to six inches to the back panel length for proper overlap.
Can I wash a box pillow cover with the foam inside?
Never wash the foam. Always remove the cover before washing. Spot clean foam with a damp cloth if needed, and ensure the cover is fully dry before reinserting the foam.
Why does my zipper get stuck when sewing?
The zipper gets stuck when sewn closed or when fabric catches in the teeth. Always leave the zipper completely open during final sewing. Use a zipper foot and sew close to (not over) the teeth.
How do I make sharp corners on a box pillow?
Snip into the seam allowance of the boxing strip just before each corner. Lower the needle, raise the presser foot, pivot the fabric 90 degrees, and resume sewing. This technique prevents puckering and creates crisp corners.
What is the burrito method for inserting foam?
The burrito method involves turning the cover inside out halfway, sliding the foam into the tube, and then unrolling the fabric over the foam like a burrito. This technique works especially well for tight-fitting covers and makes insertion much easier.
Key Takeaways for Sewing Box Pillow Covers
Sewing a box pillow cover is a game-changer for home decor, offering durability, style, and easy maintenance. By measuring accurately, choosing the right closure type, and mastering mitered corners, you can create custom-fit covers that rival store-bought furniture. Whether you opt for a zippered, washable version for outdoor use or a reversible envelope style for a guest room, the key is in the details: sharp edges, reinforced seams, and a perfectly wrapped foam insert.
Now that you know the professional techniques, from continuous strips to burrito insertion, you are ready to tackle any cushion project with confidence. Grab your foam, pick a fabric, and start sewing a cover that looks like it belongs in a design magazine.



