
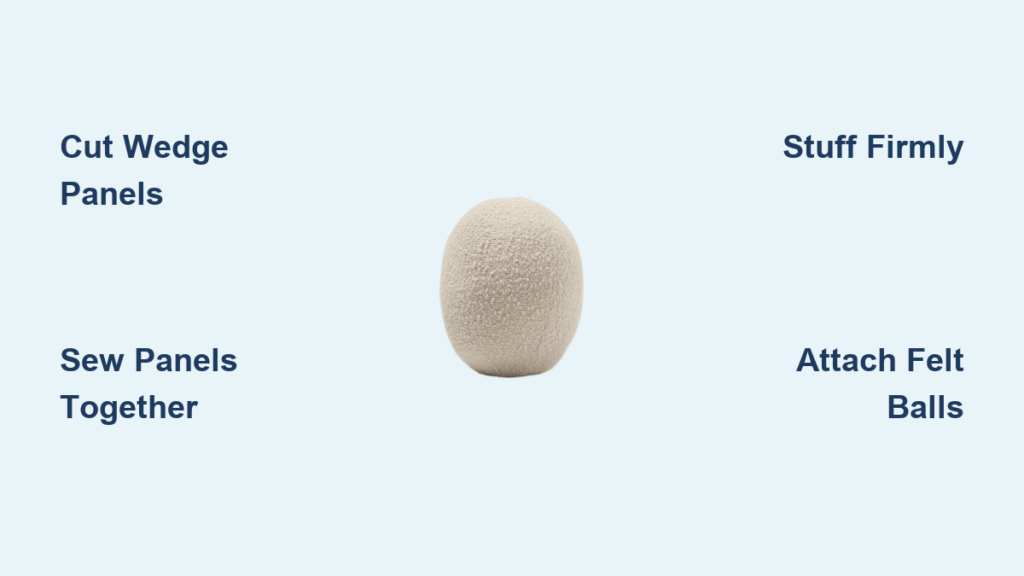
You’ve seen them on Instagram—plump, stylish pillows with bumpy edges or perfect spheres perched on sofas like modern art. But “how to sew a ball pillow” can mean two very different things: a 3D spherical cushion stitched from fabric panels, or a round pillow trimmed with wool felt balls. Both are beginner-friendly, customizable, and surprisingly simple once you know the steps.
This guide covers both interpretations of the ball pillow trend. You’ll learn how to cut precise patterns, assemble clean seams, stuff for shape retention, and attach eye-catching embellishments—all with professional results. Whether you’re upcycling old fabric or crafting a statement décor piece, this step-by-step tutorial ensures success.
Choose Your Ball Pillow Type
Before cutting fabric, decide which version suits your skill level and vision.
Spherical Fabric Ball
This option creates a fully three-dimensional cushion made from 6 or 8 wedge-shaped fabric panels. The panels are sewn together and stuffed to form a soft, round ball. This method works well for sensory toys, baby gifts, or sculptural décor. You’ll need to hand-stitch a small opening closed after stuffing.
Round Pillow with Ball Trim
This version features a flat circular cover with wool felt balls hand-sewn around the edge. It uses a pre-made round pillow insert, making assembly faster. The envelope closure allows you to remove and wash the cover. This trendy, textured look is popular in modern interiors and catches attention on social media.
Pick based on your goal: 3D shape or tactile edge detail.
Gather the Right Materials
For a Spherical Ball Pillow
Fabric and Panels
Use medium-weight fabric with unidirectional stretch for smooth curves. Cotton, polyester blend, or repurposed pillow covers work well. Cut 6 or 8 identical wedge-shaped pieces using a gore pattern. Ensure grain lines match across all panels for even sewing.
Stuffing and Fill
You will need 1 kg of polyester fiberfill for firm, plump results. For an eco-friendly option, use shredded fabric scraps mixed with original stuffing. Insert gradually to avoid lumps and ensure fullness in corners.
Tools You’ll Need
Gather scissors and a fabric marker. You’ll need a sewing machine, though a four-thread overlock is preferred for stretch fabrics. Have a needle and thread ready for the final closure. Printable patterns come in large (about 27 cm) or small (about 23 cm) diameters.
For a Round Pillow with Ball Trim
Fabric and Structure
Upholstery-grade velvet is recommended—thick, structured, and luxurious. Avoid thin or stretchy fabrics that pucker. Pre-wash natural fibers if future cleaning is expected.
Spherical Embellishments
You’ll need 28 wool felt balls, each 4 cm in diameter. Use slightly different shades in the same color family for subtle depth. Alternatives include yarn pom-poms or fabric-covered foam balls.
Core and Closure
Select a round pillow form between 12 and 18 inches, depending on your desired size. The envelope-back cover uses two overlapping back panels for a removable insert. This eliminates the need to hand-stuff.
Tools and Notions
Brown craft paper serves well for templates. Have measuring tape, pins, and fabric chalk ready. You’ll need a sewing machine for the cover and a needle with strong thread for attaching balls.
Cut Precise Patterns for Perfect Shape
Make a Gore Pattern (Spherical Ball)
Eight-Piece Method
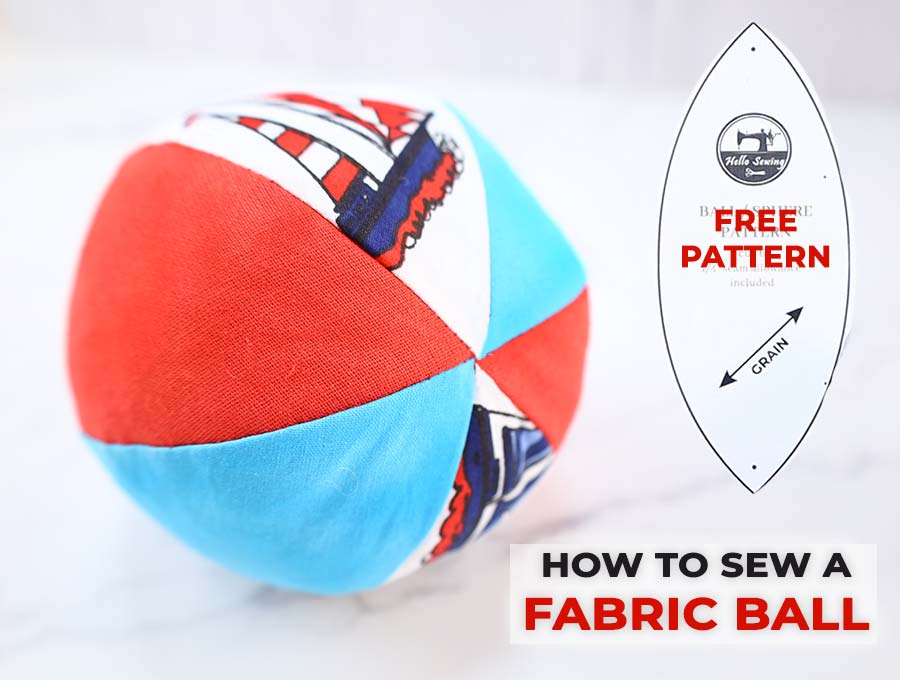
Download or draw a printable wedge-shaped gore template. Use the large size (about 27 cm finished diameter) or small (about 23 cm). Trace onto fabric 8 times, aligning grain consistently. Cut with sharp scissors for clean edges.
Six-Piece Method (Beginner-Friendly)
Cut 6 identical orange-segment shapes instead. This approach is easier to assemble and ideal for upcycling old pillows. It still creates a near-spherical shape when stuffed.
Print patterns at full scale. Some users report metric-to-inch conversion issues, so visit a print shop if needed.
Create a Circular Template (Ball-Trimmed Pillow)
Front Panel Template
Measure your pillow form’s diameter. Add ½ inch for ¼ inch seam allowance on all sides. Draw the full circle on brown craft paper to use as a template.
Back Panels for Envelope Closure
Fold the paper circle in half to make a semicircle. Trace this shape onto fabric. Extend the straight edge by 3 inches to create a hockey rink shape. Cut two identical back pieces. Fold the 3-inch extension inward by ½ inch and sew a clean hem.
The envelope style allows you to remove the cover for cleaning or swapping inserts.
Sew the Spherical Ball Pillow
Sew Panels Together (Right Sides Facing)
Eight-Piece Sequential Assembly
Place two wedge panels with right sides together. Sew along one long edge using 0.5 cm seam allowance. Attach a third panel to the second, continuing the chain. Repeat until all 8 panels are joined in a row. Sew the last seam to close the sphere. Leave a 5–7 cm opening unsewn for stuffing.
Six-Piece Nested Pair Method (Upcycling Focus)
Sew three pairs of panels right sides together, which forms three U-shapes. Turn one unit inside out. Insert a second unit into it, aligning right sides together. Sew across the open corner from end to end. Attach the third unit to complete the sphere. Turn right side out before stuffing.
The seams should radiate like longitude lines on a globe.
Stuff Firmly for a Round Shape
Insert fiberfill gradually through the opening. Use 1 kg of polyester fiberfill for fullness. Push stuffing into curved corners with a chopstick or spoon handle. Pack firmly to prevent sagging and maintain shape.
For a softer texture, blend original stuffing with small fabric scraps. Avoid over-stuffing—it can distort seams and strain stitching.
Roll the pillow gently to test roundness before closing. Add or remove fill as needed. Under-stuffing leads to dimples, while over-stuffing strains seams.
Hand-Stitch the Opening Closed
Thread a needle with matching thread. Fold raw edges inward slightly. Use an invisible ladder stitch or slip stitch to close the gap. Pull snug after each pass for a seamless look.
Double-knot the thread and trim excess. The closure should be invisible and strong. This stitch mimics a seamless join and gives a polished finish.
Assemble the Ball-Trimmed Round Pillow
Cut and Hem the Back Panels
Cut two back pieces using the hockey rink template. Fold the 3-inch extension inward by ½ inch. Sew a straight stitch to secure the hem on both pieces.
Attach Front and Back
Place the front circle right side up. Lay one back panel on top, right side down, aligned with the curved edge. Place the second back panel on the opposite side, overlapping slightly. Pin all layers together. Sew around the entire perimeter with ¼ inch seam allowance. Trim seam edges to reduce bulk.
Turn the cover right side out through the envelope opening. Insert the round pillow form fully. Adjust for even fullness and centered shape.
An alternative method involves sewing two circles with a small gap, turning, stuffing, then hand-closing. The envelope style is preferred for easy removal.
Attach Wool Felt Balls for Tactile Edge

Plan Even Spacing
Use straight pins to temporarily place each 4 cm ball around the edge. Space evenly—about 28 balls for a standard 16-inch pillow. Complete a full circle without gaps.
Hand-Sew Each Ball Securely
Thread a needle with strong polyester or quilting thread. Knot the end and pierce a ball through its center. Push the needle through the pillow seam allowance beneath. Pull tight and knot securely on the back. Repeat for each ball.
Knot after every ball to prevent all from detaching if one thread breaks.
Save Time with Internal Thread Pathing
After knotting, pass the needle through the inside of the pillow cover. Let it emerge at the next attachment point. Attach the next ball and knot again. This avoids cutting and re-threading repeatedly.
Do not use fabric glue. It is not durable long-term and is not recommended in the source material.
Customize Your Design
Match Color and Texture
A monochromatic approach uses blush fabric with dusty rose balls for modern, elegant contrast. High-contrast options like black balls on white fabric create a bold, graphic look. Texture combinations like velvet plus wool felt deliver rich, sensory appeal.
Scale to Any Size
Larger pillows need more balls—calculate based on circumference. Use the same techniques for square, heart, or rectangle cushions. Attach balls along the outer seam line regardless of shape.
Add Embellishments (Optional)
For spherical balls, consider a leather patch, yarn tassel, or contrast stitching. For ball-trimmed pillows, add a maker’s tag or embroidered initials.
Slight tonal variation in balls creates depth without clashing.
Follow Best Practices for Success
Cut with precision using templates and sharp scissors. Ensure all pieces are identical, especially for spherical panels.
Sew with consistency by always placing right sides together. Maintain 0.5 cm seam allowance for spherical pillows or ¼ inch for ball-trimmed versions. Backstitch at start and end for durability.
Test before finalizing by trying the pillow form before sewing shut. Adjust ball placement while pinned. Fluff and roll the ball pillow to check shape.
Maintain and Care for Your Pillow
Spot clean only—do not machine wash. Internal stuffing and hand-sewn closures can be damaged. Blot spills with a damp cloth and mild detergent. Air dry away from direct sunlight.
For ball-trimmed pillows, the envelope closure lets you remove the insert. Take out the cover and hand-wash or spot-clean as needed.
Fluff spherical pillows regularly to maintain shape. Brush felt balls gently to remove lint or pet hair. Well-made ball pillows last years with gentle use.
Use Your Ball Pillow Creatively
Home Décor
Place on a sofa to soften angular furniture. Use in a nursery for organic, handmade charm.
Gifting
Personalize with favorite colors or monograms. These make great gifts for housewarmings, baby showers, or birthdays.
Sensory Tools
Ideal for children or therapy sessions. Ensure all stitching is secure before use. The soft texture encourages tactile exploration.
Photo Props
High visual impact for lifestyle or product photography. This is Instagram’s favorite cushion for good reason.
Avoid Common Mistakes
Thin or stretchy velvet causes puckering. Choose upholstery-grade fabric for clean structure.
Uneven wedge sizes create a lopsided sphere. Use a template and cut all pieces at once.
Sewing balls in a chain means if one breaks, all detach. Knot each ball individually.
Soft, flat balls result from under-stuffing. Pack firmly with 1 kg fiberfill for an impressive shape.
Key Takeaways for Sewing a Ball Pillow
Sewing a ball pillow isn’t one project—it’s two distinct creative paths, each rewarding in its own way.
For 3D form and upcycling, choose the spherical method with 6 or 8 fabric panels. It’s a satisfying challenge that results in a plush, sculptural piece.
For trend appeal and texture, go for the ball-trimmed round pillow. It’s quick, stylish, and instantly elevates any room.
Both methods rely on precision cutting, consistent seams, and secure hand-finishing. With the right materials and this guide, you’ll create a pillow that looks store-bought but carries the pride of handmade.
Now grab your fabric, trace your template, and start sewing. Your perfect ball pillow is just a few stitches away.
Frequently Asked Questions About Sewing a Ball Pillow
What is the easiest ball pillow method for beginners?
The six-piece spherical ball pillow is the easiest method for beginners. The nested pair assembly simplifies construction and works well for upcycling old pillow stuffing.
How much fabric do I need for a ball pillow?
For a spherical ball pillow, you’ll need enough fabric for 6 or 8 wedge-shaped panels. A round pillow with ball trim requires a circular front piece and two back panels. Upholstery velvet in a standard yardage covers most projects.
Can I use a regular pillow insert for a ball pillow?
Yes, for ball-trimmed round pillows, a standard round pillow form works perfectly. For spherical ball pillows, you’ll need to stuff with polyester fiberfill since no pre-made insert exists in that shape.
How do I keep the felt balls from falling off?
Knot securely after attaching each ball. Use strong polyester or quilting thread. Pass the needle through the pillow interior between balls rather than cutting the thread. This prevents cascade failure if one thread breaks.
Can I wash a sewn ball pillow?
Spot clean only. Do not machine wash spherical ball pillows, as the stuffing and hand-stitched closure can be damaged. Ball-trimmed pillows have removable covers via the envelope closure, making cleaning easier.
What size wool felt balls should I use?
Four centimeter diameter wool felt balls are standard for ball-trimmed pillows. This size provides balanced visual impact without overwhelming the cushion proportions.



