
You’ve seen them on stylish sofas, trendy TikTok videos, and boutique bedding displays. Bow pillows are having a moment, adding vintage charm or modern flair to any space. The best part? You do not need to be a sewing expert to make one. Whether you want a flat sewn, 3D tied, or sash-style bow, this guide shows you how to create a custom bow pillow in under two hours.
In this step-by-step tutorial, you will learn four foolproof methods, from no-sew hot-glue crafts to machine-sewn envelope-back covers. We will cover precise measurements, fabric tips, and pro techniques for crisp corners and durable finishes. By the end, you will have a polished, decor-ready bow pillow that looks store-bought.
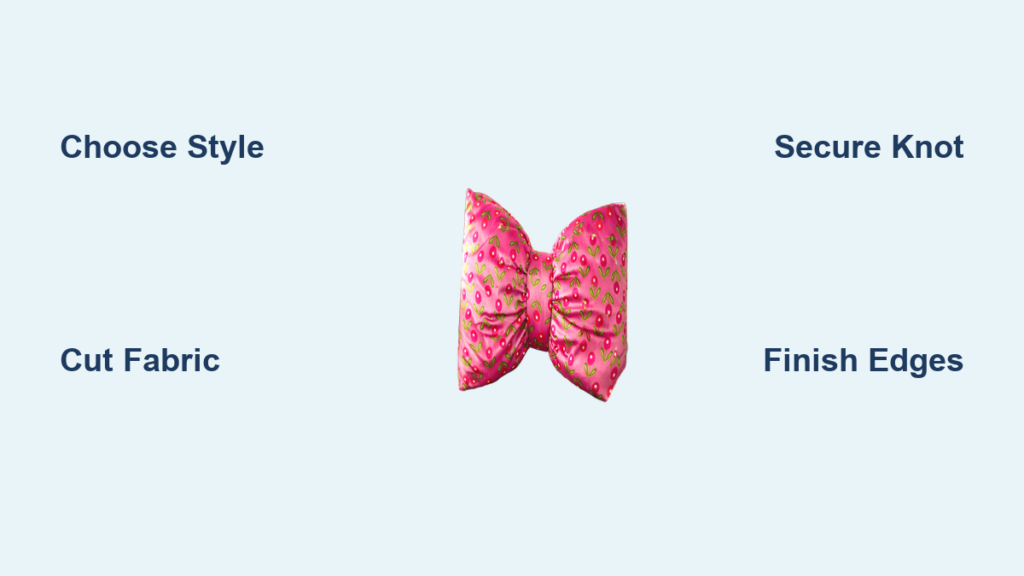
Choose Your Bow Pillow Style
Pick the Right Method for Your Skill Level
Not all bow pillows are made the same. The style you choose affects difficulty, tools needed, and durability. Here are the four most popular types.
Flat Sewn Bow offers a clean, stitched-on bow ideal for beginners with a sewing machine. 3D Tied Bow features fabric wrapped around the pillow like a gift, great for no-sew projects. Sash-Tie Bow uses a long fabric strip tied into a bow for an elegant, hand-finished look. No-Sew Bow involves hot-glue assembly, perfect for kids or fast decor updates.
Each method uses similar materials but varies in construction. All work with 16-inch by 16-inch square or 12-inch by 18-inch lumbar inserts, the most common sizes.
Match Fabric to Your Design Goal
The fabric you pick changes the look and feel of your bow pillow. Cotton or flannel is soft, easy to sew, and washable, best for everyday use. Silk or satin offers luxe drape and vintage vibes, ideal for elegant bedrooms. Canvas or shower curtain fabric is stiff and structured, creating bold, sculptural bows. Repurposed sheets or clothing are eco-friendly, budget-friendly, and unique.
Always pre-wash fabric to prevent shrinkage. For a polished finish, use matching thread and sharp scissors or a rotary cutter.
Gather Tools and Materials
Essential Supplies for Any Method
No matter which style you choose, these core items are must-haves.
Pillow insert in 12-inch by 18-inch or 16-inch by 16-inch down-filled form provides softness. Fabric in cotton, silk, flannel, or canvas requires one-half to 1 yard. Thread should be polyester or all-purpose for strength. Scissors or rotary cutter ensures clean, precise cuts. Measuring tape or ruler provides accuracy to one-eighth inch. Pins or clips hold layers in place during sewing. Fabric marker or pencil marks seam lines and folds. Iron and board presses seams for a professional finish.
Optional but Helpful Tools
Depending on your method, these tools can help. A sewing machine works best for flat sewn and sash-tie methods. A hot glue gun excels at no-sew and 3D tied bows. A safety pin or bodkin turns fabric tubes right side out. A skewer or pencil pushes out corners without tearing. A serger finishes seams on fraying fabrics.
Flat Sewn Bow Pillow Method
Cut Fabric to Exact Size
This method creates a clean, tailored look with a flat fabric bow stitched directly to the pillow front. It uses an envelope back for a removable insert and reversible design.
For a 16-inch by 16-inch insert, cut the pillow front at 17 inches by 17 inches, one inch larger for seam allowance. Cut two pillow back panels at 17 inches by 11 inches each for the overlap closure. Cut the main bow piece at 17 inches by 10 inches. Cut the bow center or tie at 3 inches by 5 inches.
For a 12-inch by 18-inch lumbar pillow, scale to front at 13 inches by 19 inches, back panels at 13 inches by 11 inches, and bow at 13 inches by 10 inches.
Finish Edges Before Sewing
Raw edges fray. Prevent this with one of these methods. The double fold hem involves ironing three-eighths inch under, folding again three-eighths inch, and sewing one-fourth inch from the edge. The zig-zag plus hem method uses a zig-zag stitch on the edge, then folding and sewing. A serger provides the fastest method for clean, durable edges.
Apply these finishes to the long edges of the main bow piece, the long edges of pillow back panels, and all edges of the bow center.
Attach Bow to Pillow Front
Lay the pillow front right side up. Center the main bow piece horizontally across the middle. Baste the short ends to the left and right sides of the pillow front with right sides up. Pinch the center inward like an accordion fold to form the knot.
Wrap and Secure the Bow Center
Take the 3-inch by 5-inch center strip and wrap it around the pinched area. Align the finished edge over the raw edge. Hand-sew with a whip stitch to secure. Optional: Tack the center to the pillow front to prevent shifting.
Assemble Envelope Back
Place the two back panels on the back of the pillow front, right sides together. Overlap them in the center with a 2-inch overlap so finished edges meet. Pin all around.
Sew and Finish the Cover
Sew around all four sides with a one-fourth inch seam allowance. Backstitch at start and end. Clip diagonal triangles from each corner to reduce bulk. Turn right side out through the envelope opening. Use a chopstick to push out corners. Insert the 16-inch pillow form.
Create Crisp Corners Like a Pro
For flatter, more professional corners, turn the cover inside out. Mark a dot three-fourths inch in from each corner. Stitch from dot to center of side, tapering to the original seam. Trim excess fabric at angles. Turn and reinsert pillow.
The result is sharp, square corners that look store-bought.
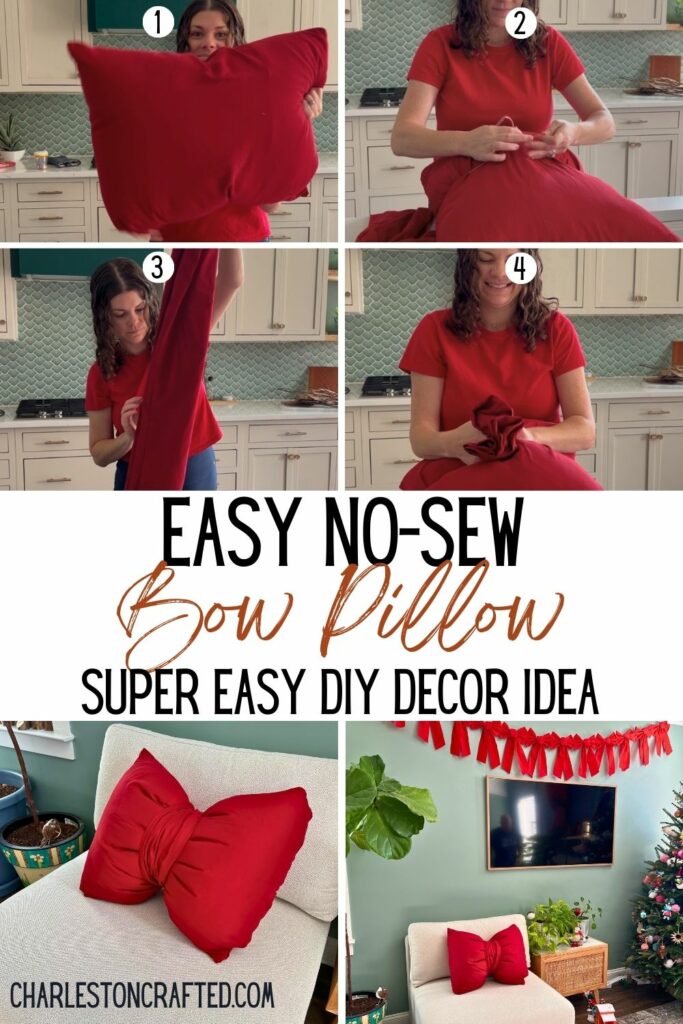
3D Tied Bow Pillow Method
Use an Old or Flattened Pillow
This method creates a giant, sculptural bow wrapped around the pillow like a gift. It is perfect for quick decor, photo props, or kids’ rooms.
Remove some stuffing to flatten the pillow slightly. Insert it into a matching or neutral pillowcase. Close the open end by sewing shut with a straight stitch, or hot gluing the inner edges together.
Create the Bow Knot
At the pillow is midpoint, gather the fabric. Tie two fabric strips around the center, cut from matching sheet. Space them a few fingers apart to mimic a layered knot.
Make the Bow Tails
Cut a 63-inch by 20-inch fabric strip. Fold lengthwise, right sides together. Sew or glue along the long edge. Turn right side out using a dowel or arm. Cut both ends at a diagonal to mimic ribbon. Seal ends with glue or stitching to prevent fraying.
Wrap and Secure the Center
Cut a wider fabric strip, for example 4 inches by 12 inches. Iron edges under for a clean finish. Wrap it around the bow tails and knot. Secure with hot glue or hand stitching.
Add a Hanger for Display
Attach a small ribbon loop to the back with hot glue for wall or door display.
Pro Tip: Use shower curtain fabric for a stiff, dramatic bow.
Sash-Tie Bow Pillow Method
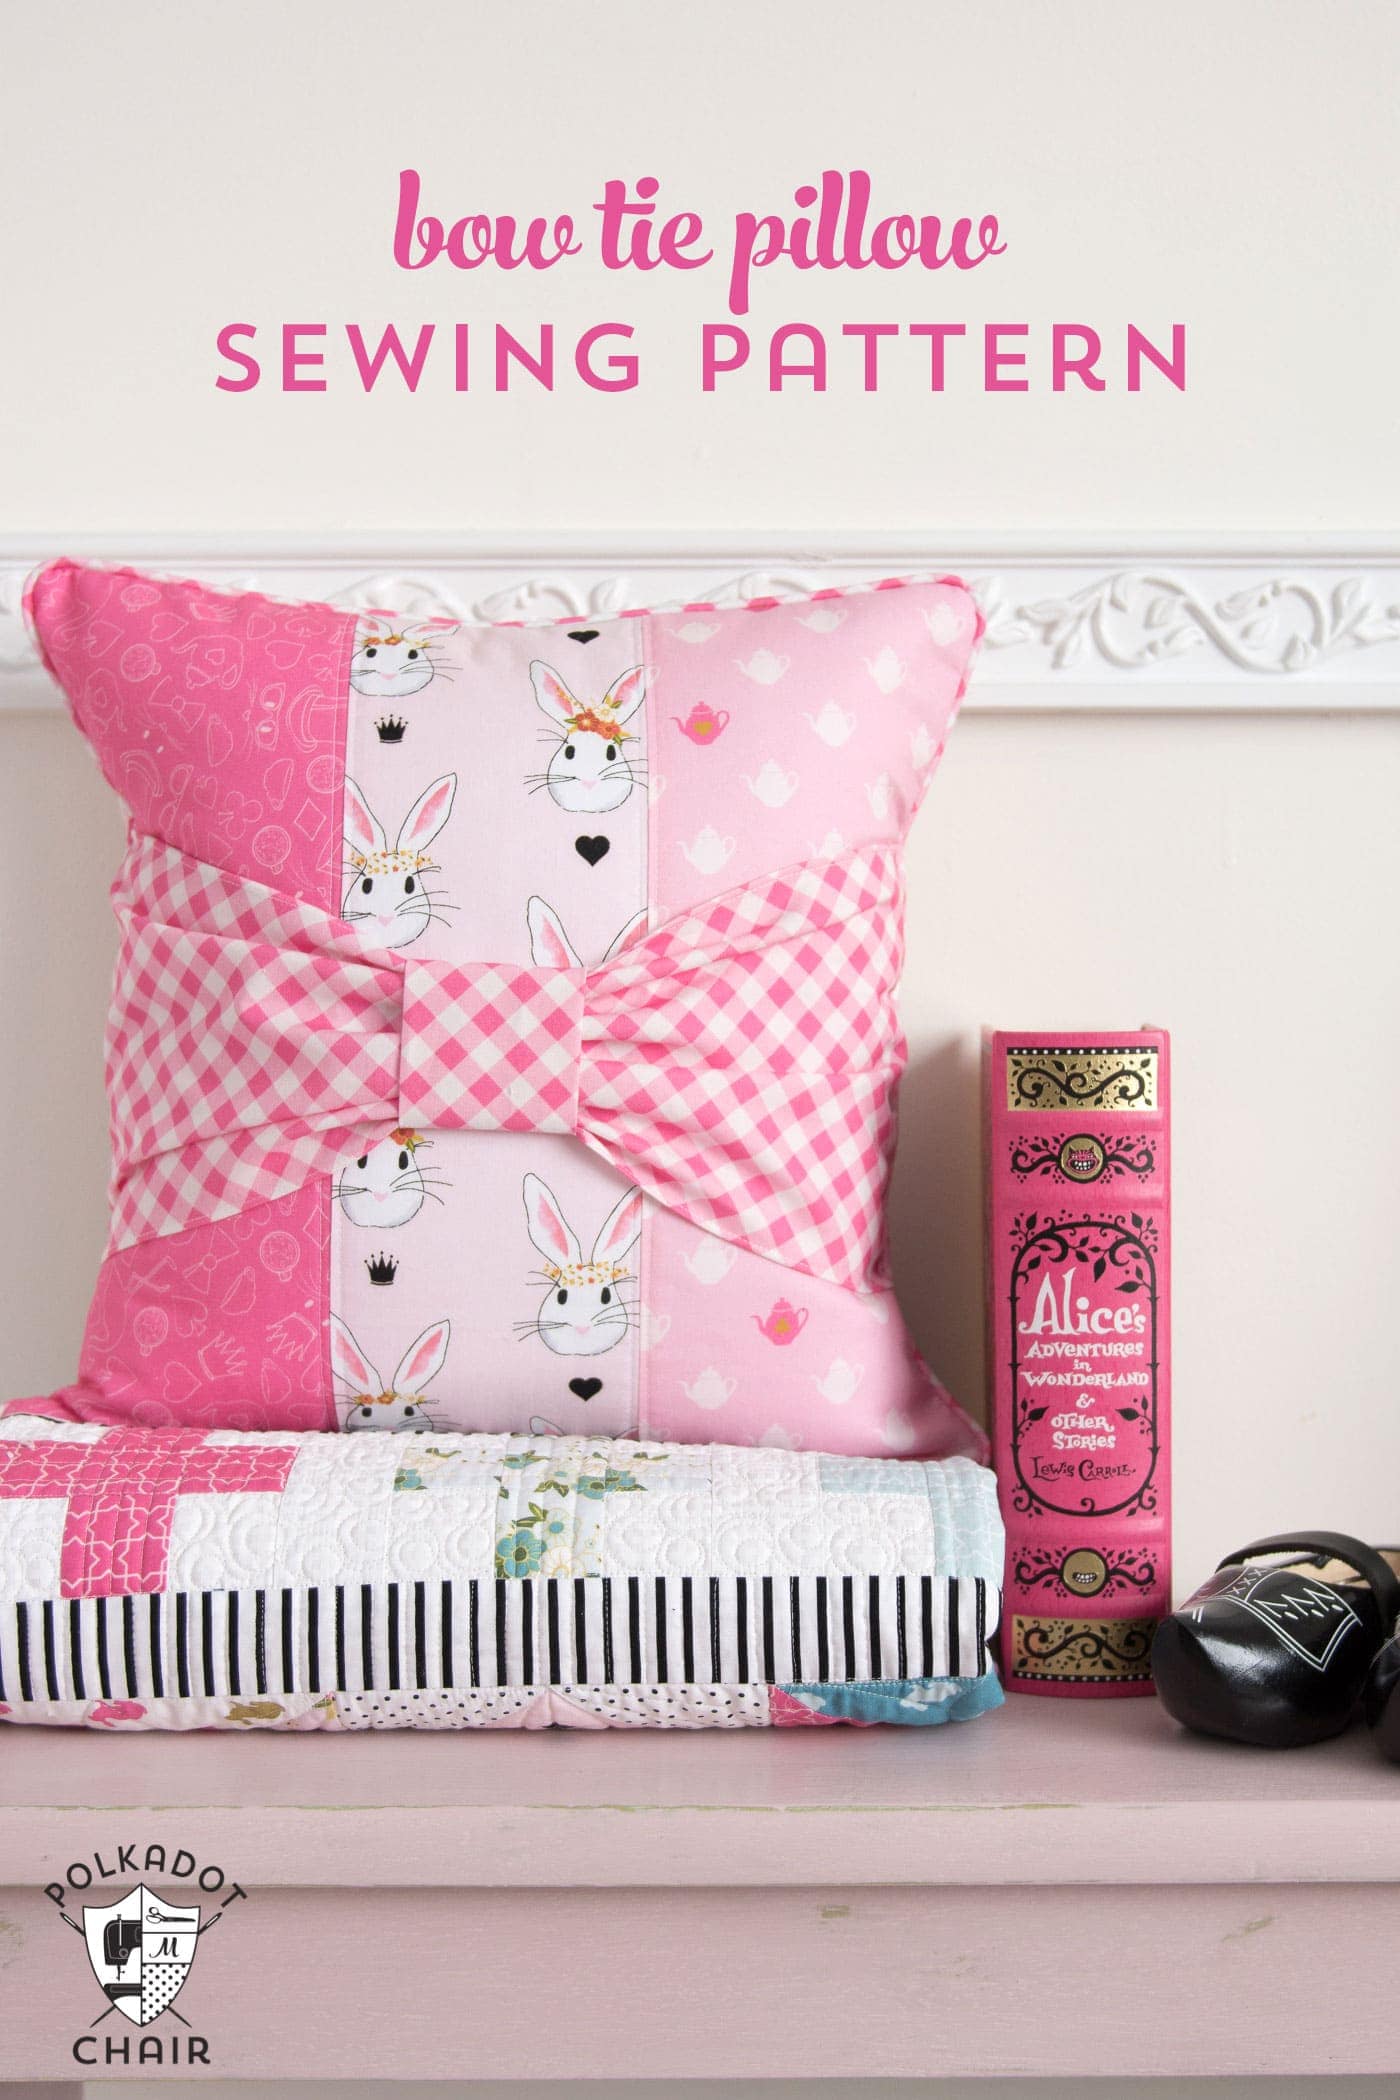
Make a Simple Pillow Cover
Cut two fabric pieces one inch larger than the insert, for example 13 inches by 19 inches for a 12-inch by 18-inch pillow. Place right sides together, pin edges. Sew around with one-half inch seam allowance, leaving a 4 to 6-inch opening in the bottom. Clip corners, turn right side out, iron flat.
Construct the Sash
Cut a 40-inch by 5-inch fabric strip. Fold in half lengthwise, wrong sides together, and iron. With folded edge down, sew along both long edges, starting with one-half inch seam and gradually angling inward to create tapered, pointed ends. Leave a 2 to 3-inch opening in the center for turning. Turn right side out using a safety pin. Iron flat and hand-stitch opening closed.
Tie and Secure the Bow
Fold sash into a bow by making one loop about one-third of length, bringing other end over and pulling through center. Adjust loops and tails for symmetry. Hand-stitch the back of the bow to lock the shape.
Attach Bow and Close Cover
Position bow on top left corner of pillow front. Hand-stitch through only the front layer, avoiding the back. Insert pillow form. Fold in raw edges of opening and whip stitch closed.
Best fabric for this method is lightweight flannel or silk for soft drape.
No-Sew Bow Pillow Method
Assemble in 30 Minutes
Perfect for beginners or crafty kids, this method requires no sewing.
Use a ready-made pillow or lightly stuff a pillowcase. Seal the open end with hot glue. Cut fabric strips from matching sheet or decorative fabric. Tie a large bow around the center. Use extra glue to secure knot and tails. Add rhinestones, buttons, or lace for flair.
No sewing, no machine, just glue and creativity.
Design Tips for a Polished Look
Scale Bow Size Proportionally
For a 16-inch by 16-inch pillow, use a 17-inch by 10-inch bow band. For a 12-inch by 18-inch pillow, use a 13-inch by 10-inch bow band. For oversized 24-inch by 24-inch pillows, scale up all pieces by 50 percent.
Cut Tails at an Angle
Diagonal cuts on bow ends mimic real ribbon. Always seal with stitching or glue to prevent fraying.
Reinforce the Bow Knot
Wrap the center with a separate fabric strip and secure with hot glue for no-sew versions, a whip stitch for hand-sewn versions, or double stitching for machine-sewn versions.
Add Embellishments
Sew a button or bead at the knot center. Use lace trim along bow edges. Attach pom-poms to tail ends.
Make It Washable and Durable
Use Removable Covers
Choose envelope back or zipper closure for easy washing. Envelope back uses overlapping panels to hide the insert. Zipper provides more security but requires advanced sewing.
Prevent Fraying
Finish all raw edges before sewing. Use polyester thread for strength. Backstitch at seam ends.
Spot Clean Non-Washable Fabrics
Shower curtains, vinyl, or canvas can be wiped with a damp cloth. Silk or satin requires gentle fabric cleaner.
Style Your Bow Pillow Like a Pro
Place on a bed or sofa with solid-color bedding. Pair with lumbar and square pillows for contrast. Use matching fabric for a cohesive look.
Consider gifting your creations wrapped in tissue paper with a ribbon and a handwritten tag. You can list finished pieces on craft marketplaces for 25 to 40 dollars each.
Frequently Asked Questions About Making a Bow Pillow
What is the easiest way to make a bow pillow without sewing?
The no-sew method uses a hot glue gun to attach fabric strips. Simply seal a pillowcase, cut fabric strips, tie a bow around the center, and secure with glue. This takes about 30 minutes and works well for beginners or kids.
How much fabric do I need for a bow pillow?
For a standard 16-inch by 16-inch pillow, one-half to 1 yard of fabric is sufficient. This allows for the front panel, back panels, and bow pieces with some room for errors or adjustments.
Can I use any fabric for a bow pillow?
Most medium to lightweight fabrics work well. Cotton and flannel are easiest to sew. Silk and satin create a luxe look. Canvas and shower curtain fabric hold sculptural shapes. Always pre-wash fabric to prevent shrinkage.
How do I keep my bow pillow from shifting?
Ensure the cover fits snugly over the insert. For sewn versions, use an envelope back with at least 2 inches of overlap. Hand-tack the bow center to the pillow front to prevent movement.
Can I wash a bow pillow?
It depends on the construction. Removable covers with envelope backs can be washed. Remove the pillow insert first. Glue-based constructions should be spot cleaned only, as washing may loosen the adhesive.
Key Takeaways for Making Your Own Bow Pillow
Making a bow pillow is fast, affordable, and endlessly customizable. Choose your method based on your skill level: flat sewn for durability, 3D tied for drama, sash-tie for elegance, or no-sew for quick projects.
Always pre-wash fabric and finish raw edges to prevent fraying. Scale your bow proportionally to the pillow size, and reinforce the center knot with stitching or glue. For washable versions, use removable envelope-back covers.
With the right tools and this guide, you can create a boutique-quality pillow in under two hours. Start crafting today and tie your space together.


