
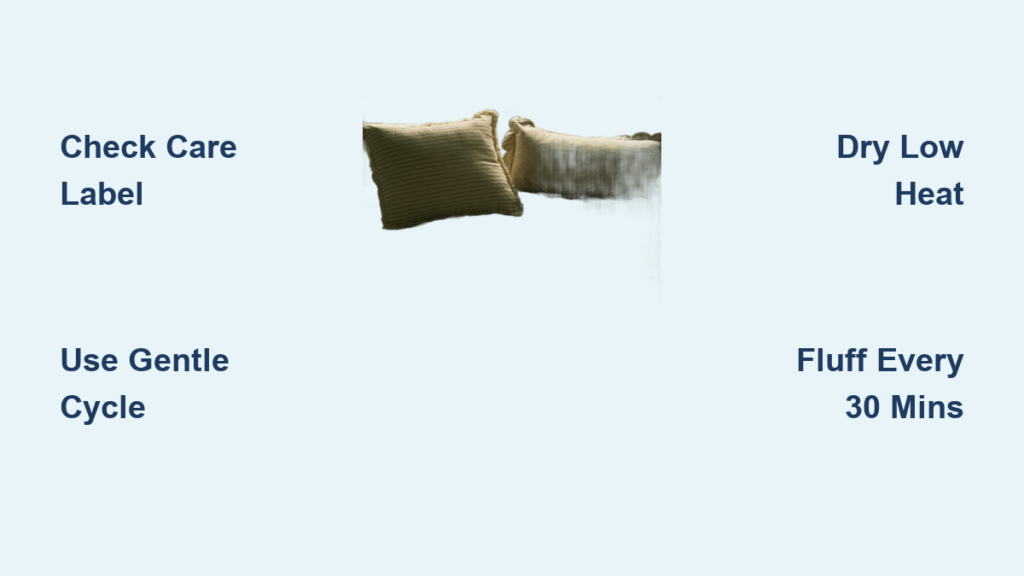
A dirty bedspread traps dust mites, sweat, and allergens that can ruin your sleep quality and damage the fabric over time. Knowing how to wash a bedspread correctly prevents clumping, shrinkage, and mold growth while restoring its fluffy texture.
This guide details every step from checking care labels to mastering the drying process for a fresh result. You will learn the exact machine settings, timing, and troubleshooting tips needed to clean your bedding safely.
Decode Your Bedspread Care Label
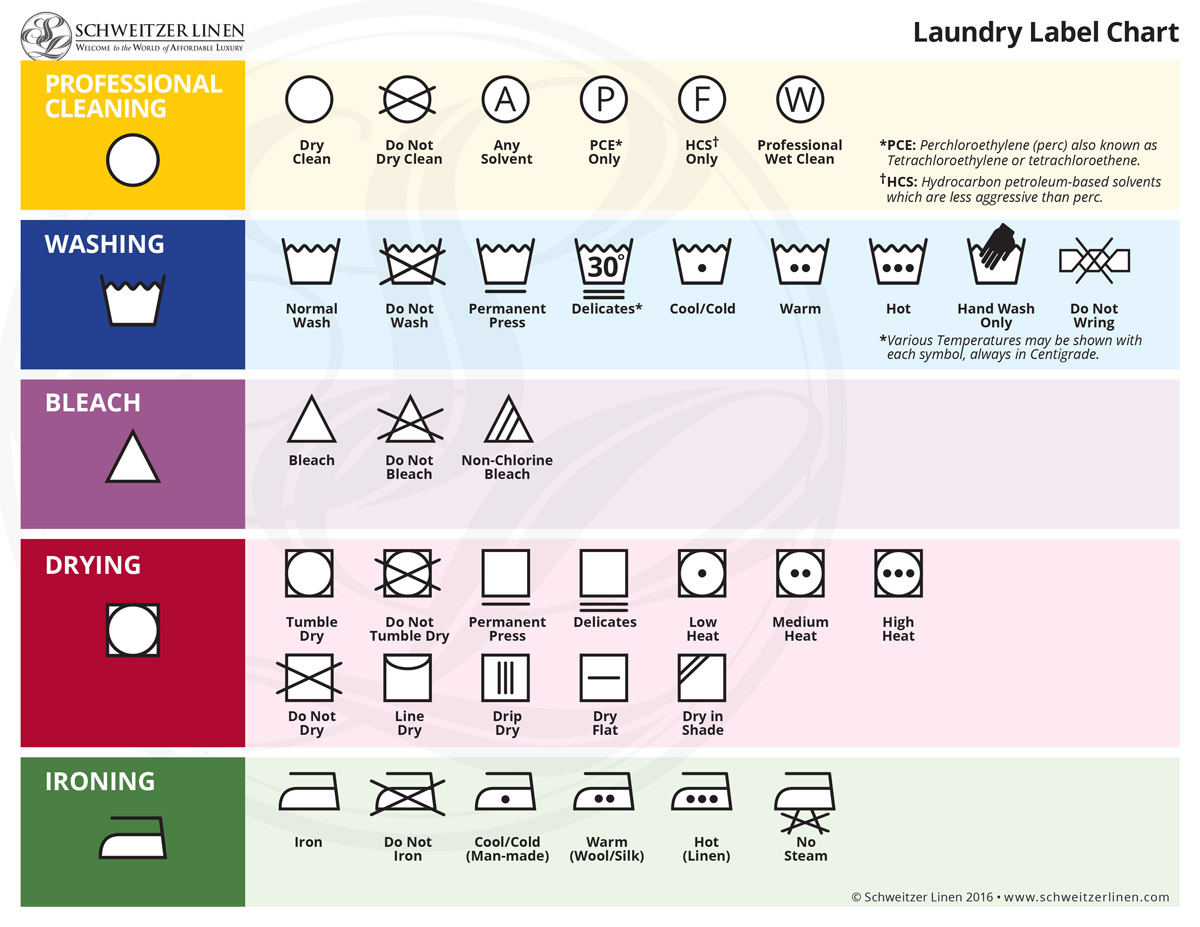
The care label sewn into your seam acts as the ultimate rulebook for cleaning your specific item. Ignoring these symbols can lead to permanent shrinkage or fiber damage that ruins the piece forever. Always locate this tag before adding any water or detergent to the mix.
What Do the Cleaning Symbols Mean?
You must interpret specific icons to determine if your item is machine washable or requires professional help.
* Bucket with water: Safe for machine washing
* Hand in water: Hand wash only, no machine agitation
* Circle: Dry clean only, do not use water
* Square with circle: Tumble dry safe
* Iron: Ironing permitted or restricted by temperature
When to Choose Dry Cleaning Only
Materials like silk, wool, and high-thread-count cotton often demand professional dry cleaning services. Machine agitation causes wool to felt and silk fibers to degrade beyond repair. If your label shows a circle symbol, take the item to a trusted cleaner immediately.
Identify Your Filling Material Type

The internal filling dictates the cleaning method you must use to avoid destroying the loft and warmth of your bedding. Different materials react uniquely to water temperature and mechanical agitation.
Common Filling Characteristics
- Down/Feather: Requires gentle cycles and low heat to prevent breakage.
- Down Alternative: Synthetic polyester fills that dry faster but melt under high heat.
- Cotton: Natural fiber that shrinks significantly in hot water.
- Wool: Highly susceptible to felting and shrinking if agitated.
- Silk: Delicate protein fibers that water can permanently damage.
Why Synthetic Fillings Differ
Synthetic options like polyester are generally more forgiving than natural down or wool fills. However, high heat can still melt synthetic fibers, causing them to clump irreversibly. Always match your washing method to the specific filling type listed on your tag.
Determine Washing Frequency Schedules
Most bedspreads only need cleaning two to four times per year if you use a protective duvet cover. Without a cover, you should wash the item every one to two months to remove body oils and dirt.
Standard Cleaning Intervals
- With Duvet Cover: Wash every 4 to 6 months.
- Without Cover: Wash every 4 to 8 weeks.
- Allergy Sufferers: Wash every 2 to 3 months to reduce irritants.
- After Illness: Wash immediately to eliminate germs.
- New Purchases: Wash before first use to remove chemical residues.
Signs Your Bedspread Needs Washing
Do not wait for visible stains before cleaning your bedding. Look for musty odors, flattened areas, or increased allergy symptoms at night. Yellowing or dark spots also indicate it is time for a deep clean.
Prepare the Bedspread for Washing
Proper preparation prevents tears and ensures your machine handles the load safely. Skipping these steps can lead to filling escape or uneven cleaning results.
Inspect and Repair Damage
Run your hands over every seam to check for loose threads or small holes. Stitch any open seams immediately because agitation will turn tiny holes into massive tears. Washing a damaged item allows filling to escape and clog your washing machine pump.
Treat Stains Before Washing
Blot spills gently with a clean cloth instead of rubbing them into the fabric. Move the filling away from the stain, apply mild detergent, and let it sit for 5 to 10 minutes. Work from the outside inward to prevent the stain from spreading further.
Balance the Load Properly
Place the bedspread loosely around the agitator if you use a top-loading machine. An unbalanced load causes excessive vibration and poor cleaning performance. Ensure the item has room to move freely within the drum.
Execute the Machine Washing Process
Your washing machine must have at least 5.0 cubic feet of capacity to clean a bedspread effectively. King and queen sizes often require commercial machines at a laundromat if your home unit is too small.
Select Correct Cycle Settings
Choose the Bulky, Bedding, or Delicate cycle on your machine. Use cold or warm water only, as hot water damages fibers and sets stains permanently. Select the Extra Rinse option to flush out all detergent and allergens.
Manage Detergent Usage
Use a small amount of mild, fragrance-free detergent to avoid residue buildup. Too much soap traps dirt and attracts more dust after drying. Avoid bleach and fabric softeners unless the care label explicitly approves them.
Master the Drying and Fluffing Technique
Drying is the most critical step to prevent mold and maintain the fluffy texture of your bedding. High heat destroys fibers, so you must use low heat or no heat settings only.
Use Dryer Balls for Loft
Add two or three clean tennis balls or wool dryer balls to the drum. These balls bounce around to break up clumps and restore the natural loft of the filling. Avoid plastic dryer balls that might damage delicate fabrics.
Stop and Shake Every 30 Minutes
Pause the dryer every 30 to 40 minutes to shake the bedspread vigorously. Pull out the item, break up any clumps by hand, and redistribute the filling evenly. This manual intervention is the number one secret to preventing lumpy results.
Verify Complete Dryness
Surface dryness is misleading, so press deep into the center and edges to check for moisture. If the item feels cool or damp anywhere, continue drying immediately. Storing or using a damp bedspread breeds mold and creates musty odors.
Air Dry Delicate Materials Safely
Air drying is required for silk, wool, or items too large for your dryer. This method takes longer but protects delicate fibers from heat damage.
Proper Air Drying Steps
Lay the item flat on a clean surface or hang it over a dedicated comforter rack. Avoid direct sunlight which fades colors and weakens fibers over time. Flip the bedspread every few hours and fluff it gently by hand until completely dry.
Hand Wash Non-Machine Safe Items
Use the bathtub method only if the care label permits water immersion but forbids machine agitation. This process is labor-intensive but necessary for delicate materials.
Bathtub Washing Steps
- Fill the tub halfway with cold or lukewarm water.
- Add mild detergent and submerge the bedspread gently.
- Soak for 15 to 20 minutes without twisting or wringing.
- Drain and refill with clean water multiple times until clear.
- Press water out gently and roll in towels to absorb excess moisture.
- Transfer immediately to a drying rack or large dryer.
Troubleshoot Common Washing Problems
Issues like clumping or odors usually stem from improper drying or incorrect machine settings. Understanding the cause helps you fix the problem quickly.
Fix Clumps and Lumps
Clumps form due to incomplete drying or lack of dryer balls. Re-dry the item with tennis balls and stop frequently to break up the filling by hand. Ensure you used an extra rinse cycle to prevent soap buildup.
Eliminate Musty Smells
Musty odors indicate trapped moisture or mildew growth inside the filling. Rewash the item with white vinegar and dry thoroughly with low heat. Air it out for 24 hours before using or storing it again.
Prevent Shrinkage Damage
Shrinkage occurs from hot water or high heat drying settings. Always use cold or warm water and dry on low or no heat. Follow the care label strictly to maintain the original size and shape.
Maintain Cleanliness Between Washes
You do not need to wash your bedspread every time you launder your sheets. Proper maintenance extends the time between deep cleans significantly.
Extend Time Between Cleanings
Use a duvet cover as your primary defense against oils and sweat. Shake and fluff the bedspread weekly to maintain loft and air it out monthly on a breezy day. Spot clean spills immediately to prevent deep staining.
Store Clean and Dry
Wash and dry the item completely before storing it for the season. Use a breathable cotton bag instead of plastic to prevent moisture trapping. Add cedar blocks to deter pests without leaving harsh chemical odors.
Frequently Asked Questions About Washing Bedspreads
Can I wash a king-size bedspread in a standard home washer?
Most standard home washers are too small for king-size bedspreads. You need at least 5.0 cubic feet of space, so using a commercial machine at a laundromat is often necessary for effective cleaning.
How long does it take to dry a bedspread completely?
Machine drying typically takes 2 to 3 hours or longer depending on thickness. Air drying can take a full day or more, so plan accordingly and check frequently for dampness.
Is it safe to use fabric softener on my bedspread?
You should generally avoid fabric softener as it coats fibers and reduces breathability. This residue can trap dirt and diminish the natural loft of down or synthetic fills.
What happens if I dry my bedspread on high heat?
High heat can melt synthetic fibers, shrink natural fabrics, and damage down clusters. Always use low heat or air fluff settings to preserve the integrity of your bedding.
How do I know if my bedspread is fully dry?
Press your hands deep into the thickest sections to feel for cool or damp spots. Surface dryness is not enough, and any remaining moisture will cause mold growth.
Key Takeaways for Washing Your Bedspread Successfully

Properly cleaning your bedding requires patience, the right equipment, and strict adherence to care labels. By using low heat, adding dryer balls, and stopping to fluff every 30 minutes, you ensure a fresh and clump-free result. Remember that thorough drying is the most critical step to prevent mold and maintain hygiene.
Start by checking your care label and inspecting for tears before you begin. If your home machines are too small, visit a laundromat to avoid damaging your investment. With these steps, your bedspread will remain soft, clean, and cozy for years to come.



