
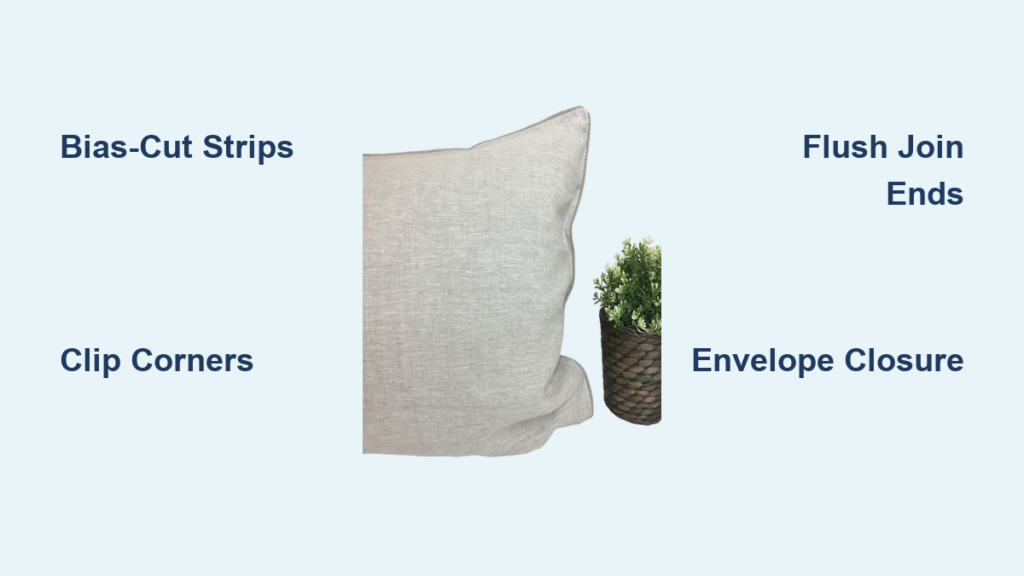
Creating a custom pillow sham with piping transforms an ordinary pillow into a sophisticated decorative piece that rivals high-end designer linens. The piping adds crisp edges, professional definition, and durability while framing your fabric choice beautifully. This guide walks you through every step from cutting fabric to the final stitch, using the envelope-back method that allows easy removal for washing.
Whether you are a beginner or experienced sewer, you will learn precise techniques for bias cutting, cording insertion, corner management, and seamless joins. We cover material selection, troubleshooting common piping problems, and three closure options to match your skill level and needs.
Cut the Right Fabric for Your Pillow Sham
Choose Durable, Pre-Washed Fabric
Select medium to heavy-weight fabric between 6 to 12 ounces per yard for best structure. Sunbrella and Outdura offer fade-resistant, water-resistant performance ideal for indoor and outdoor use. Cotton duck and pre-washed quilting cotton work well for indoor shams. Always pre-wash your fabric before cutting to prevent shrinkage after construction.
For patterned fabrics, cut a 16-inch test square first to center the design on your front panel. This prevents the disappointment of misaligned prints once the sham is complete.
Cut Panels to Exact Size
Measure your pillow insert with a tape measure rather than assuming standard sizing. Cut the front panel to match the insert exactly or 1 inch smaller for a snug, plump fit. For a 16-inch pillow, cut the front panel at 16 by 16 inches.
Cut two back panels for the envelope style. Each should be three-quarters of the pillow height. For a 16-inch pillow, cut two pieces at 16 inches wide by 12 inches tall. Label each piece with a fabric pen to avoid confusion during assembly.
Prepare Bias Strips for Piping

Cut Fabric on the Bias
Piping must bend smoothly around corners, and bias-cut strips at a 45-degree angle provide the necessary stretch. Fold the fabric corner diagonally so the selvage meets the straight edge, then press a crease to mark the bias line. Use a 45-degree acrylic ruler to cut parallel strips.
Strip width depends on your cording size according to this guide:
| Cord Diameter | Cut Strip Width |
|---|---|
| 1/8 inch (3mm) | 1¼ inches |
| 1/4 inch (6mm) | 1¾ inches |
| 3/8 inch (10mm) | 2 inches |
Add extra width if working with thick fabric.
Join Strips with Diagonal Seams
You need the pillow perimeter plus 8 inches of piping length. For a 16-inch pillow, this means approximately 72 inches total. Join strips diagonally to add length while maintaining grain continuity.
Place two strips right sides together at a right angle. Draw a line from the top-left corner to the bottom-right corner. Sew along the line, press the seam open, and trim excess to ¼ inch. Continue joining strips until you reach the required length.
Make and Insert the Piping
Wrap Cording in Bias Fabric
Use 1/8 to 1/4 inch polyester or foam cording, with 1/4 inch being the standard choice. Place the cording along the wrong side of the bias strip, centered. Fold both long edges of the strip over the cording so the raw edges meet or slightly overlap. Pin or clip in place.
Baste the Piping
Attach a zipper foot or cording foot to your sewing machine. Set the stitch length to 4.0 for basting. Sew close to the cording on the right side of the bias strip without sewing through the cording itself. This creates flexible, ready-to-attach piped binding.
Use Coats & Clark Tex 70 thread for strength, especially with outdoor or heavy-use fabrics.
Attach Piping to Front Panel
Align and Pin with Care
Lay the front panel right side up. Place the piped edge along one side, matching raw edges. Start sewing 2 to 3 inches from the end of the piping to leave room for a clean join later.
Pin or use sewing clips every 2 to 3 inches. Clips work better than pins on thick layers and prevent shifting during sewing.
Sew with Consistent Seam Allowance
Use a ½-inch seam allowance and zipper foot to stitch close to the piping. Backstitch at the start for security. Keep tension steady throughout the seam. If the fabric resists, lower the foot pressure on your machine.
Handle Corners Without Puckering
When you reach 1 inch from a corner, stop with the needle down. Lift the presser foot and pivot the fabric 90 degrees. Snip the bias seam allowance every ¼ inch, making 3 to 5 cuts that stop just before the stitching line. These snips allow the piping to bend smoothly around corners.
Resume sewing along the next side. Repeat this process for all corners.
Join the Piping Ends Cleanly

Use the Flush End-to-End Method
After sewing three sides, stop 2 to 3 inches from your starting point. Trim the cording ends so they meet end-to-end without overlapping. Unwrap the starting end’s bias fabric slightly.
Fold the raw edge of the starting strip diagonally and tuck it over the incoming cording end. Pin snugly and sew the final inches, catching all layers. This creates an invisible join with no bulk or gap.
Avoid overlapping ends, which create visible bulk that shows through the fabric.
Hem the Envelope Back Panels
Fold and Stitch Double Hems
Each back panel needs a double-fold hem on one long edge, which becomes the overlap side. Fold ½ inch to the wrong side and press. Fold another ½ inch and press again. Topstitch 1/8 inch from the inner folded edge using matching thread.
Repeat this process for both back panels. Use a walking foot if fabric layers shift during sewing.
Position Panels for Proper Overlap
When assembling, place the top back panel first, then the bottom panel, so the opening sits near the base. This configuration hides the gap and looks intentional. Standard overlap should be 4 to 5 inches, enough to keep the pillow insert fully concealed.
Assemble the Sham with Precision
Layer in the Correct Order
Place the piped front panel right side up. Lay the top back panel on top, right side down, aligning raw edges. Place the bottom back panel over it, also right side down, with its hemmed edge overlapping the top panel. Clip all around the perimeter.
Ensure corners are sharp and edges aligned perfectly. Misalignment at this stage causes lopsided results.
Sew with a Zipper Foot
Use a ½-inch seam allowance and zipper foot to stitch close to the piping. Sew all the way around, leaving a 6 to 8 inch opening for turning. Position the opening on a side away from the piping join so it is less visible.
Backstitch firmly at both start and end. Maintain even speed throughout, especially around corners.
Trim, Turn, and Shape the Corners
Reduce Bulk at Corners
After sewing, trim corners diagonally, cutting ¼ to ½ inch off the point. Clip the piping’s seam allowance every ¼ inch at each corner if you have not done this already. This prevents thick corners and helps the sham lie flat.
Turn Right Side Out
Reach through the opening and pull the sham inside out. Use a chopstick or turning tool to push out corners gently. Work slowly to avoid tearing fabric. Ensure the piping runs smoothly around all edges and corners are sharp.
Insert Pillow and Close Seam
Choose the Right Closure Method
The envelope closure requires no sewing. Simply insert the pillow through the overlapping back panels. This method works best for removable, washable covers and beginners.
For a permanent, invisible finish, hand-sew the opening closed. Fold raw edges inward ½ inch. Use a ladder stitch by inserting the needle into one fold, picking up a few threads from the opposite fold, and alternating sides. Pull tight after each stitch. Knot and bury the thread inside.
Avoid the whip stitch, which is visible and less durable.
Prevent Common Piping Mistakes
Fix Puckered or Bulky Piping
Puckering usually stems from using straight-grain strips instead of bias-cut fabric. Always cut piping fabric on the 45-degree bias. Bulky corners result from unclipped seam allowances. Snip every ¼ inch into the bias tape near corners to fix this.
Inconsistent seam allowance causes piping to pull away from edges. Use a zipper foot and maintain steady pressure throughout the seam.
Stop Cording from Showing Through
If the cord is visible through thin fabric, use thinner cording between 1/8 and 3/16 inch. Choose medium-weight fabric for better coverage. Add a lightweight batting layer behind the front panel for additional concealment.
Pick the Best Closure for Your Needs
Compare closure options to match your skill level and preferences. The envelope style offers easy changes and machine washability, making it ideal for beginners. A hidden zipper provides full access and a sleek look for intermediate sewers. The hand-sewn ladder stitch creates a permanent, invisible finish.
For a hidden zipper, install it between the piping and the edge on the back panel before attaching the front.
Use Upcycled Fabrics Creatively
Try These Alternative Materials
Consider cotton tablecloths or napkins that are pre-sized and durable with interesting patterns. Shower curtains provide water resistance, perfect for kids rooms or outdoor use. Drop cloths offer an affordable, linen-like texture after pre-washing. Curtain panels provide wide fabric that reduces seams, though check for sun fading.
Always pre-wash and press upcycled fabrics before cutting.
Maintain Your Pillow Sham
Wash and Store Properly
Remove the pillow insert before washing. Machine wash cold on a gentle cycle. Tumble dry low or air dry. Never use bleach, as it degrades fibers and fades colors.
For outdoor shams, rinse with fresh water after exposure to salt or chlorine.
Repair and Extend Life
Replace worn back panels while keeping the piped front to refresh your sham. Re-cover with new fabric if the front becomes stained. Replace cording if it becomes compressed or frayed.
Frequently Asked Questions About Making a Pillow Sham with Piping
What is the best fabric for pillow sham piping?
Medium to heavy-weight fabrics like Sunbrella, cotton duck, or pre-washed quilting cotton work best. Sunbrella offers superior fade, water, and stain resistance for indoor and outdoor use.
How do I calculate how much piping I need?
Measure the pillow perimeter and add 6 to 8 inches for joining. A 16-inch square pillow needs approximately 70 to 72 inches of piping total.
Why does my piping pucker at the corners?
Puckering happens when the bias seam allowance is not clipped. Snip every ¼ inch into the bias tape near corners to allow smooth bending without distortion.
Can I use pre-made bias tape for piping?
Yes, though custom bias-cut strips provide better flexibility around corners. Pre-made tape works for straight edges but may pucker on corners.
What closure method is easiest for beginners?
The envelope closure is easiest because it requires no hand sewing. Simply overlap the back panels to conceal the pillow insert.
How do I join piping ends without a visible bump?
Use the flush end-to-end method. Trim cording ends to meet perfectly, unwrap one bias end, fold diagonally, and tuck over the incoming end before sewing closed.
Key Takeaways for Making a Pillow Sham with Piping
Creating a professional-quality pillow sham with piping requires precise cutting on the bias, careful corner management through strategic snipping, and a seamless end-to-end join for invisible results. Choose medium to heavy-weight fabric, pre-wash all materials, and use a zipper foot to stitch close to the cording without catching it.
The envelope closure offers the easiest path for beginners, while hand-sewn ladder stitches provide invisible, permanent finishing. With practice, you can produce custom shams that rival retail prices at a fraction of the cost. Now gather your materials and start creating beautiful, tailored pillow shams for your home.


