
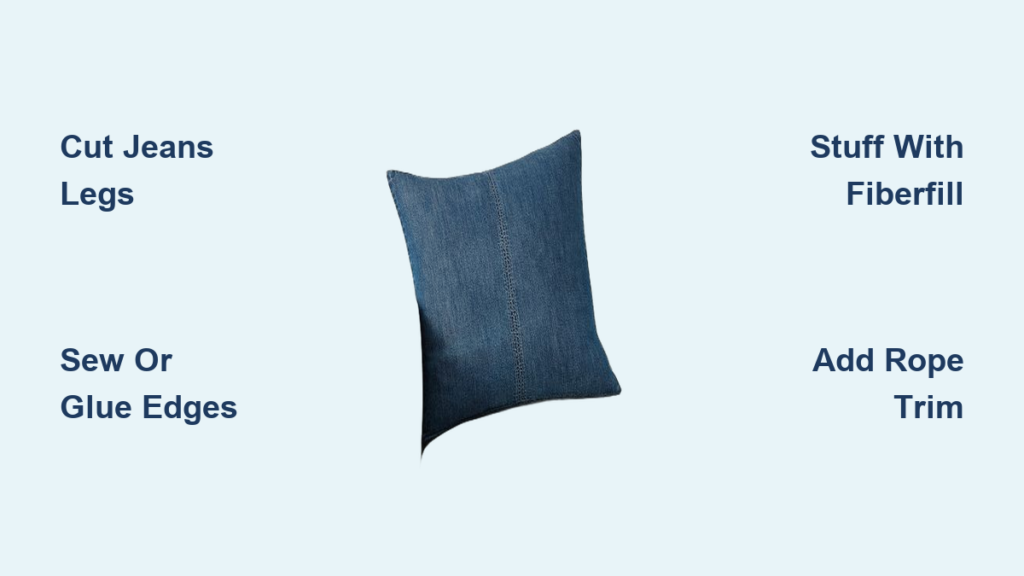
Tired of throwing out old jeans? Turn them into stylish, eco-friendly throw pillows instead. Making a pillow out of jeans is a simple, sustainable DIY project that transforms worn denim into durable home decor. Whether you’re a beginner using hot glue or an experienced sewer crafting a custom sham, this guide covers every step from choosing materials to adding decorative touches.
By the end, you’ll know exactly how to build both reusable sewn covers and no-sew stuffed pillows, complete with closure options, design variations, and pro tips for long-lasting results.
Choose Your Construction Method First
The first decision is whether to make a sewn pillow sham or a no-sew filled pillow. Each method has unique benefits depending on your tools, skill level, and intended use.
Sewn vs. No-Sew Pillow Construction
• Sewn sham: Fits over a pillow insert, fully washable, durable, and reusable. Best for frequent use and interior styling.
• No-sew pillow: Glued and stuffed permanently. Great for kids, gifts, or seasonal decor.
• Sewn method requires a sewing machine with denim needle for long-term durability.
• No-sew method uses hot glue for speed and simplicity.
Match Your Skill Level to the Method
| Skill Level | Recommended Method | Why |
|---|---|---|
| Beginner | No-sew or envelope-back sham | Minimal tools, easy assembly |
| Intermediate | Patchwork or zipper sham | Custom designs, professional finish |
| Kids or Families | No-sew with rope trim | Safe, fun, creative |
Pick based on what you have and what you want to keep using.
Gather Materials and Tools
Start with clean, dry jeans and the right supplies. Most materials can be repurposed or bought cheaply.
Essential Materials for Both Methods
• Old jeans: One to two pairs. Use legs for large panels, pockets and tags for decoration.
• Pillow form: 16″, 18″, or 20″ square. Feather-down for luxury, poly-fill for budget.
• Sharp fabric scissors: For clean cuts through thick denim.
• Ruler and fabric marker: To mark straight lines before cutting.
Sewn Sham Supplies
• Sewing machine with denim needle (100/16 or 110/18)
• Pins or clips to hold layers together
• Iron and board for pressing seams
• Zipper, snaps, or buttons for closure
• Bias tape (½ inch) for clean edges
No-Sew Pillow Supplies
• Hot glue gun (low-temp for kids, high-bond for strength)
• Polyester stuffing (reuse old pillow guts or buy fiberfill)
• ¼-inch craft rope for border trim
• Felt scraps for appliqué stars or shapes
Pro Tip: Dollar Tree sells rope, glue guns, and stuffing—great for low-cost projects.
Prepare Denim Fabric Panels
Turn jeans into flat, usable fabric by carefully dismantling the legs.
Cut and Flatten Pant Legs
• Lay one leg flat and cut off the bottom above the inseam.
• Cut along the side seam and crotch seam to open the leg into a single panel.
• Repeat with the second leg.
• Discard inseams or save for coasters.
Note: Denim width varies (14–16 inches). Larger jeans yield bigger panels.
Save These Design Elements
Do not toss these unique features that add character:
• Back pockets: Use as appliqué or functional pockets.
• Belt loops: Attach as hanging loops or border accents.
• Brand tags: Preserve “Lucky You” or Levi’s labels for vintage charm.
• Waistband: Cut and use as top or bottom trim.
Iron panels flat before cutting to avoid puckering.
Build a Sewn Denim Pillow Sham
Create a washable, reusable cover that fits snugly over a pillow insert.
Cut Front and Back Panels
• Measure your pillow form (e.g., 18″).
• Add 1 cm (⅜”) seam allowance to each side. Cut front panel at 20″ x 20″.
• For envelope back, cut two back panels. Both same width as front (20″). Height equals ¾ of pillow size (13.5″ for 18″ pillow).
Assemble Overlapping Front Panel Design
Want a layered look? Use two denim pieces with overlap:
• Place first leg piece as base.
• Cut second piece and overlap by 1 inch.
• Pin and double-stitch across the seam for strength.
• Trim excess and press flat.
This mimics high-end envelope shams.
Choose Your Back Closure Style
Pick one method based on skill and style.
Envelope Back (Beginner-Friendly)
• Place hemmed panel on top of non-hemmed panel (right sides together).
• Overlap by 4 inches (10 cm).
• Stitch around all four sides.
• Turn right side out—insert slips in easily.
Why 4 inches? Prevents gaping and keeps insert secure.
Zipper Back (Professional Finish)
• Cut single back panel same size as front.
• Use zipper foot to sew a centered or side zipper.
• Allows full removal for washing.
Snaps or Buttons (Vintage Style)
• Sew snaps or buttons onto overlap flap.
• Adds charm but may snag delicate fabrics.
Avoid Velcro: It’s less durable and shows with wear.
Sew the Sham Together
• Place front and back right sides together.
• Pin around edges.
• Stitch with 1 cm seam allowance, backstitching at corners.
• Clip corners diagonally to reduce bulk.
• Zigzag or overlock inner seams to prevent fraying.
• Turn right side out using a blunt tool to push out corners.
• Iron flat for crisp edges.
Insert pillow form—done!
Make a No-Sew Filled Denim Pillow
Perfect for beginners, kids, or quick weekend crafts.
Prepare the Denim Tube
• Lay one pant leg flat.
• Cut straight across both ends using a ruler and fabric marker.
• Remove inseam stitching at the bottom to eliminate bulk.
• Turn inside out so interior faces outward.
• Seal raw edges with a thin bead of hot glue—press together to close.
This creates a clean, sealed tube ready for stuffing.
Fill With Polyester Fiberfill
• Begin inserting stuffing from one end.
• Push deep into corners and ends to avoid hollow spots.
• Stop when firm but slightly soft to touch.
• Do not overstuff—denim will stretch.
Save money: Reuse stuffing from an old pillow.
Seal the Open End
• Fold raw edges inward like rolling a cuff.
• Apply continuous hot glue along the inner edge.
• Press closed and hold until set.
• Ensure all seams are tucked inside before sealing.
Let dry 2–4 hours before handling.
Add Rope Trim Border
• Wrap ¼-inch craft rope around the entire edge.
• Apply hot glue every 2–3 inches to secure.
• At corners, curve rope slightly—don’t crease.
• If rope frays, braid the tip or wrap with thread.
Design Tip: Rope adds rustic, nautical, or coastal charm.
Decorate With Felt Stars
• Fold red felt in half.
• Draw half a star along the fold.
• Cut through both layers—two matching stars.
• Repeat with white felt.
• Arrange stars on front.
• Glue with dabs in center and along each point.
Alternative: Use bandanas, denim patches, or fabric paint.
Customize With Design Techniques
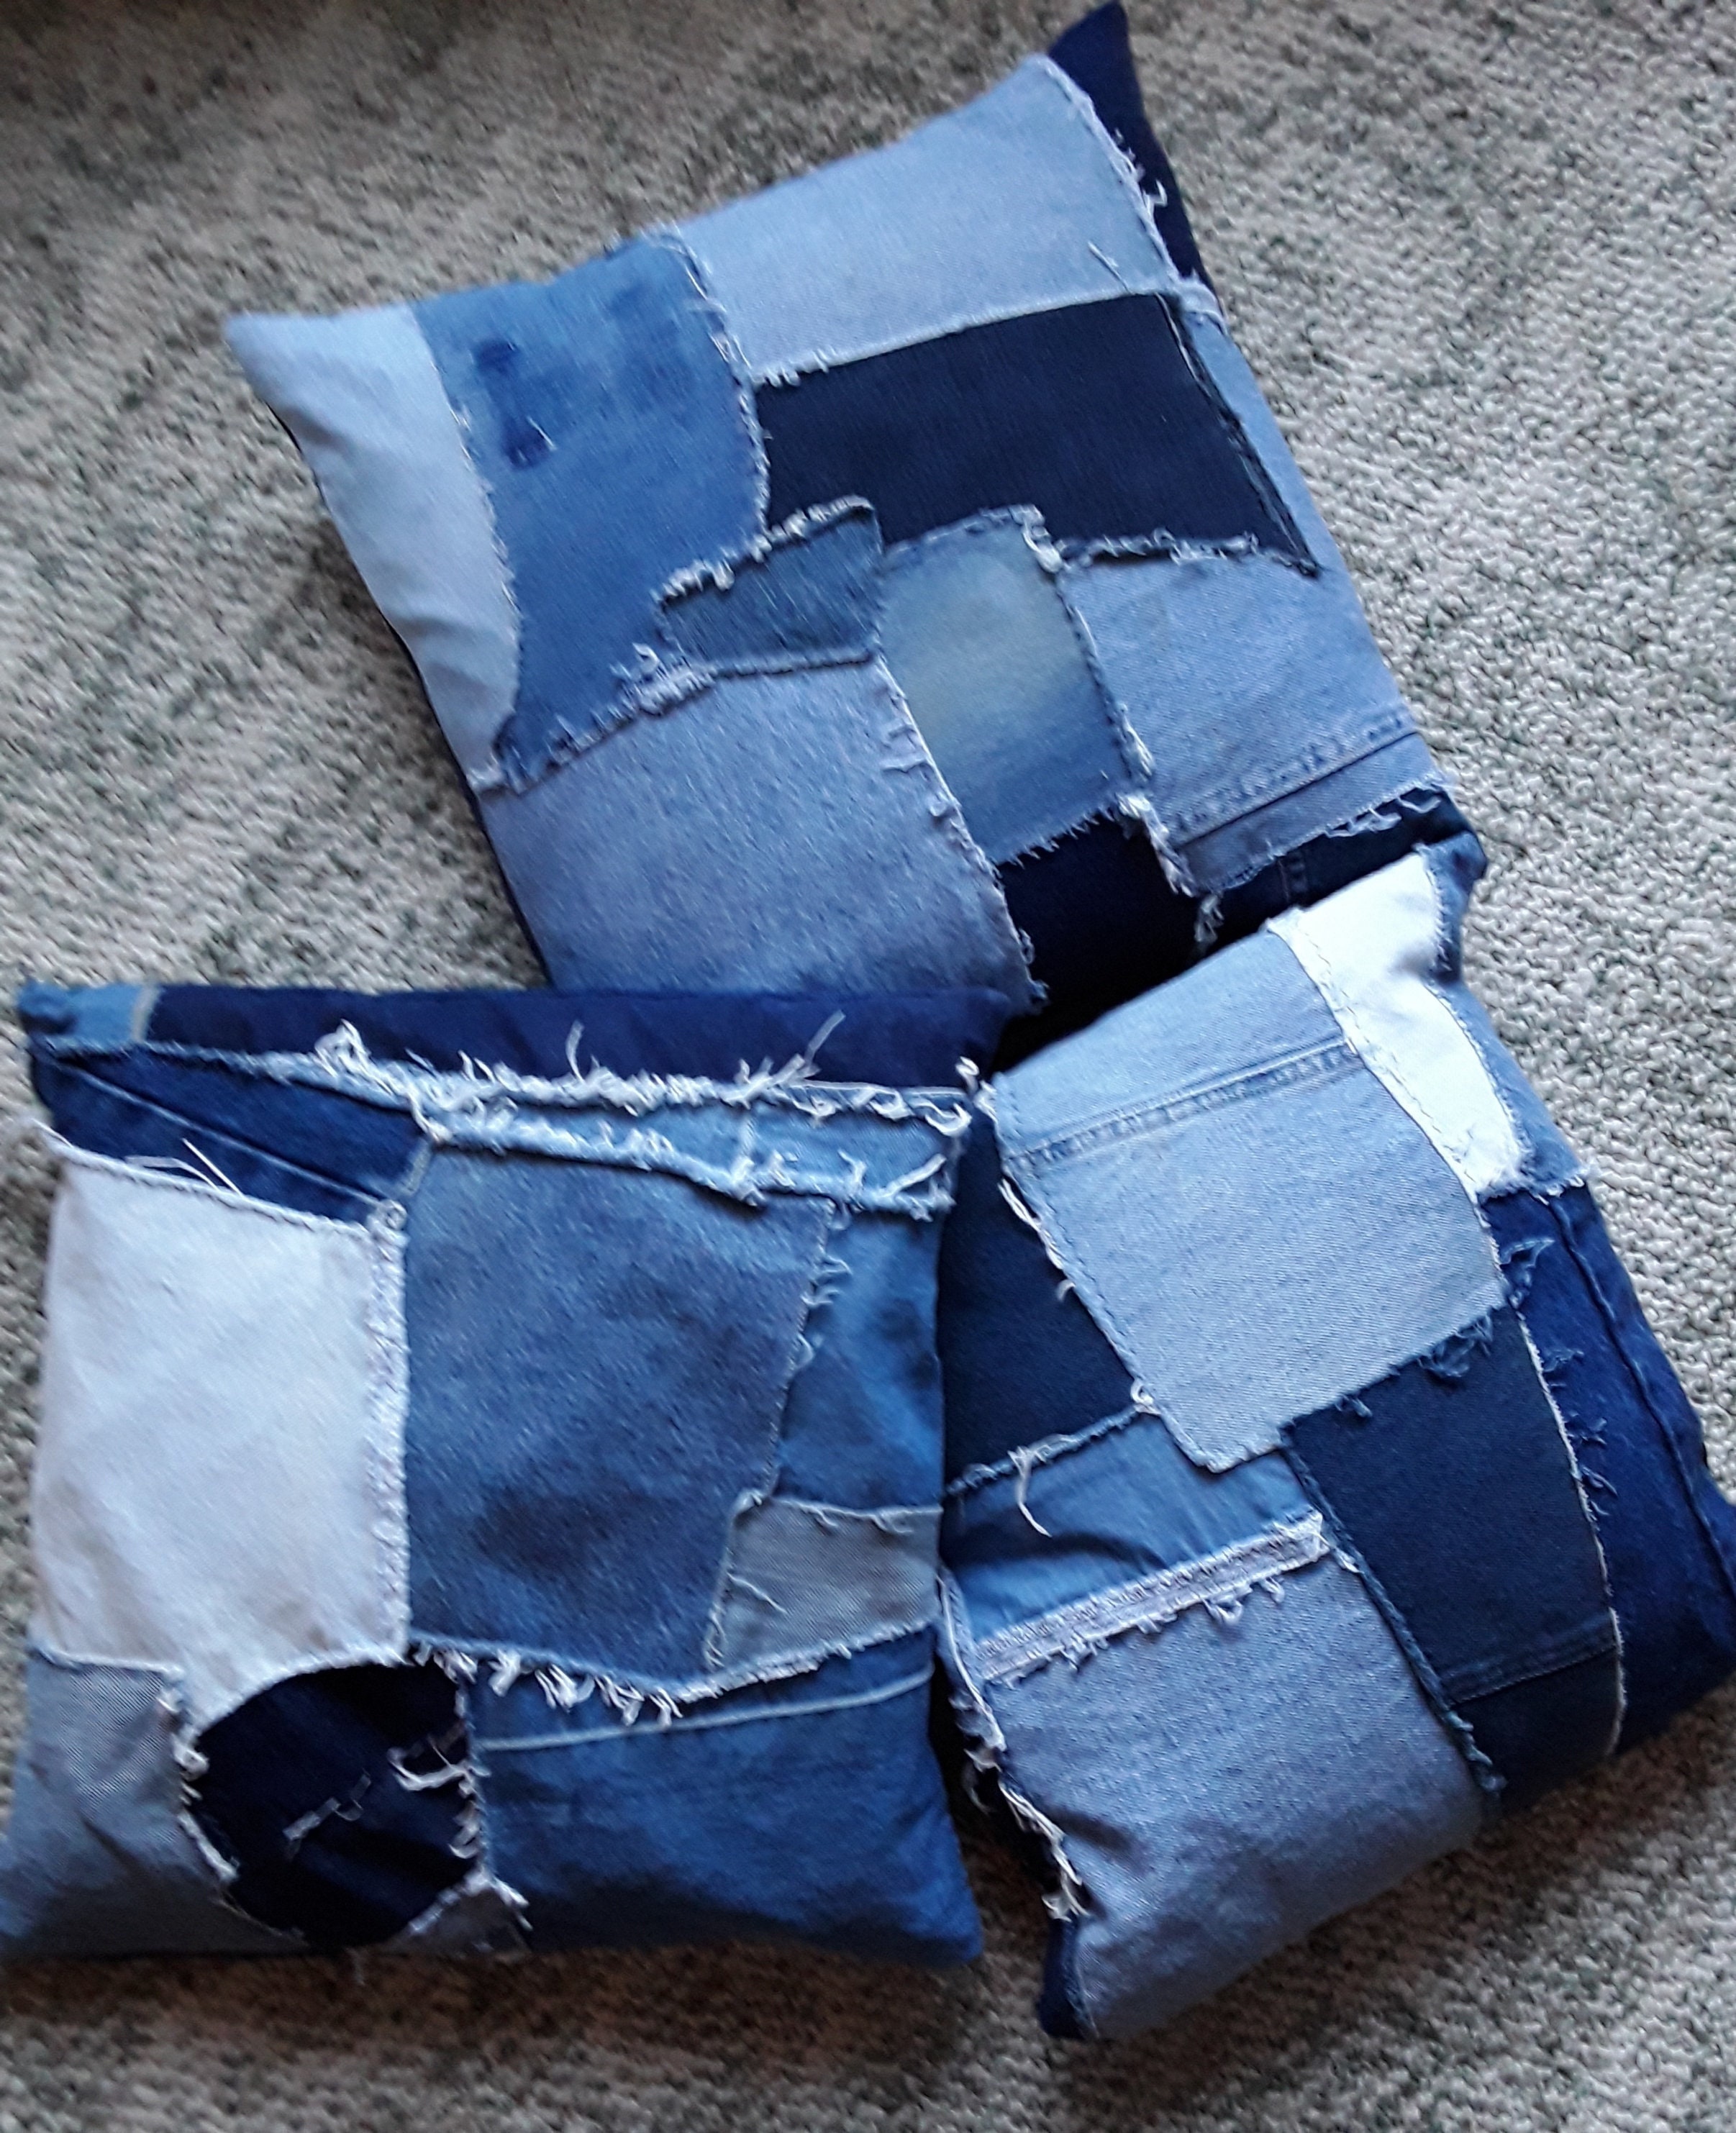
Make your pillow stand out with creative layouts and textures.
Patchwork Zigzag Front
• Cut three 4″ longer rectangles (20″ x width of leg).
• Diagonally cut each into two triangles—six total.
• Alternate mirror-image triangles.
• Overlap edges by 1 cm, pin, and sew.
• Press seams flat.
Creates dynamic, modern geometry.
Strip Sewing Ombre Effect
• Cut strips 2¼” wide from different jeans.
• Sort by shade: light, medium, dark blue.
• Sew end-to-end in gradient order.
• Press seams flat after each join.
• Sew strips side-by-side into a quilted front.
Result: A smooth color fade that highlights denim’s natural variation.
Woven Denim Panel
• Cut 18 strips (9 warp, 9 weft) at 20.5″ x 2.4″ (52 cm x 6 cm).
• Pin 9 vertically on foam board.
• Weave 9 horizontally through them.
• Secure with thumbtacks.
• Stitch intersections or leave loose for boho texture.
Pro Tip: Pull horizontal threads to fray edges for extra dimension.
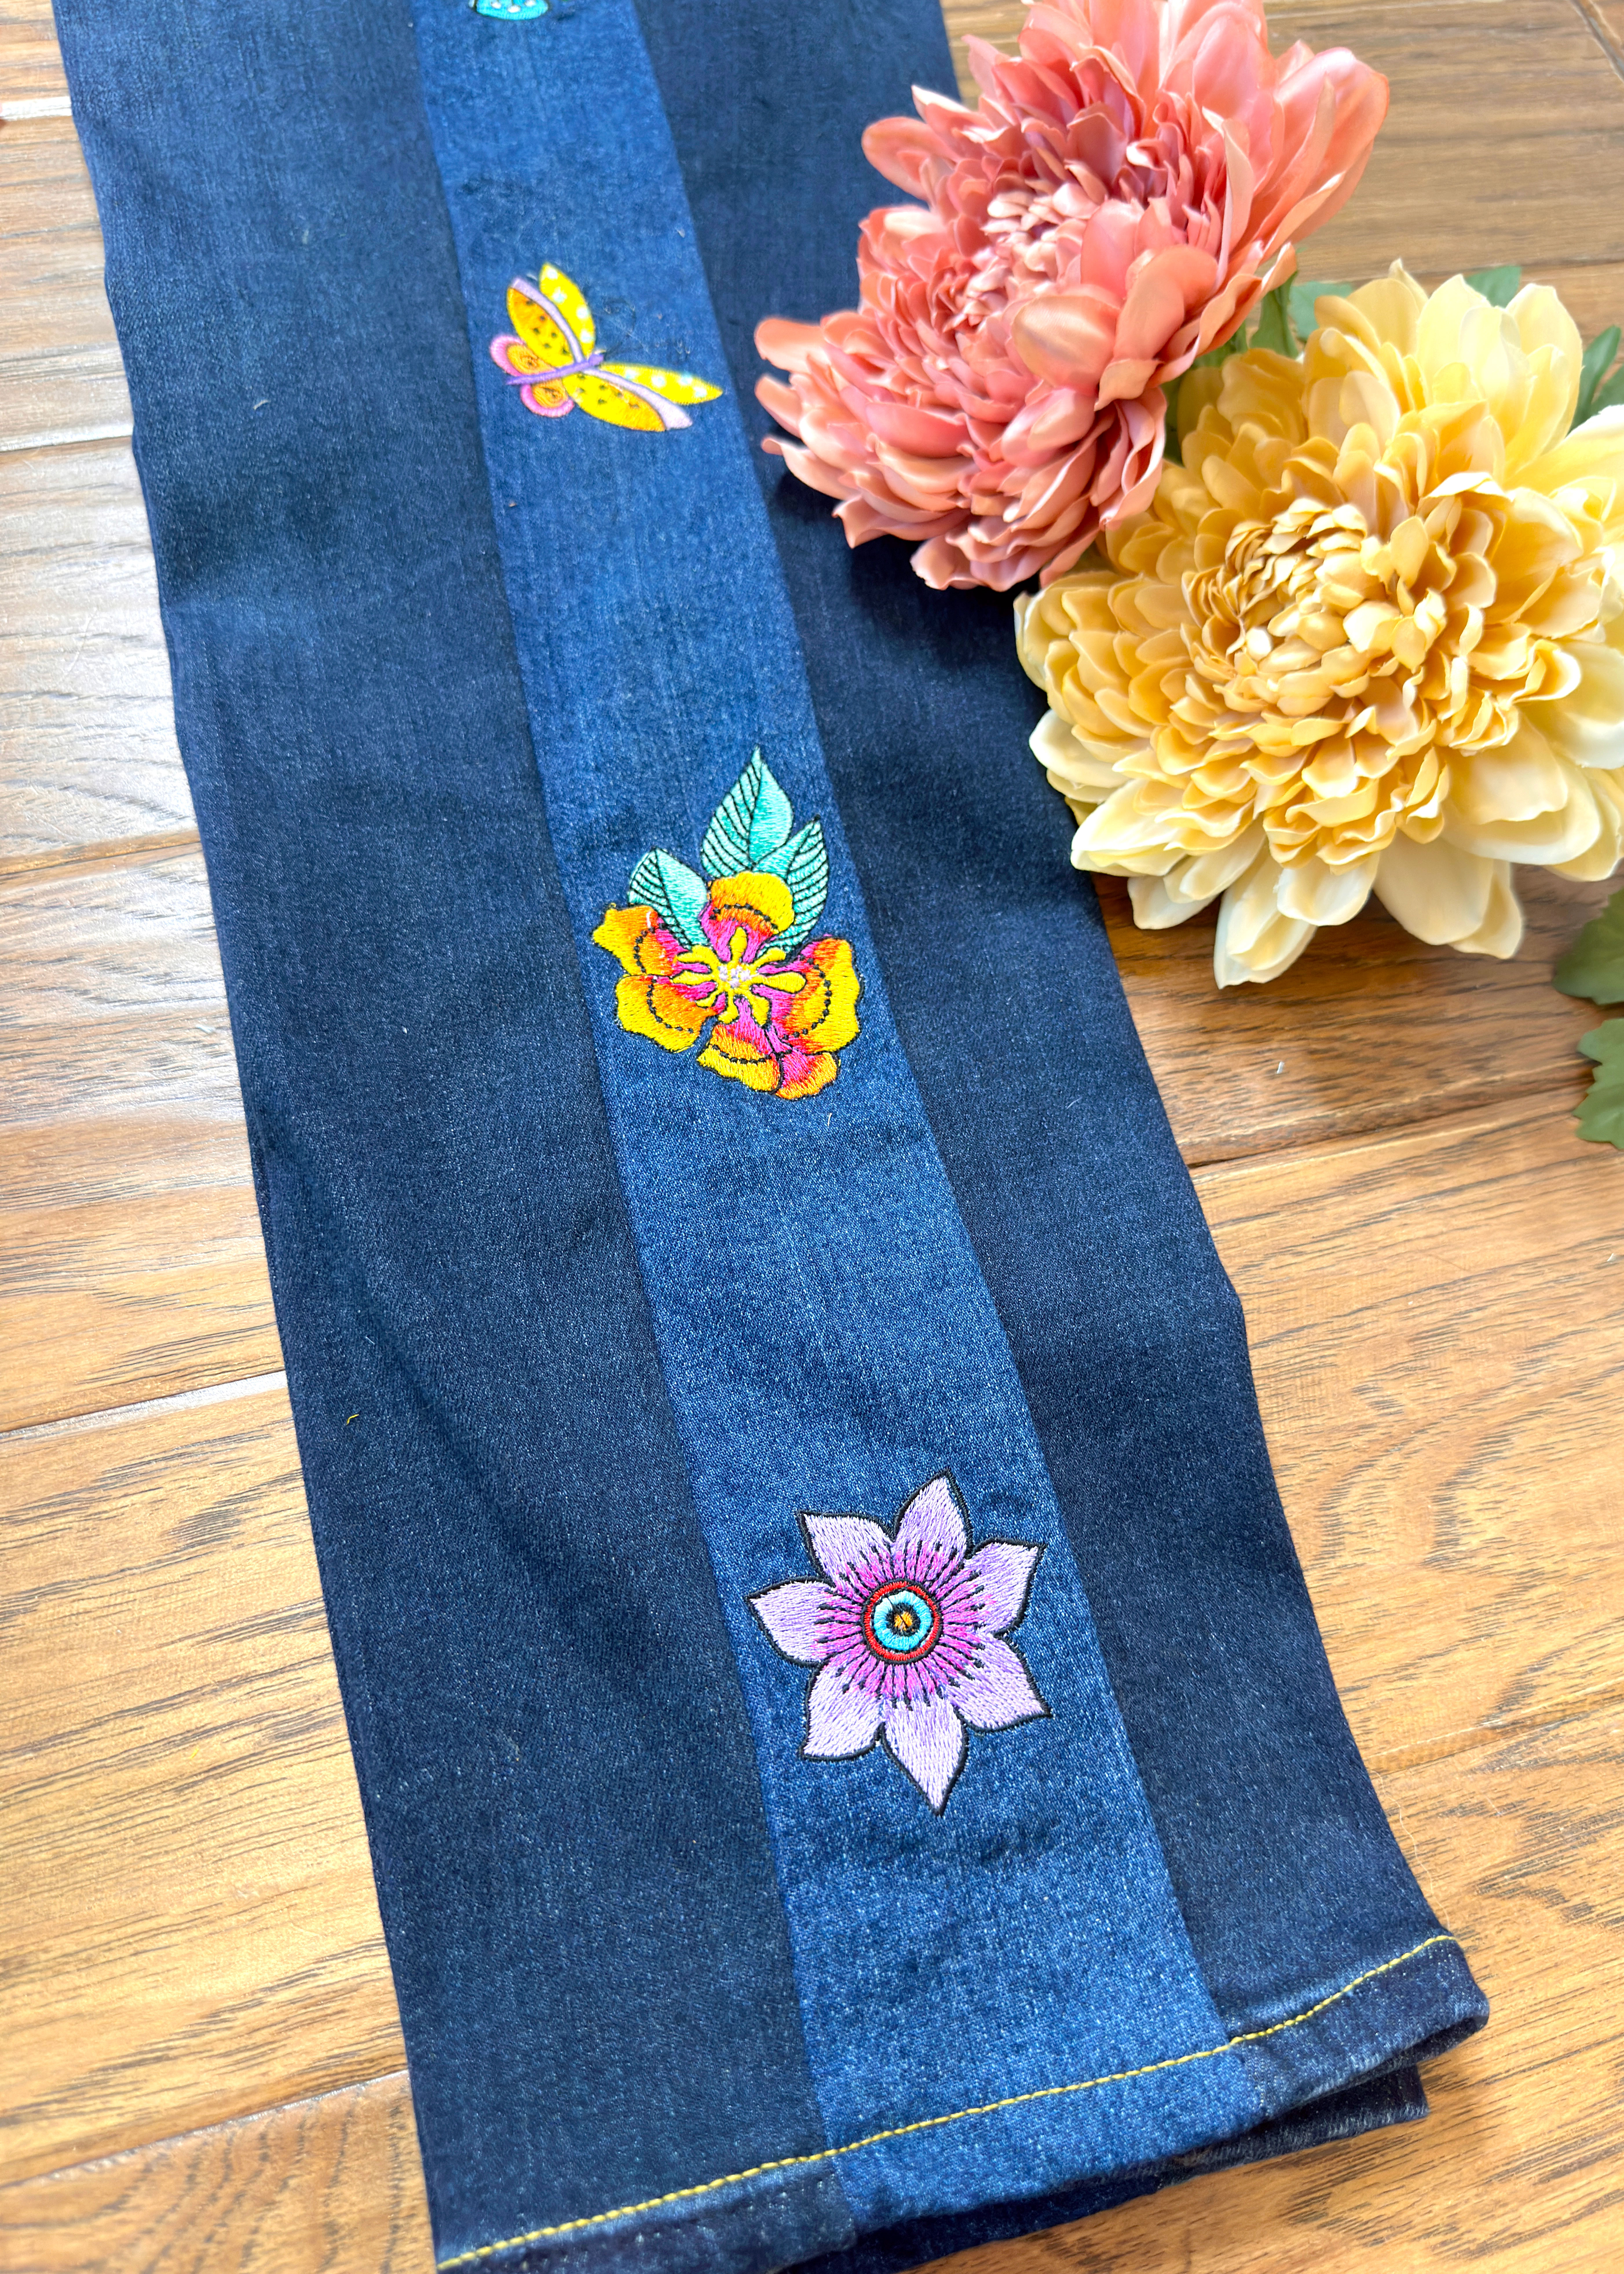
Embellish With Pockets and Tags
• Attach back pockets with top-stitching.
• Use original belt loops as side hangers.
• Preserve brand labels—they add nostalgic value.
• Add embroidery or fabric paint for monograms.
These details make each pillow one-of-a-kind.
Finish With Style and Durability
Enhance appearance and longevity with smart finishing touches.
Create Frayed Edges
• Pre-fray before sewing: Pull horizontal threads manually.
• Wash before assembly: Cold cycle encourages natural fraying.
• Control fraying: Zigzag stitch ¼” from edge before washing.
Warning: Don’t over-wash—can weaken seams over time.
Mix Denim With Other Textures
Combine with:
• Sari trim (boho flair)
• Corduroy or flannel (soft contrast)
• Gingham or plaid (rustic charm)
• Chenille (luxe feel)
Use in borders or patchwork blocks.
Use Bias Tape for Clean Edges
• Fold raw edges under.
• Pin ½-inch bias tape over edge.
• Stitch along both sides.
• Prevents fraying and adds polish.
Great for no-sew pillows with visible seams.
Maintain and Care for Your Pillow
Keep your denim pillow looking great for years.
For Sewn Shams
• Always remove insert before washing.
• Machine wash cold, gentle cycle, mild detergent.
• Air dry or tumble dry low—no high heat.
• Iron inside out with medium heat.
• Check seams annually—re-stitch if fraying starts.
Pro Tip: Wash inside a pillowcase to protect embellishments.
For No-Sew Pillows
• Spot clean only with damp cloth and mild soap.
• Avoid soaking glued areas—water weakens adhesive.
• Store away from sunlight to prevent glue brittleness.
• Re-glue lifted edges or trims as needed.
These pillows aren’t washable—keep them dry.
Troubleshoot Common Issues
Fix mistakes before they ruin your project.
Fabric Puckering When Sewing
Cause: Stretching thick denim unevenly.
Fix: Use a walking foot, pin frequently, and sew slowly.
Uneven or Ragged Fraying
Cause: Random thread pulling.
Fix: Pre-fray uniformly; use zigzag stitch to control edge.
Gaping Envelope Closure
Cause: Overlap too small.
Fix: Use minimum 4-inch overlap—ensures tight fit.
Insert Too Loose or Tight
Cause: Wrong cover size.
Fix: Add 1–2 inches total to insert dimensions (18″ insert → 19″ cover).
Glue Seepage on No-Sew Pillow
Cause: Too much hot glue.
Fix: Use thin, continuous beads—not globs. Wipe excess quickly with a dry cloth.
Explore Variations and Sizes
Scale your project for different uses.
Mini Pillows (10″x10″)
• Use for dollhouses, keychains, or pet beds.
• Make with scrap denim and tiny stuffing.
Standard Throw Pillows (16″x16″ or 18″x18″)
• Ideal for sofas, beds, or chairs.
• Most common size—fits standard inserts.
Floor Pillows (36″x36″ or 80×80 cm)
• Combine multiple jeans for reading nooks or kids’ rooms.
• Use thick poly-fill or foam for support.
Oversized Cushions
• Great for window seats or porch decor.
• Reinforce seams with double stitching.
Extend the Idea: More Denim Crafts
Turn extra scraps into matching decor.
• Denim coasters: Woven or patchwork squares.
• Rugs: Braid strips or weave into a rag rug.
• Placemats: Add pockets for napkins.
• Lampshades: Glue strips in spiral pattern (no-sew).
• Blankets: Make a denim rag quilt from leftover pieces.
One pair of jeans can fuel multiple projects.
Final Thoughts on Making a Pillow Out of Jeans
Making a pillow out of jeans is more than a craft—it’s a statement of style, sustainability, and creativity. Whether you sew a washable sham or glue a quick no-sew version, you’re giving old fabric new life. The key takeaways are choosing the right method for your skill level, preparing denim panels carefully, and adding personalized embellishments like pockets, tags, or rope trim.
With durable denim, customizable designs, and low cost, this project suits beginners and pros alike. Now that you know how to build, decorate, and care for your denim pillow, grab those old jeans and start creating. Your next favorite home accent is just a few cuts away.
Frequently Asked Questions About Making a Pillow Out of Jeans
Can I make a pillow out of jeans without sewing?
Yes. Use a hot glue gun to seal the edges of a pant leg, stuff with polyester fiberfill, and seal the open end with glue. Add rope trim or felt decorations for style. This method works well for beginners and kids.
What size pillow form do I need for jeans?
Use an 18″ pillow form for standard jeans. Cut panels with 1 cm seam allowance, resulting in approximately 20″ x 20″ covers. Adjust based on your specific jean width.
How do I prevent frayed edges from unraveling too much?
Zigzag stitch ¼” from the edge before washing. Wash in cold water on gentle cycle. Avoid over-washing finished pieces—once or twice per season is sufficient.
Are denim pillows washable?
Sewn pillow shams are machine washable if you remove the insert first. No-sew pillows are spot clean only—water weakens the hot glue bond.
How do I add a pocket to my denim pillow?
Cut the back pocket from old jeans with ½” seam allowance. Pin to front panel, then top-stitch around the edges, catching all layers. Reinforce corners with extra stitches.
Can I mix different shades of denim in one pillow?
Absolutely. Sort jeans by color (light, medium, dark) and create ombre effects using strip sewing or patchwork. Different washes create beautiful visual depth.


