
You found the perfect king-size comforter, but it now pools on the floor or swallows your twin bed whole. Cutting it feels risky because you fear fraying edges, ruined designs, or leaking fill. You are not alone in this dilemma as millions of oversized quilts end up unused simply because they do not fit. The good news is that you can make a bedspread smaller safely without sacrificing quality or aesthetics.
This guide reveals proven methods to resize any bedding from down comforters to heirloom quilts with scalloped edges. You will learn when to cut, when to tuck, and how to finish edges so they last for years. Whether downsizing a king to a twin or preserving a delicate border, these step-by-step techniques ensure a professional result.
Assess Fabric and Fill Type Before Cutting
Determining if your bedspread can be safely resized requires checking the fill type and fabric strength first. The method you choose depends entirely on whether the item contains down, synthetic fill, or cotton batting.
Check for Down or Synthetic Fill
Down-filled comforters demand special handling since cutting exposes the interior immediately. Feathers can escape rapidly if edges are not sealed right away during the process. Synthetic fills are more forgiving but may clump if you do not redistribute them after trimming. Cotton batting holds its shape better yet can shift if seams are disturbed during modification.
Evaluate Seam Strength and Fabric Wear
Press gently on the surface to check for weak spots in the material. If the fabric puckers, tears, or shows thinning, resizing by cutting is not recommended for your specific item. Weak seams may unravel during or after modification causing structural failure. Consider non-destructive alternatives like tucking or bed risers for sentimental or vintage pieces.
Identify Design Elements That Matter
Check for central medallions, borders, or scalloped edges that must remain centered and symmetrical. Measure from the center outward instead of the edge to ensure perfect balance after resizing. If your quilt has full scallops around the border, only remove fabric in increments that match a complete scallop unit.
Gather Essential Tools for Resizing Bedding
Using the right tools ensures clean cuts, strong seams, and professional finishes for your project. This is especially critical when working with thick comforters or delicate quilts.
Cutting and Marking Supplies
- Sharp fabric scissors or rotary cutter: Use scissors for curved cuts or down comforters while rotary cutters work best for long straight lines on quilts.
- Chalk, fabric marker, or red thread: Mark cut lines clearly since red thread is ideal for hand-stitching guide lines on down comforters.
- Rigid measuring tape: Flexible tapes stretch so use a stiff ruler or metal tape for accuracy.
- Pins or clips: Hold layers together during marking and sewing without damaging the fill inside.
Sewing and Finishing Equipment
- Sewing machine (heavy-duty): Only use if fabric is not too thick and ensure it has a walking foot to handle bulk.
- Hand-sewing needles and strong thread: Required for sealing down comforters since a blanket stitch provides both strength and decoration.
- Fabric glue or Fray Check: Use for no-sew edge sealing on synthetic or tightly woven cotton bedspreads.
Resize a Down Comforter Safely

Down comforters demand precision to prevent feather loss during the resizing process. Hand-stitching and double-sealing are essential steps you cannot skip.
Mark Cut Lines with Red Thread
Lay the comforter flat and taut on your work surface without letting it sag. Never use a sewing machine foot to mark lines as it can crush the down filling inside. Instead, hand-stitch two parallel lines using red thread to outline the new size. Always measure from the center outward to maintain symmetry.
Cut Carefully with Sharp Scissors
Use sharp regular scissors and cut slowly along the stitched lines you created. Keep the fabric stretched during cutting to minimize feather escape from the interior. Work in sections if needed while supporting the weight of the comforter as you go.
Seal Edges with Blanket Stitch
Immediately fold the raw edge inward by ½ inch after cutting the fabric. Hand-sew a tight blanket stitch all around the perimeter to create a durable seal. This creates a flexible barrier that prevents down leakage better than machine stitching.
Reinforce with Double Stitching
Sew a straight hand-stitch along the folded edge for long-term durability. Refold slightly and add a second parallel stitch to strengthen the new edge further. This double barrier significantly reduces the risk of feather escape over time.
Modify Synthetic or Cotton Bedspreads
Non-down bedspreads offer more flexibility in cutting and finishing techniques for your project. You can choose between sewing or no-sew options based on your skill level.
Measure and Mark Twin Dimensions
Lay the bedspread flat on a clean surface to begin your work. Use chalk or a fabric marker to draw a 39″ x 75″ rectangle centered on the design. If your piece has a border, align the cut lines with pattern edges to preserve visual balance.
Cut with Rotary Cutter or Scissors
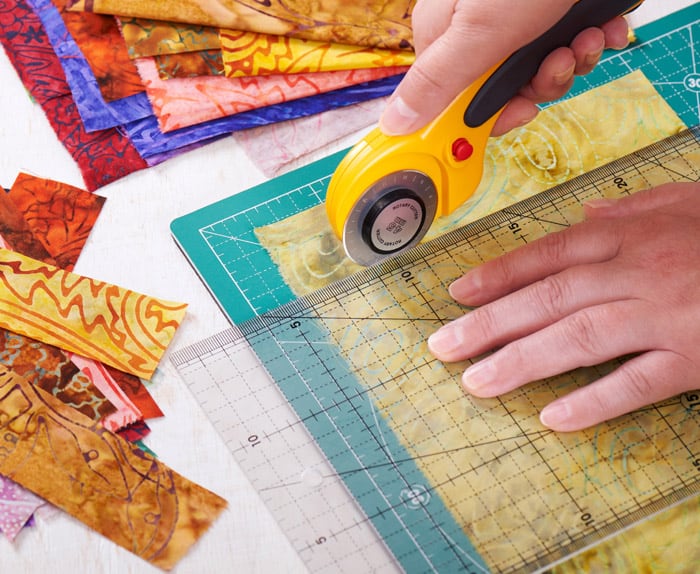
Use a rotary cutter with a straightedge for clean, straight cuts on your fabric. Cut slowly and do not stretch the fabric as this causes uneven shrinkage later. Only cut one dimension if possible to minimize structural changes to the item.
Choose Edge Finishing Method
No-Sew Option: Apply Fray Check or fabric glue to raw edges for a quick fix. This works best on synthetic fills or tightly woven cottons where fraying is minimal.
Sewed Edge (Recommended): Use a sewing machine with a zigzag stitch or straight stitch for durability. Use heavy-duty thread and a size 14 needle while a walking foot prevents fabric from shifting.
Test Fit on Target Bed
Place the resized bedspread on the twin bed to check your work. Adjust by trimming slightly if it is still too long or wide for the mattress. If it remains oversized, consider using it as a throw blanket draped over the foot of the bed.
Resize Quilts with Scalloped Edges

Preserving decorative edges requires advanced planning before you make any cuts. Cutting must align with the scallop pattern to avoid visual imbalance in the final product.
Cut and Rebind Without Distortion
Calculate how much to remove from each side by measuring from the center medallion. Mark new edge lines with chalk then sew along the line before cutting ¼ inch outside the seam. Bind the new edge with matching or contrasting fabric to finish the look professionally.
Convert to Fitted Bedspread Design
Retain original scalloped edges on the long sides by laying the quilt on the bed first. Cut excess from the foot and head ends then reattach the shortened side panels to the center. Miter corners for a clean finish and bind the head end with straight fabric since pillows will hide it.
Preserve Design with Proportional Cutting
Only remove fabric in multiples of a full scallop unit if scallops are essential to your design. If the amount does not match, consider unpicking machine quilting lines and redrawing the layout entirely. This method is best for heirloom pieces where design integrity is paramount.
Use Non-Destructive Alternatives
Try reversible methods that control drape without altering the bedspread if cutting feels too permanent. These solutions are perfect for renters or temporary setups.
Tuck and Topstitch Excess Fabric
Fold excess fabric under at the sides and foot of the bed to reduce the drop. Create a tuck just above the mattress edge and topstitch it flat to secure the shape. You can undo the stitches later if needed making this ideal for temporary situations.
Install Bed Risers
Raise the bed frame 3–6 inches using bed risers to lift the mattress higher. This prevents the bedspread from touching the floor without any cutting or sewing. It is especially useful for heavy quilts that are hard to sew or wash frequently.
Repurpose Leftover Fabric
Save the excess fabric when cutting down a king to a twin size for other uses. Use it as a mattress cover for extra warmth or a lap blanket for the couch. You can also make pillows or quilt blocks for crafts to reduce waste.
Maintain Resized Bedding Long-Term
Proper care extends the life of your modified bedspread and prevents seam failure over time. Regular maintenance ensures your hard work lasts for years.
Inspect Seams Regularly
Check hand-sewn or machine-stitched edges monthly for gaps or loose threads. Repair any small holes immediately with a needle and thread to prevent feather loss. Early detection saves you from major repairs later.
Wash with Care
Follow the original care label instructions when washing your resized item. Use a gentle cycle and cold water for hand-sewn edges to protect the new seams. Air dry or tumble dry on low heat since high heat can weaken threads.
Store Flat or Loosely Folded
Avoid tight folding or compression when storing resized items away. Store them flat or loosely draped to prevent stress on new seams. Never vacuum-pack a down comforter as it damages loft and insulation properties.
Redistribute Fill After Use
Shake the bedspread vigorously after making the bed each morning. This prevents fill from shifting to one side and maintains even warmth distribution. It keeps your comforter looking fluffy and functioning well.
Final Verification Checklist
Verify these five points before declaring your project complete and using the bed. This ensures a professional result that lasts.
- Are all cut edges sealed? Ensure no fraying or feather escape is possible.
- Is fill evenly distributed? Check for cold spots or lumps in the material.
- Does it fit the bed? Confirm it lies flat with the desired 6–12 inch drop.
- Is the design balanced? Verify the medallion is centered and scallops are symmetrical.
- Are care instructions noted? Keep washing and storage guidelines preserved for future use.
Final Note: Resizing a bedspread is a practical way to revive oversized bedding for your home. Whether you cut, tuck, or reconfigure, the key is matching the method to the material type. Down comforters need hand-sewn seals while quilts with scallops benefit from strategic rebinding techniques. With the right tools and attention to detail, you can transform an ill-fitting bedspread into a perfectly tailored piece.
Frequently Asked Questions About Making a Bedspread Smaller
Can I cut a down comforter without feathers escaping everywhere?
Yes, but you must hand-stitch two parallel guide lines with red thread before cutting. Keep the fabric stretched taut while cutting slowly with sharp scissors to minimize leakage. Immediately seal the raw edges with a hand-sewn blanket stitch to prevent feathers from escaping.
What are the standard twin size dimensions for resizing?
The standard twin size dimensions are 39 inches wide by 75 inches long for the mattress coverage. You should add 1 to 2 inches to these measurements if you plan to sew a seam allowance. Always measure from the center outward to ensure your design remains symmetrical.
How do I preserve scalloped edges when making a quilt smaller?
You must remove fabric in increments that match a full scallop unit to avoid distorting the pattern. Alternatively, you can convert the quilt into a fitted bedspread style that retains scallops on the long sides. Cutting arbitrarily will ruin the visual balance of the scalloped design.
Is there a way to make a bedspread smaller without cutting it?
Yes, you can tuck excess fabric under the mattress and topstitch it flat for a reversible solution. Installing bed risers to lift the bed frame also prevents the bedspread from touching the floor. These methods allow you to return the item to its original size later if needed.
What tools do I need to resize a heavy comforter?
You need sharp fabric scissors, a rigid measuring tape, and strong thread for hand-sewing. A rotary cutter works well for straight lines on quilts while red thread helps mark cutting lines on dark fabrics. Heavy-duty needles and a walking foot are essential if using a sewing machine.
Will resizing my comforter void the manufacturer warranty?
Yes, cutting or altering a commercially purchased comforter will void any existing manufacturer warranties. This includes warranties regarding fill power, fabric integrity, or construction quality. Always consider this before modifying expensive or new bedding items.
Key Takeaways for Making Your Bedspread Smaller
Resizing bedding successfully depends on matching your technique to the specific fill type and design. Down comforters require immediate hand-sealing to prevent leakage while synthetic fills allow for more flexible cutting options. Always measure from the center outward to maintain visual balance in your final product.
Start by assessing your fabric strength and gathering the right tools like sharp scissors and red thread. Follow the specific steps for your material type whether that means double-stitching down or using Fray Check on cotton. Your perfectly fitted bedspread awaits with just a little patience and care.



