
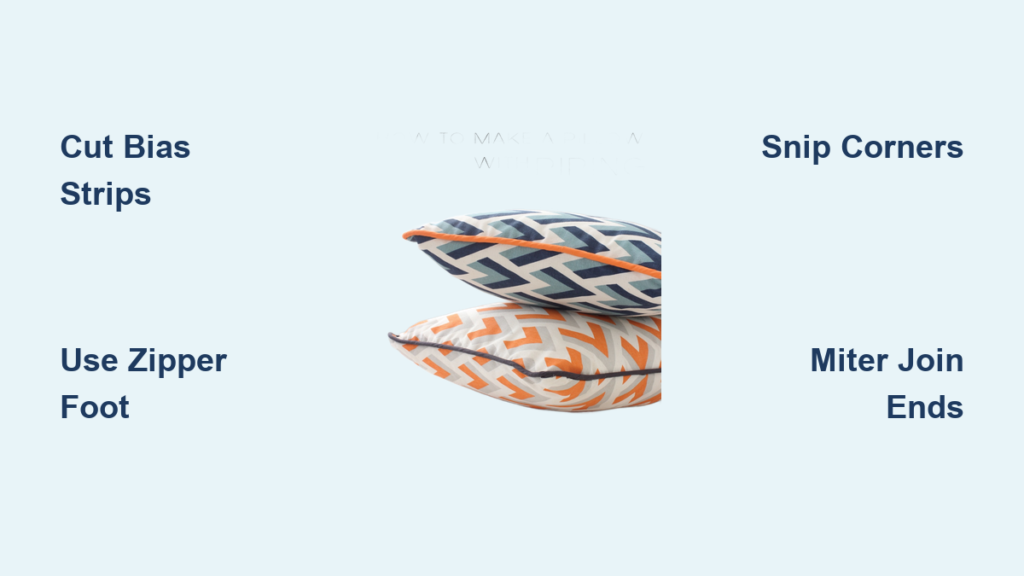
Sewing piping on a pillow instantly elevates its look from homemade to high-end. Whether you’re refreshing throw pillows for your living room or crafting custom decor for a gift, piping adds structure, durability, and a polished finish that mimics professional upholstery. The process involves wrapping a cord in bias-cut fabric, attaching it to the pillow front, and sewing everything together with precision, especially around corners. With the right tools and technique, even beginner sewists can achieve clean, gap-free results.
In this guide, you’ll learn how to cut bias strips, join piping ends seamlessly, attach piping securely, and assemble a durable pillow cover using an envelope closure. You’ll also discover expert tips to avoid common mistakes that make DIY pillows look amateur.
Cut Pillow Panels to Size
Before handling piping, prepare your pillow cover pieces with proper seam allowances to ensure a snug fit.
Front Panel Dimensions
Cut the front piece 1 inch larger than your pillow insert on each side. For example, cut a 21″ × 21″ piece for a 20″ insert. This accounts for a ½” to ⅝” seam allowance on all sides, ensuring the pillow looks tailored once sewn.
Back Panels for Envelope Closure
For a zipper-free design, cut two overlapping back panels. Each panel should be ¾ the width of the front and full height. For a 21″ front panel, cut back panels 14″ wide by 21″ tall. The overlap ensures the insert stays hidden while allowing easy removal for washing.
Pro Tip: Pre-wash all fabric to prevent shrinkage after completion. Iron panels smooth before cutting.
Cut and Join Bias Strips
Bias-cut strips are essential for flexible, non-puckered piping, especially around sharp corners.
How to Cut on the Bias
- Fold fabric diagonally from selvage to selvage to create a 45° angle.
- Cut along the fold to form a triangle, then align edges to make a continuous parallelogram.
- Use a rotary cutter and ruler to slice 2″-wide strips along the bias grain.
Joining Strips Seamlessly
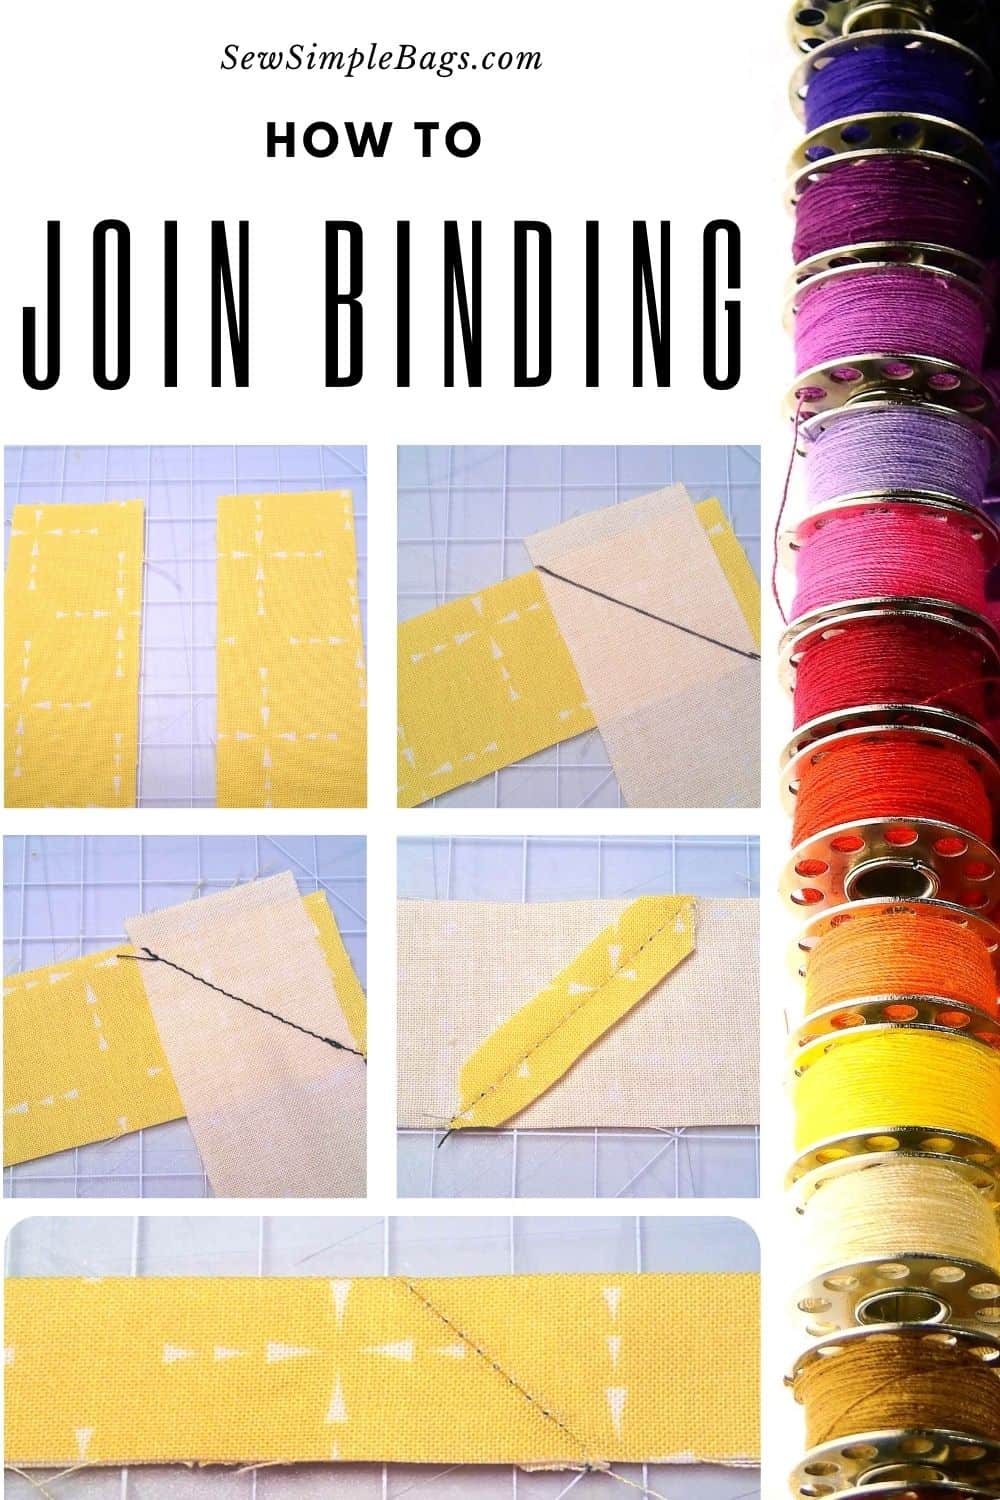
- Place two strips right sides together at a 90° angle.
- Draw a diagonal line across the overlapping corner.
- Sew along the line, then press seam open and trim excess to reduce bulk.
- Repeat until total length exceeds pillow perimeter by 6–8″.
Why Bias? Cutting on the 45° grain allows slight stretch, preventing tension and ripples when bending around edges.
Make the Piping Cord
Creating your own piping gives full control over color, thickness, and fabric match.
Assemble Cording and Bias Tape
- Insert welt cord (1/8″ to 1/4″ diameter) into the fold of the bias strip.
- Center the cord so equal fabric wraps both sides.
- Secure with a zipper foot. This is non-negotiable for sewing close to the cord.
- Sew with a basting stitch (length 4.0) or standard 3.0 mm stitch, staying just beside the cord without sewing over it.
- Start with a 2″ fabric tail unsewn for easier joining later.
Alternative: Some prefer “raw piping,” leaving the bias open until final assembly, then sewing cord and tape in one step.
Attach Piping to Pillow Front
This step locks the piping in place before enclosing it between front and back panels.
Align and Pin Piping
- Place pillow front right side up.
- Match raw edge of piping to raw edge of front panel, cording facing inward.
- Pin every 2–3 inches, keeping tension even. Do not stretch the fabric.
Sew Around the Edges
Begin sewing at the center of one side, leaving a 2–3″ tail. Use the zipper foot to follow the previous stitching line as closely as possible.
Corner Technique: Snip and Bend
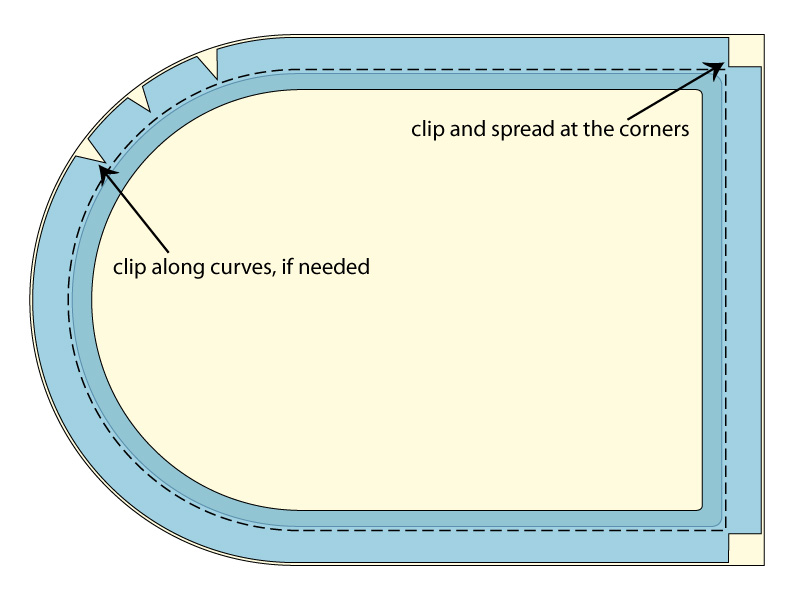
- Stop 1–2″ before each corner.
- Make 3–5 small snips (¼” deep) into the bias seam allowance only. Do not cut the stitching or cord.
- These release cuts allow the piping to bend smoothly without gaps.
- Pivot fabric and continue sewing along the next side.
- Use shorter stitches (2.0 mm) near corners for better control.
Warning: Skipping snips leads to bulges or open seams at corners. This is the number one cause of amateur-looking results.
Join Piping Ends Cleanly
A seamless join prevents lumps and visible gaps where the ends meet.
Diagonal Wrap Method (Pro Finish)
- When nearing the start, stop 2–3″ before the beginning.
- Trim the second cording end so it butts tightly against the first (no overlap).
- Unpick the last 1–2″ of stitching on the second end.
- Pull the fabric back from the cord.
- Cross the cord ends and wrap the loose fabric over the starting end like a miter.
- Fold neatly and pin closed.
- Sew with backstitching to secure.
Folded Overlap (Beginner-Friendly)
Trim both ends flush. Fold the starting end ¼–½” inward. Overlap the second end over it, enclosing both cord tips. Pin and sew shut with backstitch.
Key Point: Avoid bulky overlaps. Use only enough fabric to cover the cord tips cleanly.
Hem the Back Panels
For envelope closures, clean hems create a professional interior finish.
Double-Fold Hem Steps
- On each back panel, fold one long edge ¼” toward the wrong side.
- Fold again ¼” to encase the raw edge.
- Press with iron for a crisp fold.
- Topstitch 1/8″ from inner fold using a straight stitch.
Overlap Tip: When assembled, back panels should overlap by 3–5 inches, fully hiding the insert.
Assemble the Pillow Cover
Now bring all pieces together with precise alignment.
Layer with Piping Facing In
- Place front panel right side up.
- Lay back panels right sides down onto front, overlapping in center.
- Align all raw edges and ensure piping is untwisted and centered.
- Pin or clip every few inches around perimeter.
Critical Check: Keep piping above the presser foot during sewing. Never stitch through it accidentally.
Sew and Finish the Seams
Final stitching locks everything in place while reducing bulk.
Perimeter Stitching
- Use ½” to ⅝” seam allowance and zipper foot.
- Sew close to cording without catching it.
- Backstitch at start and end, especially at envelope opening for durability.
- Sew slowly around corners to maintain smooth curves.
Reduce Bulk
While still wrong side out, clip corners diagonally, cutting near but not through stitches. Trim seam allowances to ¼” using pinking shears. Optionally, serge or zig-zag inner edges to prevent fraying.
Why Clip Corners: This reduces fabric bulk, allowing corners to turn out sharply.
Turn, Press, and Insert
The final steps give your pillow a crisp, store-bought appearance.
Turn Right Side Out
- Use a point turner, chopstick, or knitting needle to gently push out corners.
- Aim for sharp, symmetrical points. Work slowly to avoid poking holes.
Press with Care
Use a low-heat iron and pressing cloth. Press seam allowance toward back. Avoid direct pressure on piping. Steam lightly to smooth without crushing the cord.
Insert Pillow Form
- Slide in a down or high-quality poly insert (for example, 20″ × 20″).
- Adjust envelope flaps to fully conceal the opening.
Pro Choice: Down inserts retain shape longer and provide a plusher feel than basic polyester.
Expert Tips for Flawless Results
Must-Do Techniques
- Always use a zipper foot. It is the only way to sew close to cording.
- Test on scraps first, especially with thick cords or slippery fabrics.
- Replace your needle if skipping stitches. Dull needles damage cording.
- Hand-baste piping for delicate fabrics to prevent shifting during machine sewing.
Design Options
Use contrasting piping for bold accent (navy with gold trim, for example). Match piping to room palette or patterned fabric for subtle elegance. Try double piping (two parallel cords) for a dramatic, modern edge.
Fix Common Piping Problems
Puckered or Wavy Edges
Cause: Stretching bias tape during sewing.
Fix: Pin carefully, avoid pulling, use clips instead of pins on slippery fabrics.
Gaps at Corners
Cause: Not enough snips in bias tape.
Fix: Make 3–5 small, even cuts into seam allowance before turning.
Twisted or Uneven Piping
Cause: Misalignment during attachment.
Fix: Stop frequently to check alignment. Pin densely near corners.
Visible Join or Bulky Seam
Cause: Overlapping cord ends or poor folding.
Fix: Butt cord ends tightly and miter the fabric join cleanly.
Piping Sewn Into Final Seam
Cause: Accidentally catching piping under foot during assembly.
Fix: Lift fabric and visually confirm piping is free before sewing.
Frequently Asked Questions About Sewing Piping on a Pillow
What is the best cording size for pillow piping?
The most common cording size is 3/16″ to 1/4″ diameter. This balances visibility and structure well. Use 1/8″ for subtle accents on lightweight fabrics, and 3/8″ or larger for bold, modern looks on sturdy upholstery.
Can I use premade bias tape for piping?
Yes. Premade bias tape works well. Select a width that fully encases your cording with at least ½” excess for seam allowance. You can find cotton, polyester, and silk options at most craft stores.
Why does my piping pucker around corners?
Puckering happens when the bias tape stretches during sewing. Pin every 2–3 inches and avoid pulling the fabric as you sew. Using clips instead of pins on slippery fabrics helps maintain even tension.
How do I join piping ends without a bulky seam?
Use the diagonal wrap method. Butt the cord ends tightly end-to-end, then fold the fabric from one end over the other in a mitered pattern. This creates a smooth, flat join that is virtually invisible.
Do I need a special foot to sew piping?
Yes. A zipper foot is essential for sewing close to cording without catching it under the presser foot. For very thick cording (3/8″ or larger), consider a bulky overlock foot to accommodate the extra depth.
Can I wash pillows with homemade piping?
Yes. Piping actually reinforces edges against wear and fraying, making your pillow more durable. Use a gentle cycle and air dry or tumble dry low. The bias-cut fabric moves with the pillow, reducing stress on seams.
Key Takeaways for Sewing Piping on a Pillow
Sewing piping on a pillow transforms simple fabric into elegant, professional-looking decor. The essential steps include cutting bias strips at a 45° angle for flexibility, using a zipper foot to sew close to the cord without catching it, and making small release snips at corners to prevent gaps and bulges.
The envelope closure method provides durability and easy removal for washing. Pre-wash all fabrics, test on scrap material first, and take your time around corners for the cleanest results. With practice, you’ll master corner control, seamless joins, and professional finishes that make your pillows look anything but DIY.



