
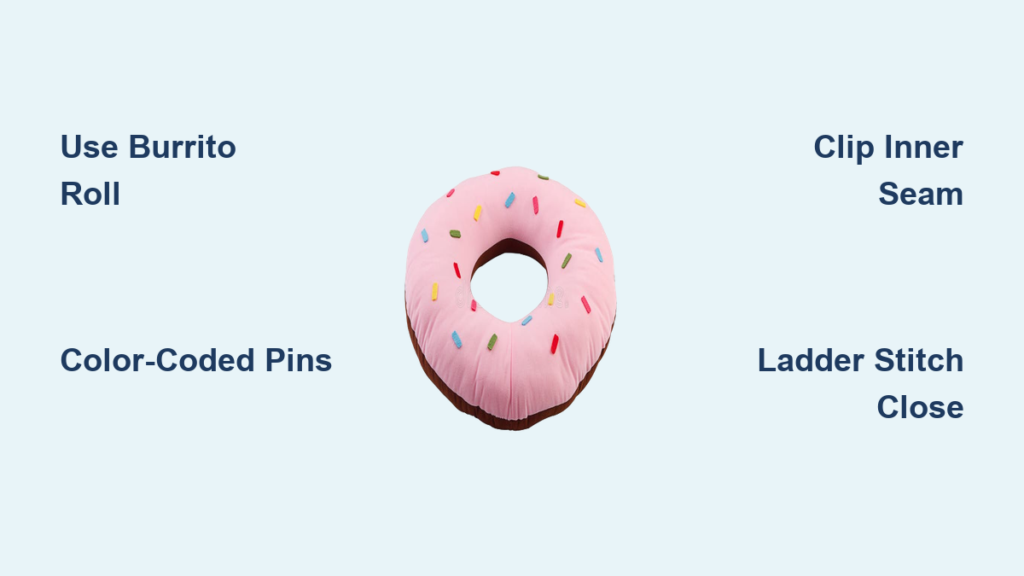
Imagine making a soft, whimsical donut pillow that looks good enough to eat, except it’s sewn not baked. Whether you’re crafting a cozy lap cushion, a playful nursery decor piece, or a fun Halloween costume accessory, learning how to sew a donut pillow opens the door to a creative project with big visual impact. The real trick lies in turning the ring-shaped pillow right sides out without twisting. But do not worry, techniques like the burrito roll method make it possible even for first-time sewers. In this guide, you will learn step-by-step how to cut, assemble, stuff, and finish a polished donut pillow using common fabrics like fleece or minky.
Cut Perfect Donut Shapes from Fabric
Draft a Reusable Donut Pattern
Creating an accurate pattern is the foundation of a polished donut pillow. Fold a large sheet of paper or fusible interfacing into quarters. Place a ruler pivot at the folded corner, which becomes the center of your future circle. Measure out to your desired outer radius and mark points along the edge, then connect them into a smooth quarter-circle arc. Cut along the arc and unfold to reveal a full circle. Repeat with a smaller radius to cut out the center hole. You now have a donut-shaped template ready for tracing onto fabric.
Cut Two Identical Dough Layers
Use sharp fabric scissors or a rotary cutter to cut two identical donut rings from your main fabric. For efficiency, fold the fabric in half and trace both the outer and inner circles across both layers. This method cuts two rings at once, saving fabric and ensuring perfect symmetry. Avoid stretching curved edges during cutting to maintain shape accuracy. Set one aside for the top layer and one for the bottom layer.
Attach Frosting with Zig-Zag Stitch

Choose and Prepare Frosting Fabric
Select a contrasting fabric for the icing, such as soft pink minky, white fleece, or chocolate brown felt. Cut a swirling, piped frosting shape freehand or using a folded paper template for symmetry. The inner opening of the frosting piece must be larger than the donut hole to avoid catching in the final seam. For stability, especially with stretchy minky, fuse lightweight interfacing to the back before cutting.
Appliqué Frosting to the Dough Base
Place the wrong side of the frosting onto the right side of one donut layer, which serves as your base. Align the center and smooth outward to prevent wrinkles. Pin or use basting spray to hold everything in place. Sew around the frosting edge using a zig-zag stitch with width set to 3.0 to 4.0 millimeters and length at 1.5 millimeters. This secures stretchy or fraying fabrics while creating a decorative border. Backstitch at both start and end points. Keep the frosting within the half-inch seam allowance zone, never letting it extend into the stitching line.
Add Sprinkle Decorations Before Assembly
Pick Safe, Durable Sprinkle Materials
Decorate your donut pillow with fabric sprinkles like felt strips, pompoms, or wool balls. For children’s pillows, use flat fabric appliqués or Kam snaps, which are baby-safe and will not detach during washing. Avoid loose buttons or small parts unless securely hand-stitched through all layers. Felt and fleece jimmies work particularly well because they do not fray and withstand machine washing.
Hand-Sew Sprinkles Securely
Attach sprinkles before sewing the two donut layers together. Position them on top of the frosting layer. Use a sharp needle and double-thread to hand-stitch each sprinkle with tight knots. For pompoms or wool balls, sew through the center and pull the thread into the stuffing to hide knots inside the pillow. If using Kam snaps, reinforce the back with a small patch of fusible interfacing to prevent tearing.
Use the Burrito Roll Method for Turning
Sew the Outer Edge with an Opening
With the frosting-side facing up, place the second donut layer on top with right sides together. Pin around the outer edge, leaving a 4 to 6 inch gap for turning. Sew the outer perimeter with a half-inch seam, backstitching at both ends. Do not sew the inner hole yet.
Prepare and Sew the Inner Hole Seam
On the top layer only, trace a small circle with a washable marker, keeping the same size as your donut hole. Sew directly on the line using a straight stitch. Cut out the center, leaving a half-inch seam allowance. Clip the inner seam every half-inch to help it lie flat when turned.
Roll and Sew the Inner Seam
Roll the donut like a burrito by tucking the sewn outer edge inward and folding the inner edge over it, aligning the marked stitching lines. Insert three colored pins before rolling: blue at the start, yellow opposite, and dark blue at a third point. Match these pins when rolling to prevent twisting. Pin along the half-circle path and sew with a half-inch seam, stopping 2 to 3 inches short of closing the circle. Backstitch at both ends. This technique creates a tunnel that, once pulled through, turns the donut right sides out.
Turn Your Donut Right Sides Out Without Twisting
Match Alignment Pins and Pull Through
After sewing, match the colored pins exactly as you did before: blue to blue, yellow to yellow, dark blue to dark blue. This prevents the twisting that commonly plagues donut pillow projects. Gently pull the fabric through the opening using your fingers or a blunt tool like a chopstick. Work slowly, pushing out curves and corners. The donut will pop out like a giant fortune cookie, bulky but intact.
Check for Twists and Press the Seams
Once fully turned, inspect the seam carefully. No twists indicate success. Use a knitting needle or turning tool to push out any soft spots near the center hole. Press lightly with a cool iron and pressing cloth, especially on minky or fleece, to flatten seams without melting fibers.
Stuff and Close the Opening

Fill with Polyester Fiberfill
Begin stuffing through the opening with polyester fiberfill. Start loose, then gradually firm up the body. Use a chopstick to push stuffing into tight curves around the inner hole. Avoid overstuffing because your pillow should stay soft and pliable. For kids, let them help with stuffing since it is safe and fun.
Hand-Stitch the Opening Closed
Fold the raw edges inward evenly. Use an invisible ladder stitch to close the gap. Insert the needle inside the fold, pick up one thread from the opposite side, and pull. Alternate sides for a seamless finish. Do not close completely at first; leave 1 to 2 inches open. Add final stuffing to perfect firmness, then finish stitching and trim excess thread.
Customize Your Donut Pillow Design
Try Different Flavor Themes
Switch up the look with themed fabrics. Use dark brown fleece for a chocolate donut, light tan for vanilla, or glitter fabric for a birthday sprinkle version. Match frosting colors to pink, blue, or rainbow. Use metallic thread for extra sparkle. For holidays, add appliqués like hearts for Valentine’s or pumpkins for Halloween.
Mix and Match Fabrics
Pair camel minky for the dough with Paris Pink minky for frosting for a luxe modern look. Use quilting cotton and flannel for a washable kids’ version. Felt and fleece are ideal for beginners because they do not fray. Wool blankets with wool balls give a natural cozy aesthetic.
Avoid Common Sewing Mistakes
Prevent Frosting in the Seam Zone
If the frosting extends into the half-inch seam allowance, it will get caught during sewing. Always trim the frosting shape so it stops short of the stitching line. This keeps seams clean and prevents bulk that ruins the finished look.
Use Color-Coded Pins to Prevent Twisting
Misaligned rolling causes a twisted donut after turning. Use three colored pins as alignment markers and double-check they match before sewing the inner seam. This small step saves hours of seam ripping and frustration.
Clip Inner Seams Generously
The inner curve needs to turn smoothly. Clip the seam allowance every half-inch around the circle. This allows the fabric to spread and lie flat when turned, eliminating puckering around the center hole.
Maintain and Repair Your Donut Pillow
Wash Gently and Air Dry
Hand-wash or use a gentle machine cycle with cold water if all fabrics are colorfast. Place in a mesh bag to protect sprinkles. Always air dry because heat can melt minky or shrink fleece. Fluff occasionally to maintain shape.
Repair Loose Sprinkles Easily
If a sprinkle loosens, re-stitch it using the same method. Pull knots into the stuffing to hide them. Reinforce with a small backing patch if needed. Most repairs take under 5 minutes.
Frequently Asked Questions About Sewing a Donut Pillow
What is the best fabric for a donut pillow?
Fleece and minky are the best choices because they are soft, durable, and do not fray. Minky provides a luxurious feel while fleece is budget-friendly and easy to work with for beginners.
Why is my donut pillow twisting after turning?
Twisting happens when the layers are misaligned during the rolling process. Using a color-coded pin system prevents this issue. Insert three colored pins at key points and match them exactly when rolling and sewing.
Can I make a donut pillow without a pattern?
Yes, you can trace around household objects like plates and glasses to create circles. Use a cup for the inner hole and a plate for the outer circle. This works for simple projects but produces less precise shapes.
How much stuffing do I need for a standard donut pillow?
A standard 12 to 16 inch pillow typically requires 16 to 32 ounces of polyester fiberfill. Adjust up or down based on your preferred firmness level.
Is the burrito roll method difficult for beginners?
The burrito roll method sounds complex but is straightforward once you practice. The key is using colored pins for alignment and leaving a sufficiently large turning gap. Test on scrap fabric first to build confidence.
Key Takeaways for Sewing Your Own Donut Pillow

Sewing a donut pillow is a fun, rewarding project that combines creativity with practical technique. By using the burrito roll method, aligning with colored pins, and finishing with a ladder stitch, you will create a polished professional-looking pillow no matter your skill level. Choose soft non-fraying fabrics like minky or fleece to simplify the process, and always test the turning technique on scrap fabric before committing to your final piece. With this guide, you are ready to make a sweet squishy masterpiece that is as functional as it is adorable. Gather your materials, follow the steps in order, and enjoy the process of bringing your donut pillow to life.



