
Struggling with acid reflux, snoring, or just want a more comfortable way to read in bed? A wedge pillow can transform your sleep and relaxation, but store-bought models are often too firm, overpriced, and uncomfortable. The good news: you can make a custom wedge pillow at home for a fraction of the cost, tailored to your exact comfort needs. Whether you’re dealing with GERD, recovering from surgery, or simply want better posture while lounging, a DIY wedge pillow delivers personalized support without the stiff, unforgiving foam of commercial versions. This guide walks you through two proven methods: a no-sew pillow stacking technique ready in minutes and a sewn foam-core version that’s durable and professional.
Why Build Your Own Wedge Pillow
Commercial wedge pillows are marketed as health solutions, but most users report real problems. The foam feels like a brick, creating pressure points that lead to neck pain and morning headaches. These one-size-fits-all designs don’t adapt to your height, bed size, or sleeping style, and they cost between $70 and $108 often with poor comfort-to-price ratio. A homemade wedge pillow solves all this. You control the firmness, shape, and softness while cutting costs by up to 80 percent.
DIY vs. Commercial: Key Benefits
DIY wedge pillows offer significant advantages over store-bought options. You can use existing pillows for zero cost or invest $40 to $120 in premium materials. The comfort level is fully customizable with soft, adjustable layers, unlike the rigid unyielding foam of commercial models. You can use your favorite neck rolls and cervical supports, which commercial wedges typically block. The height, angle, and firmness are all adjustable, and the finished product features replaceable covers with a 3 to 7 year lifespan, compared to foam that degrades in 1 to 2 years.
Two Ways to Build a Wedge Pillow

Choose based on your budget, time, and sewing skills.
Method 1: No-Sew Pillow Stacking
This approach is perfect for testing comfort or getting instant relief. You’ll use existing pillows to create a stable wedge shape without any sewing. The entire setup takes minutes and costs nothing if you already have pillows on hand.
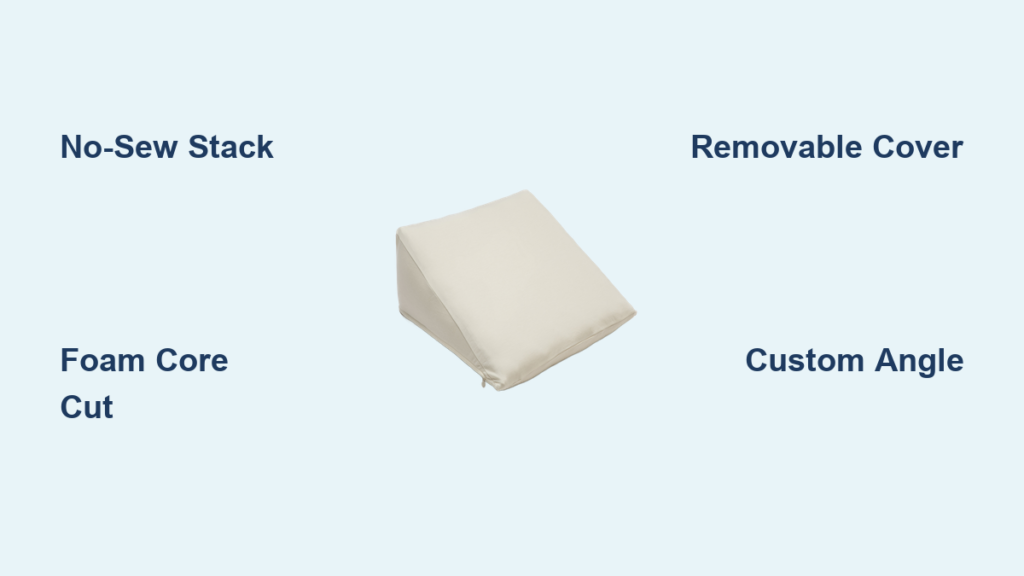
Method 2: Sewn Foam-Core Cushion
This method works best for long-term use, medical needs, or a polished professional look. It requires intermediate sewing skills and costs $40 to $120 depending on fabric quality. The result is a durable, removable-cover wedge with modular features like D-rings and bolster attachments.
No-Sew Method: Pillow Stacking Setup
Build a stable, supportive wedge in minutes using this no-sew technique.
What Youll Need
Gather these materials before starting. You’ll need one queen or king-sized firm pillow to serve as the vertical base, plus three to four standard pillows for the horizontal layers. Optional safety pins work for temporary setup, while buttons create permanent fastening. The cost is zero if using pillows you already own.
How to Assemble the Stack
Step 1: Test the Layout First
Place the vertical base pillow upright at the head of your bed. Lay the first horizontal pillow across the lower third of the base, the second pillow halfway up, and the third pillow at the top for head support. Secure temporarily with safety pins, then sleep on it for one to two nights to test comfort and stability. Pro tip: align all pillows in the same direction to prevent shifting during the night.
Step 2: Permanent Button Fastening
If the prototype works, make it permanent. Sew buttons through contact points where horizontal pillows meet the vertical base. Use heavy-duty thread and reinforce with double stitching. Space buttons every six to eight inches along seams. Buttons distribute stress better than thread alone and prevent seam tearing.
Step 3: Customize for Height and Angle
Taller users over six feet should add a fourth horizontal pillow or use a king-sized base. For a gentler incline, extend horizontal pillows further forward. For a steeper angle, stack more vertically or reduce base width. The interlocking orientation of vertical plus horizontal locks the structure in place.
Pillow Stacking: Pros and Cons
This method offers instant setup with no sewing skills needed and full customization at zero cost. However, it has a bulkier appearance, isn’t portable, and may require re-pinning over time. It’s best for budget users, acid reflux relief, and testing before building a sewn version.
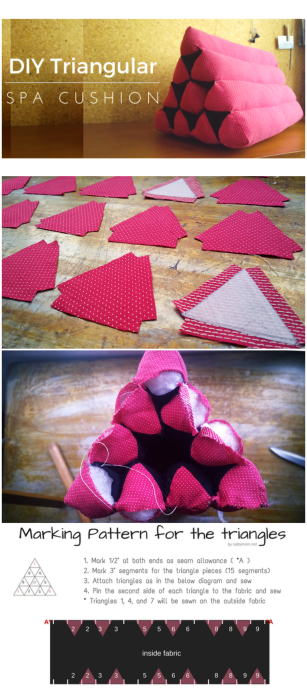
Sewn Wedge Pillow: Foam-Core Build
A durable, professional-grade wedge with removable cover and modular features.
Materials List
You’ll need upholstery fabric such as cotton canvas or Outdura for the outer cover, lining fabric for the inner layer, polyester batting for a soft layer over foam, and silk film to allow vacuum-sealing for foam insertion. The core requires a firm foam panel measuring 24 by 80 inches, cut into a wedge shape. Additional items include a 20-inch zipper for the removable cover, six half-inch D-rings for attaching a bolster or straps, snap hooks to connect accessories, and spray adhesive to bond foam layers.
Tools Youll Need
Essential tools include a 120-inch measuring tape, rotary cutter or pinking shears, a foam saw such as Sailrite, a foam shaper tool, a heavy-duty sewing machine with a zipper foot, and a vacuum with hose attachment. Pro tip: use a foam saw for clean cuts since scissors crush foam.
Cut and Assemble the Foam Core
Step 1: Cut the Foam Panel
Cut the 24 by 80 inch foam into two 24 by 40 inch sections. From each section, cut two 20 by 20 inch squares and two 20 by 12 inch rectangles. Stack all four pieces and mark a diagonal line from corner to corner. Cut along the line using a foam saw, then re-stack to confirm the triangular shape. You should have a right triangle with a 26-inch base and 13-inch height.
Step 2: Glue and Smooth Layers
Spray foam adhesive on contact surfaces and press layers together firmly. Let cure for one to two hours. Use a foam shaper tool to smooth edges and remove burrs. Warning: don’t skip the curing time since weak bonds cause shifting during use.
Build the Fabric Cover
Step 1: Cut Fabric Panels
Cut the following pieces from your fabric: front and back panels in triangular shape measuring 26 inches by 13 inches, two right triangles for side panels, a base panel measuring 26 by 6 inches, and two optional 7 by 7 inch triangles for pocket panels.
Step 2: Add Side Pockets
Cut two triangular side pieces diagonally to create four smaller triangles. On two of them, measure seven inches up from the base on both edges, connect the marks, and cut to create a flat-top pocket. Fold the top edge twice at three-eighths inch, press, and topstitch.
Step 3: Sew D-Rings for Accessories
Mark seven inches up from the bottom on each side panel, making three marks per side. Position D-rings close to the seam, facing inward. Sew with a zipper foot, backstitching over each for strength. D-rings let you attach a bolster pillow for neck or lumbar support.
Step 4: Assemble the Cover
Sew side panels to the back panel along the 21-inch edges. Attach the front panel to the sides along the 26-inch edges. Sew the bottom panel to the front. Pin side panels to the bottom and stitch. Clip corners to reduce bulk, then turn right side out. Leave the opening between the back and bottom for foam insertion.
Insert the Foam
Step 1: Wrap Foam for Smooth Insertion
Spray adhesive on the foam and wait until it becomes tacky. Wrap with polyester batting and smooth out any lumps. Encase in silk film, attach the vacuum hose, and remove air. Repeat if the foam re-expands. Vacuum-sealing compresses the foam enough to fit through small openings.
Step 2: Insert and Close
Slide the compressed foam into the cover and adjust the position, centering it front to back. Hand-stitch or machine-sew the opening closed. Optional: install a zipper or Velcro for future removal.
Optional: Attach a Bolster Pillow
Add neck, arm, or lumbar support using D-rings.
Build the Bolster
Cut one 20 by half-inch fabric strip for the main panel and two 20-inch diameter circles for the ends. Fold the main panel strip five inches from each end, sew a half-inch seam, and leave the center open. Pin circles to the ends, snip curves every half-inch to reduce bulk, then sew and turn right side out. Insert a 20 by 6 inch bolster form and close with a ladder stitch.
Add Straps and Hooks
Cut two 2 by 18 inch fabric strips, fold edges inward, press, and topstitch. Attach YKK snap hooks to the ends and clip them to the D-rings on the wedge.
Customize Your Wedge Pillow
Tailor it to your body, bed, and specific needs.
Adjust Firmness
For the base, use firm foam for support. For the top layer, choose soft microfiber or memory foam for comfort. Add quilted batting to the cover for extra softness. Pro tip: stack foam layers and glue soft on top of firm.
Modify Size and Angle
For taller users, scale up to a king-sized base measuring 20 by 36 inches. For a steeper incline, increase the height to 15 inches. For leg elevation, flip the wedge and use the narrow end under your knees. Remember that 30 to 45 degrees is ideal for acid reflux and breathing.
Choose the Right Fabric
Cotton canvas works best for breathable, washable, affordable options. Outdura provides UV and water resistance for outdoor use. Microfiber offers softness and durability with stain resistance. Velvet gives a luxury feel but is less durable.
How to Use Your Wedge Pillow
Correct Sleeping Position
Sit with your buttocks on the lowest point and let your spine follow the incline. Keep your head fully supported without hanging off the edge. Add a neck roll if needed. First-time tip: practice sitting upright for 10 minutes to adjust to the position.
Best Sleep Positions
Back sleeping is ideal since it keeps the airway open. Side sleeping works with additional body pillow support for alignment. Stomach sleeping is not recommended as it increases spinal strain.
Non-Sleep Uses
Use your wedge pillow for reading in bed to support your back and arms, for laptop use to promote upright posture, during pregnancy by placing it under your belly when side-lying, for outdoor lounging with UV-resistant fabric, and for post-surgery recovery to keep your torso elevated safely.
Maintenance and Care
Cleaning Guide
Machine wash the removable cover in cold water on a gentle cycle and air dry. Spot clean non-removable covers with mild detergent. Wipe the foam core with disinfectant but never soak it. The batting and silk film are not washable, so protect them with a cover. Pro tip: rotate the wedge weekly to prevent wear.
Lifespan and Upkeep
Replace pillow stacks as pillows flatten. The sewn version lasts three to seven years. Replace foam every two to three years. Re-vacuum the silk film every three to six months to maintain compression.
Who Should Build a Wedge Pillow
GERD and acid reflux sufferers benefit from six to 12 inches of elevation that prevents reflux. Snoring and sleep apnea individuals get airway opening with head support from a sewn version with neck bolster. Post-surgery patients need consistent, firm elevation from a foam-core design. Budget users should start with pillow stacking for zero cost and instant relief. Pregnant individuals benefit from a soft-stuffed wedge for belly and back support. Outdoor lovers should choose UV-resistant fabric for patio or beach use.
Final Tips for Success
Start with what you have and test stacking before buying materials. Prioritize base stability since a wobbly base ruins the entire structure. Use buttons or D-rings since they prevent slippage better than stitching alone. Balance firmness and comfort with a firm base and soft top layer. Track your results by noting changes in reflux, snoring, or neck pain. Invest in a foam saw to make clean cuts without crumbling.
Why DIY Wins Over Store-Bought
A homemade wedge pillow isn’t just cheaper, it’s better. You get full control over comfort, angle, and firmness with no neck pain from rigid foam. You can use your favorite sleep accessories while enjoying proven health benefits including reduced reflux, better breathing, and deeper sleep. You’ll save money long-term with a one-time build that lasts years. Whether you spend zero dollars on stacked pillows or $120 on a sewn masterpiece, you’re investing in better sleep, better health, and real comfort without paying a premium for poor design.
Frequently Asked Questions About Making a Wedge Pillow
How long does it take to make a wedge pillow?
The no-sew pillow stacking method takes minutes. The sewn foam-core version takes three to six hours depending on your skill level and whether you need to acquire tools.
What is the best angle for a wedge pillow?
An angle between 30 and 45 degrees works best for acid reflux relief and improved breathing. Adjust based on your specific needs and comfort preferences.
Can I wash my DIY wedge pillow?
Yes, if you include a removable zippered cover. Machine wash cold on gentle cycle and air dry. Never soak the foam core.
How much does it cost to make a wedge pillow?
The pillow stacking method costs zero dollars using existing pillows. The sewn version costs $40 to $120 depending on fabric and foam quality.
Is a wedge pillow good for side sleepers?
Yes, but you’ll need additional support. Add a body pillow alongside the wedge for proper spinal alignment when sleeping on your side.
Key Takeaways for Making Your Own Wedge Pillow
Building your own wedge pillow gives you complete control over comfort, angle, and firmness at a fraction of the store-bought price. Choose the no-sew pillow stacking method for instant relief at zero cost, or invest in a sewn foam-core version for long-term durability and professional results. The right angle, proper positioning, and quality materials transform your sleep while eliminating acid reflux, reducing snoring, and supporting post-surgery recovery. Start with what you have, test your configuration, and customize until it’s perfect for your body and needs.


