
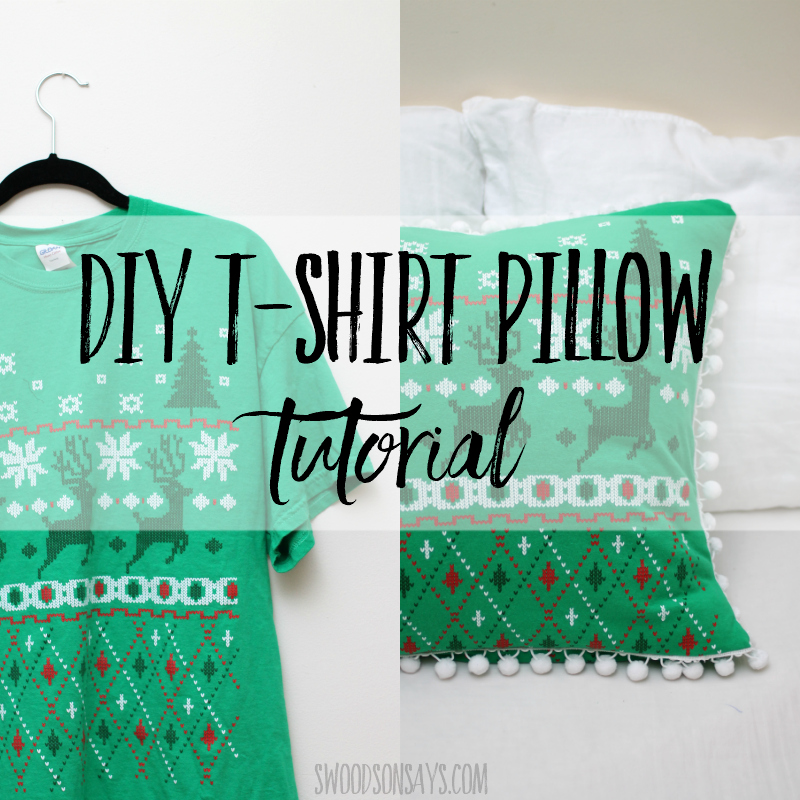
Nothing breathes new life into an old t-shirt quite like turning it into a cozy, personalized pillow. Whether it’s a band tee, a baby onesie, or a sports jersey filled with memories, transforming fabric into a soft home accent is a simple, sustainable way to preserve sentimental value while reducing waste. The process requires minimal tools, basic sewing or none at all, and just one shirt to create a functional keepsake. In this guide, you’ll learn five proven methods from no-sew covers to huggable memory pillows, along with expert tips on cutting, stuffing, and finishing like a pro.
Find the Perfect T-Shirt Pillow Method for Your Skill Level
Not every t-shirt pillow is made the same. Your choice of method depends on skill level, durability needs, and whether you want a removable cover or a permanent keepsake.
Match Your Skill Level to the Right Method
Pick a construction style that matches your experience. Beginners should try the no-sew cover or envelope-style pillow, both requiring little to no sewing. Intermediate crafters can opt for zippered covers or huggable arms designs. For sentimental projects, go for fully stuffed memory pillows with hand-stitched closures.
Each method uses the same core material, a t-shirt, but delivers different results in look, feel, and function.
Compare Construction Types
| Method | Sewing Needed | Washable | Best For |
|---|---|---|---|
| No-Sew Cover | None | Yes, removable | Kids, quick decor |
| Envelope Cover | Light | Yes, removable | Fast, no zipper |
| Zippered Cover | Machine | Yes, removable | Reusable, polished look |
| Stuffed Memory Pillow | Machine plus hand | Spot clean only | Keepsakes, gifts |
| Huggable Arms Pillow | Machine | Gentle wash | Emotional comfort |
Pick based on how often the pillow will be used, cleaned, or gifted.
Collect Everything You Need for T-Shirt Pillow Making
Before cutting fabric, gather the right supplies. Most are household items, but a few specialty tools ensure clean, professional results.
Core Supplies You Will Need
One clean t-shirt made from cotton or cotton-blend works best. You will also need scissors or a rotary cutter, a ruler or measuring tape, pins or clips, fabric chalk or a washable marker, and an iron with an ironing board.
Pro Tip: Pre-wash the shirt to pre-shrink the fabric and prevent shifting after sewing.
Add-Ons Based on Your Chosen Method
For sewing projects, gather all-purpose polyester thread, a sewing machine, and a stretch needle sized 75/11. For stability, use fusible lightweight interfacing to prevent stretchy knit from distorting. For stuffing, get polyester fiberfill in 8 to 16 ounces depending on your pillow size. For closures, use a 12-inch zipper for zippered covers or extra fabric for envelope backs.
Keep your scraps. Use them for patchwork or to reinforce necklines later.
Prepare Your T-Shirt for Cutting and Sewing

A well-prepped shirt ensures clean cuts, stable seams, and centered designs. Take time here to avoid misaligned graphics or stretched edges.
Cut Off Sleeves and Collar
Lay the shirt flat with the front facing up. Cut along the armhole seams to remove both sleeves. Trim off the collar, leaving a clean neck opening. Discard the side seams and shoulders, using only the large front and back body panels.
Visual Cue: Align any logo or design in the center of the fabric panel before proceeding.
Flatten and Stabilize the Fabric
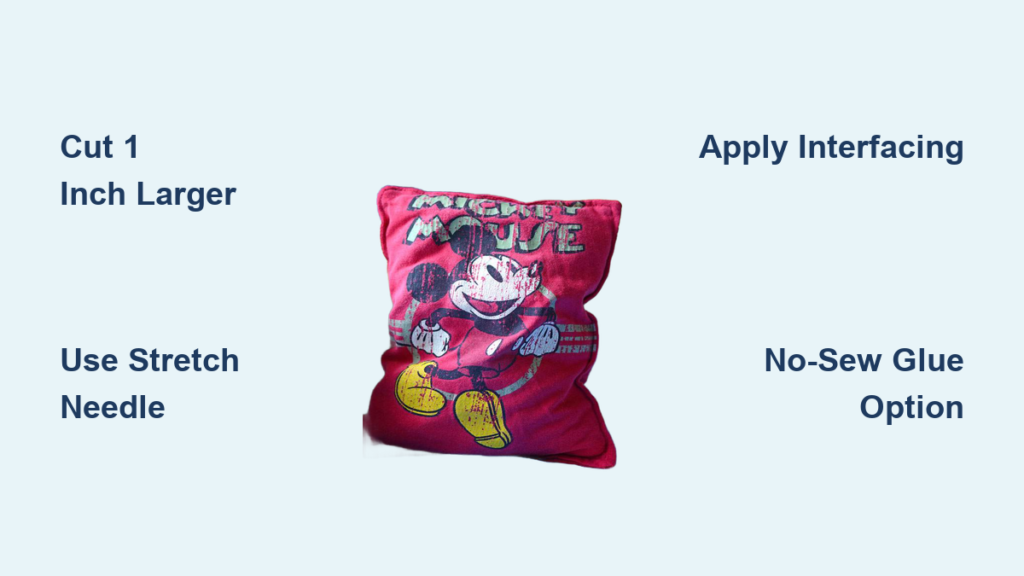
T-shirt knits stretch easily, which can warp seams during sewing. Apply fusible interfacing to the wrong side of your cutting area. Cut a piece 1 to 2 inches larger than your target pillow size. Iron with medium heat and firm pressure, using a pressing cloth if there is a printed design.
Warning: Never iron directly on printed graphics. Heat can crack the ink and ruin the design.
Cut T-Shirt Fabric to the Right Dimensions
Accuracy in cutting ensures a snug, plump fit. Too big and the pillow sags. Too small and it will not close properly.
Follow the 1-Inch Rule
Always cut fabric 1 inch larger per side than your pillow form to accommodate a half-inch seam allowance on each edge.
| Pillow Form | Cut Size |
|---|---|
| 12 by 12 inches | 13 by 13 inches |
| 14 by 14 inches | 15 by 15 inches |
| 16 by 16 inches | 17 by 17 inches |
| 18 by 18 inches | 19 by 19 inches |
Pro Tip: Use a quilter’s square or cardboard template to mark perfect squares.
Center the Design
Place your ruler so the graphic sits in the middle of the cut square. Avoid placing seams over key images, especially faces or text. Save leftover fabric for future crafts or reinforcement patches.
Sew a Removable Zippered T-Shirt Pillow Cover
Want a washable, reusable cover with a polished finish? The zippered method lets you swap inserts and clean easily.
Install the Zipper Correctly
Cut two identical squares for the front and back. Place them right sides together and pin only the bottom edge. Center a 12-inch zipper face down on the pinned edge, aligning the teeth with the seam line. Secure each end with X-shaped pins.
Sew with a half-inch seam allowance. Use a regular stitch up to the first X. Switch to a basting stitch with length 4.0 to 5.0 between the X marks. Resume regular stitch after the second X.
Press the seam open, flip the zipper down, then sew around the entire zipper using a zipper foot. Remove the basting stitches when finished.
Critical Step: Unzip the zipper halfway before sewing the rest of the cover. Otherwise, you cannot turn it right side out.
Finish the Cover
With the zipper half-open, pin the remaining three sides with right sides together. Sew all around with a half-inch seam allowance. Trim the corners diagonally to reduce bulk.
Turn right side out and push out the corners with a chopstick. Insert a pillow form that is 2 inches smaller than your cut size. Zip shut.
Durability Boost: Backstitch at zipper ends and top-stitch edges for strength.
Create an Envelope-Style T-Shirt Pillow Cover
No zipper? No problem. This beginner-friendly method uses overlapping back panels and the shirt’s original hem.
Cut the Back Panels
The front panel should be a full square based on your target size. For the bottom back panel, use the shirt’s original hem and cut it to the same width with a height of 7 to 9 inches. For the top back panel, cut from the upper back at the same width but around 16 inches tall to allow for 5 to 7 inches of overlap.
Key Detail: The overlap must be at least 5 inches. Less than that and the pillow will peek through.
Assemble and Sew the Envelope Back
Place the front panel face up. Lay the top back panel face down, aligned at the top edge. Place the bottom back panel face down, aligned at the bottom edge, overlapping the top back by 5 to 7 inches. Pin all layers together around the perimeter.
Sew all four sides with a half-inch seam allowance. Use a zigzag stitch if the fabric stretches. Backstitch at start and end. Trim corners diagonally. Turn right side out through the open back and push out corners. Slide in the pillow form.
Advantage: This method uses existing hems for a clean, finished look with no extra hemming needed.
Sew a Stuffed Memory Pillow from Your T-Shirt
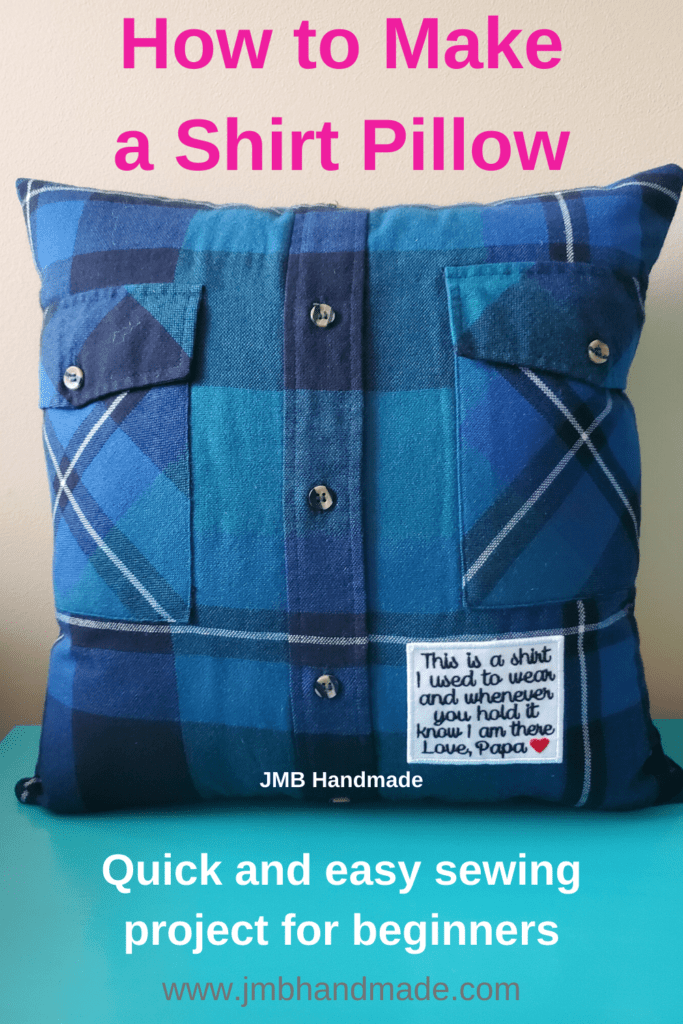
For keepsakes, memorials, or baby clothes, a permanently stuffed pillow preserves emotion in soft form.
Sew Three Sides Only
Cut two identical squares and apply interfacing to prevent stretching. Place right sides together and pin the edges. Sew around three sides and part of the fourth, leaving a 3-inch opening at the bottom.
Stitch Type: Use a straight stitch with length 2.5 to 3.0 or a zigzag for stretch resistance.
Turn and Stuff Evenly
Trim excess fabric and clip corners diagonally. Turn right side out and push out corners with a chopstick or pencil. Begin stuffing with small handfuls of polyester fiberfill. Distribute evenly and avoid overstuffing. Aim for soft huggability. Overstuff slightly because filling settles over time.
Close with Invisible Slip Stitch
Fold raw edges inward along the opening. Thread a hand-sewing needle with matching thread. Use a slip stitch, also called a ladder stitch. Insert the needle into the fold and pull through. Repeat every quarter inch, catching just a few threads from each side. Knot securely when closed.
Emotional Touch: Add a sachet of lavender, a handwritten note, or embroider a name for extra meaning.
Make a No-Sew T-Shirt Pillow Cover in Minutes
No machine? No needle? No problem. This 15-minute version is perfect for kids or temporary decor.
Fold and Secure the Shirt
Cut off the bottom hem just above the seam. Remove sleeves along armhole lines. Lay the shirt body flat, inside out. Fold vertically so the sides meet. Pin or clip the left and right edges.
Seal Without Sewing
Apply fabric glue along pinned edges and let it dry for 4 to 6 hours. Alternatively, insert fusible tape between layers and iron to bond. If a sewing machine is available, stitch with a half-inch seam allowance.
Leave the top open, turn right side out, and insert an 18 by 18 inch pillow form.
Best For: Swapping covers frequently or classroom crafts.
Craft a Huggable T-Shirt Pillow with Sleeve Arms
Turn the entire shirt into a cuddly companion with sleeve arms. This design is ideal for emotional comfort or memory gifts.
Patch the Neck Hole
Cut a 2 to 3 inch band from the shirt’s bottom hem. Turn the shirt wrong side out. Place the band over the neck opening from the right side. Pin in place and stitch closely around the ribbing. Trim excess from the inside.
Why This Works: It prevents gaping and adds strength to the top seam.
Reinforce and Stuff
Insert narrow grosgrain ribbon into the bottom hem for optional structure. Stitch along both edges to secure. Stitch one sleeve closed using a zigzag stitch. Leave the second sleeve open for stuffing.
Turn right side out and stuff through the open sleeve. Push poly-fil into the body and the closed sleeve. Overstuff slightly because it settles with use. Stitch the second sleeve shut.
Design Insight: The shape mimics a hug, making it great for anxiety relief or long-distance comfort gifts.
Apply Proper Sewing Techniques for T-Shirt Fabric
T-shirt fabric is stretchy knit, not woven cotton. Using the wrong settings causes skipped stitches or puckering.
Set Up Your Machine for Knits
Use a stretch or ballpoint needle sized 75/11. This glides between fibers rather than cutting them. Set your stitch to straight with length 2.5 to 3.0, or use zigzag for seam stretch. Use a walking foot if available to prevent shifting. Choose all-purpose polyester thread that is strong and flexible.
Test First on Scraps
Use trimmed sleeve fabric to test your settings. Check whether the needle skips. Check whether the seam stretches without breaking. Check whether the tension is balanced. Adjust before sewing the final piece.
Select the Ideal Stuffing for Your T-Shirt Pillow
The right fill determines softness, durability, and care needs.
Compare Fill Types
Polyester fiberfill offers a soft, light, hypoallergenic feel and is machine safe. Old pillow stuffing is eco-friendly but has variable texture and requires spot cleaning. Memory foam scraps provide firm, supportive feel with gentle cleaning. Cotton batting is natural and breathable but requires hand washing.
Pro Tip: Use a chopstick to push stuffing into tight corners and sleeves.
Add Creative Touches to Personalize Your Pillow
Make it personal. A few small upgrades turn a basic pillow into a standout gift.
Add Contrast and Trim
Use flannel, denim, or solid cotton for a contrasting back. Sew bias tape or ribbon along edges for a pop of color. Create a double-sided pillow using two different shirts.
Label With Meaning
Attach a fabric tag with the name, date, and event. Embroider initials or a short message near the seam.
Emotional Hack: Hug the pillow before gifting. This symbolic warmth transfer is loved by recipients.
Solve Typical T-Shirt Pillow Problems
Even experts make mistakes. Here is how to fix them fast.
Flat Pillow
Cause: Fabric is too large for the form. Fix: Cut the next cover 1 inch smaller than the form for a snug fit.
Gaping Neck or Stretched Seams
Cause: No interfacing or wrong needle. Fix: Apply stabilizer before sewing and use a stretch needle.
Zipper Will Not Sew Smoothly
Cause: Wrong presser foot. Fix: Switch to a zipper foot for tight clearance.
Corners Not Sharp
Cause: Not clipped or not pushed out. Fix: Trim corners diagonally and use a chopstick to fully extend points.
Pillow Slips Out Back
Cause: Insufficient overlap of less than 5 inches. Fix: Make the top back panel at least 5 inches shorter than the front.
Frequently Asked Questions About Making a Pillow From a T-Shirt
Can I make a pillow from a t-shirt without sewing?
Yes. You can use fabric glue or fusible tape to seal the edges. Simply fold the shirt vertically, pin or clip the sides, apply glue or tape, and leave the top open for inserting a pillow form.
What type of t-shirt works best for pillow making?
Cotton or cotton-blend t-shirts work best because they are durable, soft, and easy to sew. Avoid thin or overly stretchy fabrics that may warp during construction.
How do I prevent my printed t-shirt design from getting damaged?
Apply fusible interfacing to stabilize the fabric. When ironing, always press from the wrong side using a pressing cloth to prevent heat damage to prints.
How do I choose the right pillow form size?
Cut your fabric 1 inch larger per side than the pillow form to account for seam allowance. For example, use a 15 by 15 inch pillow form with 17 by 17 inch fabric.
Can I wash my t-shirt pillow?
It depends on the method. Zippered and envelope covers are removable and machine washable. Stuffed memory pillows and huggable designs require spot cleaning or gentle hand washing.
Key Takeaways for Making a Pillow From a T-Shirt
Making a pillow from a t-shirt is more than a craft. It is a way to preserve memories, reduce waste, and create something truly personal. Choose your method based on skill level, from quick no-sew covers to huggable designs with sleeve arms. Always stabilize knit fabric with interfacing, cut accurately using the 1-inch rule, and use the right needle and stitch settings for stretchy fabric.
Whether you choose a removable cover for easy washing or a permanently stuffed keepsake, each method delivers lasting value with minimal investment. Follow these steps, avoid common pitfalls like forgetting to unzip halfway or using the wrong needle, and enjoy turning old fabric into a soft, meaningful keepsake. With washable finishes, durable seams, and endless customization, your t-shirt pillow will be a favorite for years to come.


