
You do not need to spend $800 on a luxury upholstered piece when you can learn how to turn a wooden headboard into a fabric one for under $200. This DIY project transforms outdated furniture into a custom focal point while giving you full control over the padding and design.
Discover how to create a plush wingback or modern floating style using basic tools and smart hacks. This guide covers every step from stripping old trim to installing hidden lighting without requiring any sewing skills.
Strip and Prep the Wooden Frame
Removing existing attachments is the first critical step to ensure a smooth surface for your new upholstery. Old trim, molding, and legs create uneven bumps that ruin the final look of the fabric.
Remove Trim and Molding
Use a hammer and crowbar to carefully detach all decorative elements from the frame. Focus on exposing the main wooden structure since it provides the necessary support for the new layers.
Sand and Clean the Surface
Thoroughly sand reclaimed wood or old doors with medium-grit sandpaper to remove splinters and flaking paint. Wipe the frame with a damp cloth and let it dry completely before applying any adhesive.
Reinforce Structural Weaknesses
Check for warping or loose joints and fix them with wood glue and clamps. Drill pilot holes before adding screws to prevent the wood from splitting during the transformation process.
Build Custom Wingback Extensions
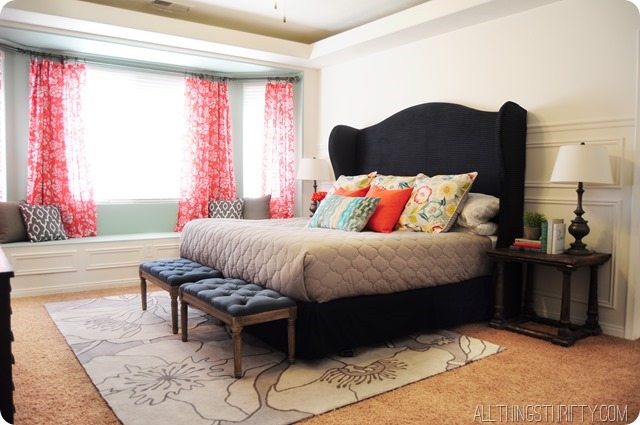
Adding wings creates a sophisticated wingback style that frames the bed and adds architectural interest to the room. You can achieve this look by attaching MDF or plywood panels to the sides of your existing frame.
Cut and Position Wing Panels
Cut two panels from 2-inch thick MDF to your desired height, aiming for 55 inches in standard rooms. Secure these pieces to the main frame using 2-inch screws driven through pilot holes.
Hide Seams at the Joints
Staple the fabric seam exactly where the wing meets the main frame to keep it invisible. Use two separate fabric pieces for the wings to avoid unsightly vertical seams across the center of the headboard.
Construct a Decorative Wooden Frame
A wooden frame adds a rustic or modern border that defines the shape of your new upholstered piece. This element covers raw edges and provides a polished finish that rivals store-bought designs.
Cut and Finish Pine Slats
Cut pine slats with a 7×7 cm profile into three pieces for the top and sides. Sand them smooth and apply two coats of varnish or paint to match your bedroom aesthetic.
Assemble and Mount the Frame
Join the slats using L-brackets screwed from the inside to keep fasteners hidden. Attach the completed frame to the back of the upholstered headboard using small brackets or direct screws.
Apply Foam Padding Correctly
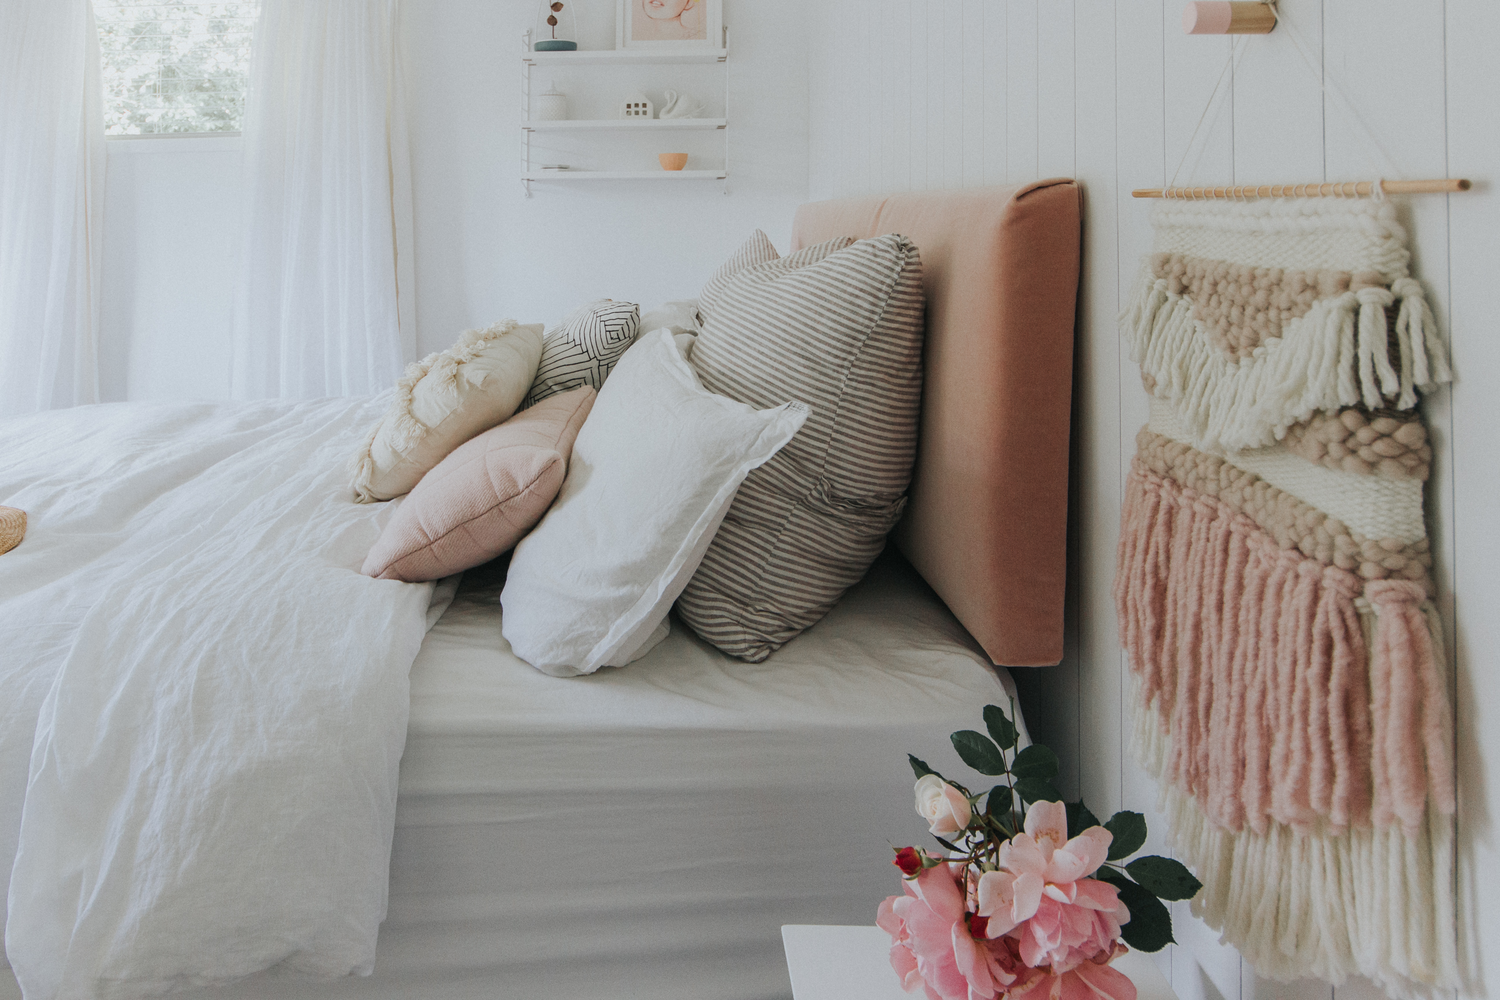
Proper foam application determines the comfort and plushness of your final headboard. Using the right density and thickness ensures the piece looks luxurious rather than flat or cheap.
Cut Foam to Exact Size
Lay 1 to 2-inch upholstery foam over the frame and trim it with sharp scissors for clean edges. Avoid using drywall knives as they crush the foam instead of cutting it cleanly.
Use Mattress Toppers for Volume
Consider using a 10 cm thick mattress topper as a budget-friendly alternative to specialty foam. This method provides excellent volume and a hotel-style plush feel for a fraction of the cost.
Adhere Foam Securely
Spray foam-safe adhesive on both the board and the foam back before pressing them together. Start from the center and work outward to eliminate air bubbles and ensure a tight bond.
Install the Batting Layer
Batting smooths out the transition between the foam and fabric while adding a layer of softness. This step prevents the wooden frame from showing through the final fabric layer.
Size and Layer the Batting
Cut blanket-style batting 2 to 3 inches larger than the foam on all sides for wrapping. Use two layers on wingbacks or arms to ensure the wood frame remains completely hidden.
Staple Without Over-Stretching
Start stapling at the top center and pull the material taut without stretching it too tight. Work your way outward to the sides and bottom while maintaining gentle tension to avoid tearing.
Wrap Headboard With Fabric
Wrapping the fabric is the most visible part of the process and requires patience to achieve a professional result. Proper tension and folding techniques prevent wrinkles and bulkiness.
Position and Align the Fabric
Lay your pre-washed fabric face down on a clean surface and place the headboard on top. Ensure the pattern is straight and centered before making any permanent attachments.
Staple Perimeter Tightly
Begin stapling at the top center and pull the fabric taut as you move toward the corners. Add staples every 1 to 2 inches around the perimeter to create a wrinkle-free surface.
Fold Corners Like a Gift
Fold the side flaps inward toward the center and pull tight to reduce bulk before stapling. Trim any excess fabric behind the staple line to create a seamless corner without lumps.
Hide Staples and Raw Edges
Concealing hardware and raw edges gives your project a high-end appearance that looks professionally manufactured. Decorative trim and piping are effective ways to cover imperfections.
Apply Decorative Trim
Attach wooden or fabric-covered trim around the perimeter using fabric glue or finishing nails. Miter the joints by folding the trim ends under for a seamless and custom furniture look.
Add Piping for Polish
Sew or glue piping along the edges using contrasting thread to make the design pop. Install this detail before the final stapling or glue it on as a finishing touch.
Install Optional LED Lighting

Adding lighting creates a cozy ambiance and modernizes the look of your bedroom sanctuary. LED strips can be hidden behind the frame or integrated into the design for a soft glow.
Attach LED Strip Lights
Mount warm white or dimmable LED strips behind the headboard or inside a floating frame. Test the placement and brightness before finalizing the fabric installation.
Diffuse Light Softly
Pair LEDs with sheer or translucent fabric sections to create a gentle halo effect. This technique works well for reading nooks or creating a relaxing evening atmosphere.
Mount as a Floating Headboard
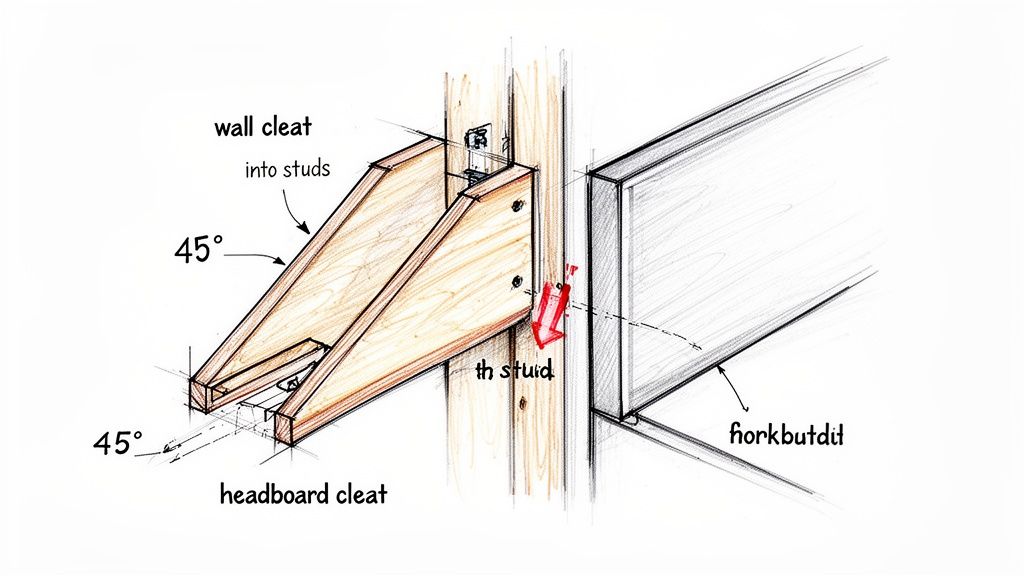
A floating installation creates a sleek modern profile by hiding all hardware and legs. This method makes the room feel larger and adds a contemporary touch to the design.
Use Interlocking Flush Mounts
Attach one half of a French cleat system to wall studs and the other to the back of the headboard. Mark alignment points carefully to ensure the piece hangs level and secure.
Verify Level Installation
Slide the headboard onto the wall mount and use a spirit level to check for accuracy. Adjust the mounts until the headboard sits perfectly horizontal for a clean look.
Explore Alternative Design Ideas
You can customize your headboard further with removable panels or tufted details to suit your specific style. These options allow for seasonal changes or unique aesthetic preferences.
Create Removable Fabric Panels
Use magnetic strips or heavy-duty Velcro to attach fabric panels for easy cleaning or redecorating. This approach is ideal for renters who need non-permanent solutions.
Try a Tufted Capitoné Look
Drill small holes through the foam and fabric to thread buttons for a classic tufted appearance. Note that a smooth finish often looks more contemporary than traditional tufting.
Add Hidden Storage Compartments
Incorporate shallow drawers or compartments behind the headboard covered in matching fabric. These spaces are perfect for storing books remotes or charging cables out of sight.
Choose the Right Materials
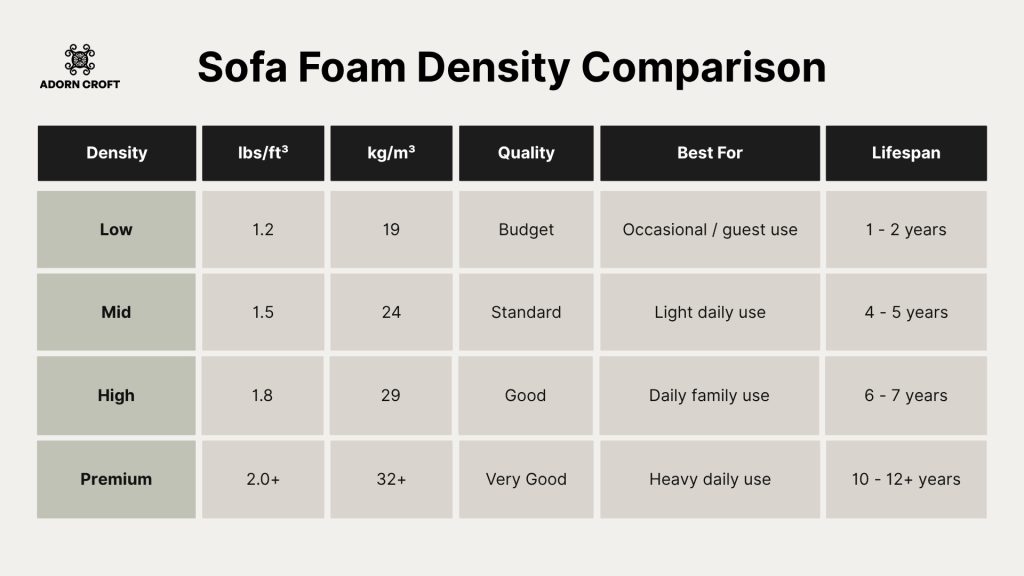
Selecting high-quality materials ensures your headboard remains durable and beautiful for years to come. The right fabric and foam density make a significant difference in the final outcome.
Pick Durable Washable Fabric
Choose performance fabrics or velvet for a soft yet durable surface that resists stains. Pre-wash all fabric to prevent shrinkage and iron with starch for a crisp tailored finish.
Select High-Density Foam
Opt for foam with a density of 1.8 to 2.0 lb to ensure long-lasting support and comfort. Thin or low-density foam flattens quickly and makes the headboard feel cheap.
Avoid Common Mistakes
Steering clear of typical errors saves time and prevents the need for costly rework later in the project. Attention to detail during the preparation phase pays off in the final result.
Do Not Cut Foam with Drywall Knives
These tools compress and tear foam rather than cutting it cleanly. Always use sharp scissors or an electric carving knife for precise foam cuts.
Do Not Over-Stretch Batting
Pulling batting too tight causes it to tear easily and creates uneven surfaces. Maintain gentle tension to keep the layer smooth and intact.
Never Skip Pre-Washing Fabric
Unwashed fabric shrinks after installation causing wrinkles and puckering. Ironing with starch helps achieve a professional and crisp appearance.
Prevent Bulky Corners
Improper folding techniques add unnecessary lumps to the corners of the headboard. Use the gift wrap method and trim excess fabric to maintain clean lines.
Perform Final Quality Check
A thorough inspection ensures your hard work results in a stable and visually appealing piece of furniture. Check every detail before declaring the project complete.
Verify Structural Security
Ensure all wings frames and trim pieces are securely screwed or glued in place. Shake the headboard gently to test stability and confirm nothing feels loose.
Test Surface Smoothness
Run your hand over the entire surface to feel for lumps or spots where wood shows through. Fix any imperfections immediately before mounting the piece.
Inspect Corner Neatness
Confirm that corners look like neatly wrapped gifts without bulk or loose folds. Re-staple any areas that appear uneven or messy.
Match Room Aesthetic
Ensure the fabric choice complements your existing bedding and wall colors. A sky-blue velvet headboard should enhance the room palette rather than clash with it.
Frequently Asked Questions About Upholstering Headboards
Can I turn a wooden headboard into a fabric one without sewing?
Yes, you can complete this entire project using only a staple gun and adhesive. Sewing is not required if you use the gift wrap method for corners and attach trim to hide edges.
How much does it cost to upholster a headboard yourself?
You can transform a wooden headboard for approximately $200 compared to $800 for store-bought versions. This budget covers foam, fabric, batting, and basic tools like a staple gun.
What type of foam is best for a DIY headboard?
Use upholstery foam with a density of 1.8 to 2.0 lb for the best balance of comfort and durability. A 10 cm thick mattress topper also works well as a budget-friendly alternative.
How do I hide staples when upholstering a headboard?
Place staples where decorative trim or the next fabric section will cover them. You can also staple along the very back edge or under wing extensions to keep them invisible.
Can I make my headboard removable for cleaning?
Yes, use magnetic strips or heavy-duty Velcro to attach fabric panels instead of stapling directly. This allows you to remove the fabric easily for washing or seasonal updates.
Key Takeaways for Turning Your Wooden Headboard into Fabric
Transforming your existing wooden headboard into a fabric masterpiece saves money and adds custom style to your bedroom. By following steps like proper foam selection, careful stapling, and smart finishing techniques, you achieve professional results in one weekend.
Start by stripping old trim and prepping your frame before adding layers of foam and batting. Choose durable fabrics and avoid common pitfalls like over-stretching materials to ensure your new headboard lasts for years.



