
You do not need to buy new furniture to refresh your bedroom because learning how to revamp a headboard is faster and cheaper. Whether you found a thrift store gem or want to update a dated piece, this project lets you create a custom look for your space.
This guide covers every step from planning and material selection to execution and troubleshooting. You will discover methods to upholster, paint, stain, or add structural elements like floating shelves without needing professional experience.
Choose the Right Revamp Style for Your Bedroom

Your headboard sets the visual tone for the entire room, so selecting a style that matches your decor is essential. A cohesive design ensures your new focal point integrates seamlessly with existing furniture and wall colors.
Match Aesthetic to Your Bedroom Theme
Different styles require specific materials and finishes to achieve the desired look. Consider these popular themes when planning your project:
* Dark Academia: Uses deep stains like Dark Walnut, padded velvet, and asymmetrical trim for a moody feel.
* Farmhouse or Rustic: Features reclaimed wood, shiplap, natural finishes, and distressed paint textures.
* Modern Minimalist: Relies on floating designs, crisp white paint, and clean geometric shapes.
* Boho or Nautical: Incorporates rope wrapping, tapestries, and woven textures for an organic vibe.
* Luxurious or Traditional: Showcases tufted upholstery, nailhead trim, and rich fabrics like chintz or linen.
Pick the Right Revamp Approach Based on Skill Level
Not every method requires heavy tools or a large budget. Select a technique that fits your current abilities and available time:
* Paint or Stain: Best for beginners, taking 2 to 4 hours with a cost of $20 to $60.
* Fabric Wrap: A beginner-friendly option requiring 3 to 5 hours and costing $50 to $120.
* Full Upholstery: An intermediate task taking 6 to 8 hours with a budget of $100 to $200.
* Wood Slats or Shiplap: Requires intermediate skills, 4 to 6 hours, and costs $60 to $150.
* Floating Shelf Headboard: An advanced project needing 6 to 10 hours and $100 to $300.
Gather Essential Tools and Materials
Success depends on having the correct equipment before you start working. Collecting these items beforehand prevents interruptions and ensures a smooth workflow.
Essential Tools Checklist
You will need specific tools to measure, cut, and secure your materials effectively. Ensure you have these items ready:
* Measuring tape and level
* Scissors or electric fabric scissors
* Staple gun with 1/4″ staples
* Screwdriver or drill
* 220-grit sandpaper or Surf Prep sander
* Paint sprayer (optional but recommended)
* Artist brush for touch-ups
* RZ Mask for safety during sanding
Safety First: Always wear a mask when sanding or spraying primer to protect your lungs.
Base Materials by Method
Your material list changes based on the technique you choose. Here is what you need for common approaches:
* For Upholstery: Plywood board, 1 to 2 inch foam padding, batting, and upholstery-grade fabric.
* For Painting: TSP-based cleaner, water-based primer, interior paint, and satin top coat.
* For Wood Additions: Pine boards, pallet wood, wood glue, screws, and decorative trim.
* For Creative Touches: LED strip lights, thick rope, picture rails, or mirror tiles.
Prep the Surface Correctly Before Painting
Proper surface preparation is the most critical step for a durable finish. Skipping this stage often leads to peeling paint or weak adhesive bonds later.
Clean Thoroughly Before Any Work
Dirt, oil, and old wax prevent paint and adhesive from sticking properly to the surface. Follow these steps for a clean base:
1. Mix White Lightning cleaner with water in a spray bottle.
2. Spray the entire surface and scrub gently with a sponge pad.
3. Wipe clean with a damp cloth and let it dry completely.
Why it matters: Skipping cleaning causes peeling paint and weak foam adhesion.
Sand for a Smooth Finish
Sanding creates a texture that helps primer and paint adhere securely. Use 220-grit sandpaper or a hand sander for best results.
* Attach a sponge pad for curved areas to follow contours.
* Sand until the surface feels smooth and slightly dull.
* Wipe away all dust with a damp cloth before proceeding.
Warning: Never skip this step because even glossy finishes need scuff-sanding.
Repair and Fill Imperfections
Fix any dents, holes, or gaps to ensure a professional appearance. Use wood filler like Dixie Mud and let it dry completely. Sand the filled areas smooth and use stain markers for small scratches on stained wood.
Paint or Stain the Frame for Durability
Applying color transforms the look of your headboard instantly. Using the right primer and technique ensures your hard work lasts for years.
Prime for Long-Lasting Results
Primer blocks odors and stains while creating a uniform surface for paint. Use BOSS water-based primer directly from the container without thinning it.
1. Strain the primer to remove any clumps.
2. Apply with a sprayer or brush and let dry for 2 to 4 hours.
3. Use this layer as your first coat of paint if desired.
Pro Tip: Use a dedicated sprayer for primer to avoid clogs and ensure even coverage.
Apply Base Coat and Protective Top Coat
Use high-quality interior paint like Dixie Belle’s Cotton for a crisp white finish. Spray two thin coats, waiting 2 hours between each application.
* Move indoors if temperatures are too cool to prevent drying issues.
* Apply a satin finish or clear coat for protection.
* Mix a small amount of stain into the clear coat to prevent cloudiness.
Final Check: Lightly sand with a red pad between coats for ultra-smooth results.
Upholster for Soft Luxe Comfort
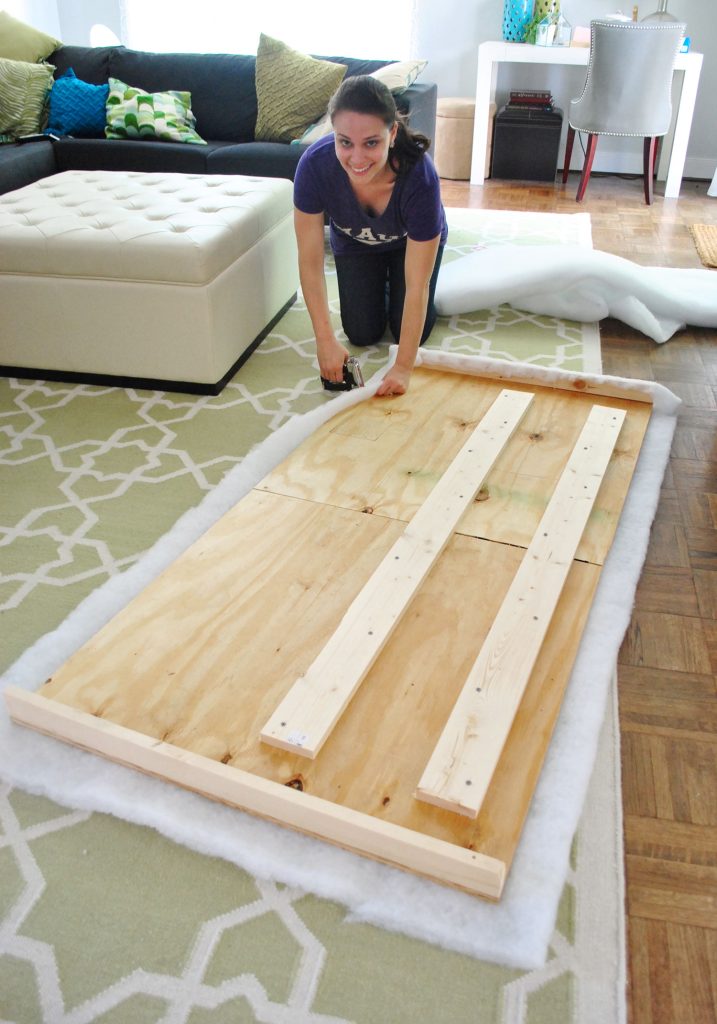
Adding fabric and padding creates a plush, comfortable surface perfect for reading in bed. This method adds texture and warmth to your bedroom decor.
Build the Layered Stack
Start by laying your fabric face down on a large, flat surface. Place the foam on top, ensuring it is cut 1 inch smaller than the board.
* Add three layers of batting for extra plushness.
* Set the wooden board on top of the stack.
* Skip foam for a lightweight build and use thick batting only.
Staple Fabric Tightly
Pull the fabric taut over the edges and staple it to the back of the board. Start at the center of the top edge and work your way down.
1. Move to the bottom center, pull tight, and staple.
2. Repeat for the left and right sides, always working from the center out.
3. Remove staples and re-stretch if wrinkles appear.
Avoid Wrinkles: If fabric sags, remove staples and re-stretch evenly.
Trim Excess and Add Decorative Elements
Cut off extra fabric with scissors for a clean edge. Attach decorative trim with wood glue and small nails to hide the staples. Splice trim pieces at corners for wide headboards.
Upgrade with Structural Add-Ons
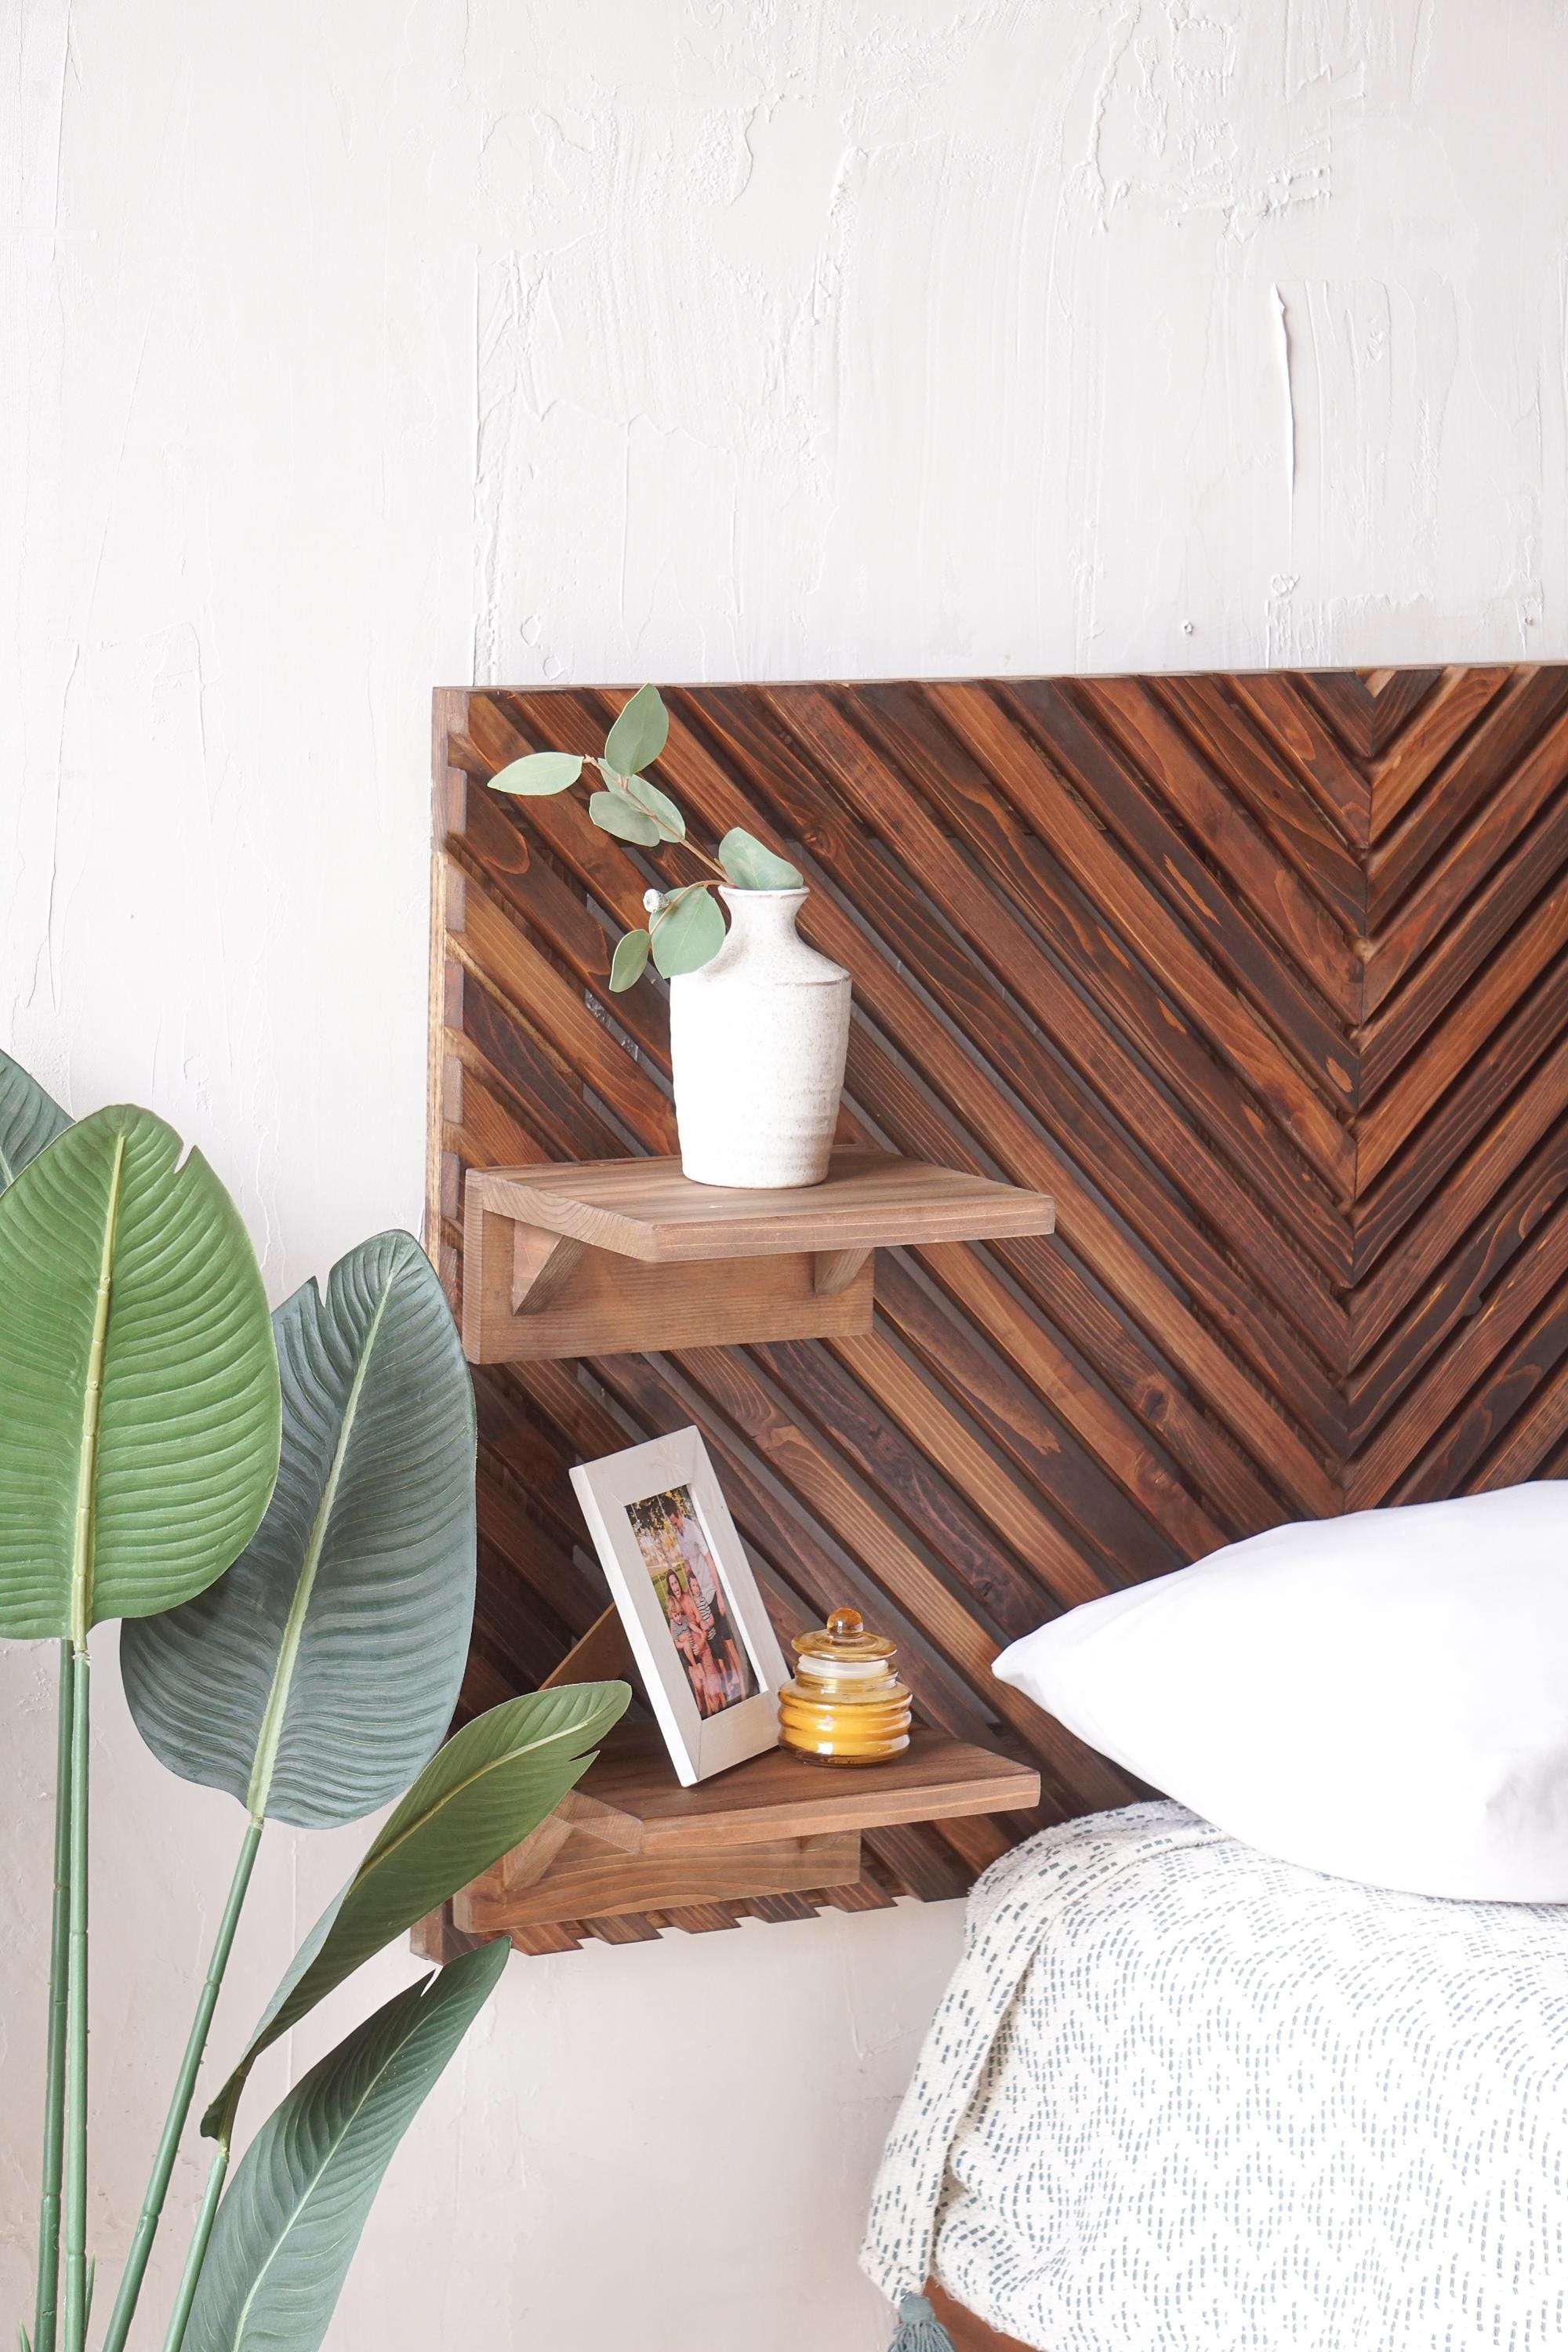
Adding wood elements or shelves increases functionality and visual interest. These upgrades turn a simple headboard into a multi-purpose feature.
Install Wooden Slats or Shiplap
Cut 1×2 or 1×3 boards to match your bed width. Arrange them vertically, horizontally, or in a herringbone pattern.
* Attach to the backing board with wood glue and screws.
* Sand, stain, or paint the unit as one piece.
* Use pallet wood for a rustic farmhouse charm.
Build Floating Shelves Above Bed
Mount brackets at your desired height above the mattress. Attach solid wood shelves and style them with books, plants, or candles. This adds storage without crowding the bed area.
Mount a Mirror Headboard
Hang a large framed mirror or cluster small mirrors to reflect light. Use heavy-duty wall anchors to ensure safety. This technique makes the room feel larger and brighter.
Try Creative Low-Cost Alternatives
You can achieve a high-end look without spending a fortune. These creative ideas use inexpensive materials for maximum impact.
Rope-Wrapped Edge and Curtain Styles
Wrap thick rope or twine tightly around the headboard perimeter. Secure it every 6 inches with small nails and seal with a clear coat.
* Install a curtain rod 6 to 12 inches above the bed frame.
* Hang heavy drapery or a tapestry for a renter-friendly option.
* Use LED strip lights behind the board for ambient glow.
Gallery Wall Headboard
Attach small picture frames or prints directly to the board. Arrange them in a grid or asymmetrical cluster. Use lightweight frames to avoid sagging and add a personal touch.
Troubleshoot Common Problems
Issues like lifting foam or cloudy paint can happen, but they have simple fixes. Knowing how to correct these mistakes saves time and materials.
Foam Won’t Stick or Fabric Wrinkles
Poor surface prep or weak adhesive often causes foam to lift. Use lighter foam or rely on fabric tension to hold padding in place.
* Remove staples if fabric wrinkles due to over-stretching.
* Re-stretch from top to bottom with even pressure.
Paint Looks Cloudy or Trim Is Short
Water-based top coats can dry cloudy in humid conditions. Sand lightly and apply a “chocolate milk” mix of clear coat and stain.
* Splice two trim pieces with a miter joint if they are too short.
* Buy extra trim to minimize visible joints.
Optimize for Budget and Impact
Revamping is cost-effective compared to buying new furniture. A thrifted flip can cost around $175 while retail options exceed $400.
Cost Breakdown and Savings Tips
A typical project includes a $35 thrifted headboard, $30 for foam, $50 for fabric, and $60 for finishes.
* Use leftover paint or sample pots to save money.
* Source reclaimed pallet wood or free curbside lumber.
* Buy remnant fabric from upholstery shops.
Eco Win: Revamping reduces waste and supports sustainable decor practices.
Install and Maintain Your New Headboard
Secure attachment ensures safety and stability for daily use. Proper maintenance keeps your revamped piece looking fresh for years.
Attach to Bed Frame or Wall
Flip the bed frame upside down to align mounting holes. Secure with included screws or heavy-duty bolts to prevent wobbling.
* Use heavy-duty wall anchors for floating designs.
* Level the board before screwing into the wall.
* Hide cords for LED lights behind the board.
Cleaning and Maintenance Tips
Wipe painted wood with a damp cloth and avoid harsh chemicals. Vacuum upholstered fabric monthly and spot-clean with mild soap.
* Re-seal pallet wood every 1 to 2 years.
* Dust rope wraps with a soft brush.
* Use upholstery-grade fabric to prevent wear.
Frequently Asked Questions About Revamping Headboards
How much does it cost to revamp a headboard?
A basic DIY revamp using a thrifted frame costs between $100 and $200. This includes foam, fabric, paint, and trim, which is significantly less than buying new.
Can I revamp a headboard without sewing?
Yes, you can revamp a headboard without sewing by using a staple gun to attach fabric directly to the board. This method works well for flat panels and simple designs.
What type of fabric is best for headboards?
Upholstery-grade fabric is best because it withstands daily wear and tear. Avoid lightweight quilting cotton as it may tear or fade quickly.
How do I prevent paint from peeling off the headboard?
Prevent peeling by cleaning the surface with a TSP-based cleaner and sanding thoroughly before painting. Proper prep ensures the primer adheres to the wood.
Is it better to mount a headboard to the wall or bed frame?
Mounting to the wall creates a modern floating look and works well for heavy designs. Attaching to the bed frame is traditional and allows for easier bed movement.
Key Takeaways for Your Headboard Revamp Project
Revamping a headboard transforms your bedroom with minimal cost and maximum style. Proper preparation, including cleaning and sanding, ensures your paint or fabric lasts for years.
Choose a method that matches your skill level, from simple painting to complex upholstery. Start your project today to create a unique focal point that reflects your personal taste.



