
Do you struggle with neck pain during long flights or wake up with stiffness from poor sleep support? A neck pillow can transform your comfort, but store-bought options are expensive and often lack customization. How to make a neck pillow at home gives you complete control over materials, firmness, and design while saving 50 to 70 percent compared to retail prices. Whether you want a plush travel pillow, a therapeutic rice-filled wrap, or a quick no-sew solution using household items, this guide walks through every method step by step.
This article covers six distinct construction techniques, from beginner-friendly sewing projects to repurposed sock and towel pillows. You’ll learn which fabrics work best, how to choose the right filler, and pro tips for achieving a professional finish.
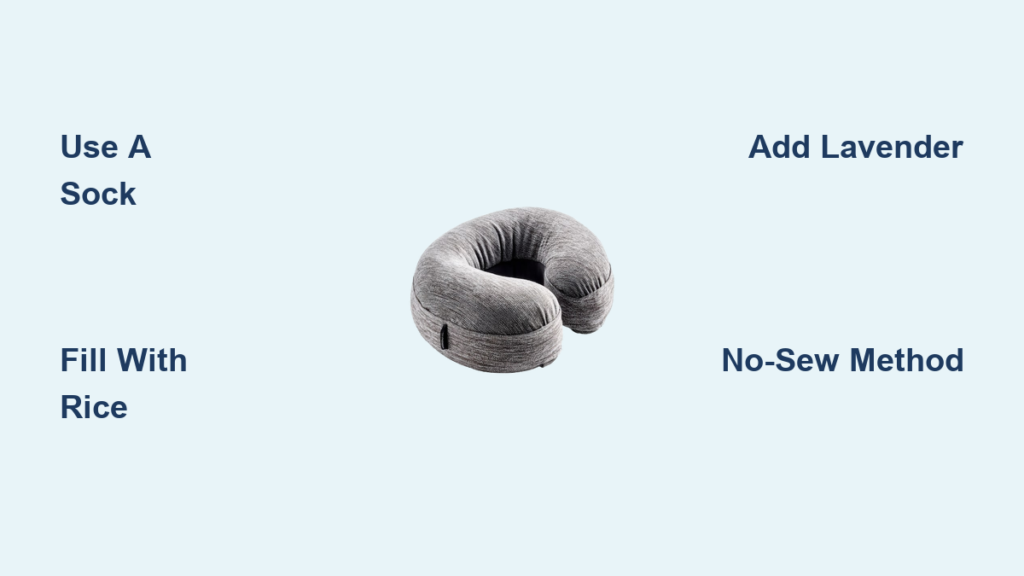
Choose Your Ideal Neck Pillow Shape
Selecting the right shape determines how well your pillow supports your neck. Each design serves different purposes and comfort needs.
U-Shaped Travel Pillow Design
The U-shaped pillow wraps around the back of your neck with symmetrical ends that meet under your chin. This classic design prevents head drooping during flights, car rides, or train trips. The balanced support keeps your spine aligned and reduces muscle strain.
For this shape, use a template measuring 14 to 15 inches tall and 20 inches wide, with an inner neck opening of 7 to 8 inches. Lightweight fillers like polyester fiberfill or memory foam work best for travel. Sew two matching fabric pieces right sides together, leaving a gap to turn and stuff.
Bow-Tie Pillow for Adjustable Comfort
The bow-tie or hourglass design features two padded ends connected by a narrower center. This flexible structure conforms to your neck with gentle pressure and allows you to adjust the fit. Handles or loops attached at the center let you pull and tighten as needed.
This design excels for bedtime use, reading in bed, or anyone with chronic neck tension. The padded ends provide plush support while the slim center stays comfortable. Use three identical U-shaped pieces for assembly.
Fleece Hybrid for Quick Projects
The fleece hybrid skips complex seam finishing entirely. Fleece doesn’t fray, making it ideal for beginners or quick gift projects. Cut soft fleece into a U-shape, fold it once, sew around the edges with a 3/8-inch seam allowance, leave a 3-inch gap, turn right side out, and stuff with polyfill.
This method produces a soft, cozy pillow in under 30 minutes with no clipping or binding required.
Select Fabrics and Fillers That Match Your Needs

The right materials determine comfort, durability, and functionality. Choose based on your intended use.
Best Fabrics by Purpose
Cotton in quilting weight, sateen, or flannel offers breathability and holds shape well for everyday use. Fleece provides warmth and soft texture with no-fray edges, perfect for no-sew projects. Cuddle fabric delivers ultra-plush luxury for premium pillows or gifts. Terrycloth or towels work excellently for rice-filled therapy pillows due to durability and absorbency. Old T-shirts or socks stretch and repurpose economically.
Pre-wash all fabric before cutting to prevent shrinkage. Double-layer fabric for improved durability and to stop filler leakage.
Fillers That Add Function
Polyester fiberfill stays soft, lightweight, and machine-washable for general comfort. Memory foam provides firm, shape-retaining support for maximum neck support. Uncooked rice holds heat and cold for therapeutic relief. Dried lavender mixed with rice adds calming aromatherapy benefits. Essential oils like lavender or peppermint personalize the sensory experience.
Label rice-filled pillows clearly with “Contains Rice – Do Not Wash” to prevent mold or pest issues.
Sew a Basic Two-Piece Neck Pillow
This beginner-friendly method creates a custom travel pillow in 30 to 60 minutes.
Cut Fabric With Proper Seam Allowance
Fold your cotton or cuddle fabric in half, right sides together. Place a U-shaped paper template along the fold, centered and aligned. Pin in place and cut around the outline, adding 1/4 to 1/2 inch seam allowance. You will get two identical pieces. Use sharp scissors or a rotary cutter for clean curves.
Sew and Turn the Pillow
Place both pieces right sides together. Pin edges and sew around the perimeter with a straight stitch, leaving a 4-inch gap for turning and stuffing. Backstitch at start and end for strength. Clip V-shaped notches into curved seams to reduce bulk when turning.
Turn the pillow right side out using a chopstick or point turner. Push gently to fully extend the ends.
Stuff and Close the Opening
Press seams flat with an iron. Begin adding fiberfill in small amounts, pushing deep into corners. Add until firm but comfortable, as overfilling creates stiffness. For rice fillers, fill only two-thirds full to maintain flexibility.
Fold raw edges of the opening inward by 1/2 inch. Close with an invisible ladder stitch for a seamless finish. Consider sewing a second line of stitching just inside the first seam for added durability.
Build a Three-Piece Structured Pillow
This method creates a clean interior with no exposed seams and resists flattening over time.
Sew in Three Stages
Cut three identical U-shaped pieces from cotton or fleece. First, fold one piece right sides together along the long curve and sew from center to each end. Second, align the center of a second piece with the first and sew from center outward, leaving a 2.5-inch gap in the middle. Third, place the third piece on top, right sides together, and sew completely around without a gap.
Turn and Finish
Turn the pillow right side out through the 2.5-inch gap. Use a knitting needle or chopstick to push out corners. Hand-stitch the opening closed with a ladder stitch. The triple-layer construction adds long-term support and resists flattening.
Use only the edge of the presser foot touching the fabric for better control on tight curves.
Create a No-Sew Sock Pillow in 5 Minutes
This quick method uses household items for instant therapeutic relief.
Fill a Crew or Knee-High Sock
Grab a clean crew or knee-high sock, not ankle length. Fill it with 2 to 3 cups of uncooked rice. Add 1/4 cup of dried lavender and 10 to 15 drops of essential oil like lavender or eucalyptus. Stir well to distribute the scent before pouring into the sock.
Fold and Seal the Top
Leave 2 to 3 inches of empty sock at the top. Fold the end down twice, using the sock’s elastic band to hold it in place. Sew the folded edge shut by hand with a whip stitch or machine stitch. Attach a tag warning: “Contains Rice – Do Not Wash.”
Use this pillow hot by microwaving in 1-minute intervals for up to 2 minutes, or cold by freezing for 30 minutes or longer.
Repurpose a Towel Into a Neck Pillow
Transform a household towel into a functional pillow with this simple method.
Modify a Hand Towel
Use a terrycloth hand towel at least 20 by 12 inches. Trim off any labels. Fold lengthwise with right side inward. Sew one long edge and one short end with a 5/8-inch seam allowance. Turn right side out.
Fill and Close
Fill the tube two-thirds full with rice and lavender mixture. Fold the open edge inward by 5/8 inch and sew shut with small, tight stitches. The textured terry surface grips clothing and resists slipping. Hang on a hook when not in use for convenient storage.
Make a Fleece U-Pillow in 30 Minutes
This quick project produces a cozy pillow perfect for gifts or personal use.
Cut and Sew Fleece
Cut 1/2 yard of fleece in half. Fold one piece with stretch horizontal. Place a U-shape pattern on the fold and cut one side. Refold and cut the second piece. Place both pieces right sides together and clip edges.
Sew around with a 3/8-inch seam allowance, leaving a 3-inch hole. Turn right side out. No need to clip curves or finish seams since fleece won’t fray.
Hand-Stitch the Opening
Use a ladder stitch with matching thread to close the gap. Pull tight after each stitch for invisibility. No ironing needed as fleece holds its shape naturally.
Enhance Your Pillow With Smart Features
Add functionality with these optional upgrades.
Add a Removable Washable Cover
Create a removable zippered cover using cotton sateen or flannel. This lets you machine-wash the outer layer without damaging the inner pillow. Insert the inner pillow like a cushion cover, ideal for travel or shared use.
Install Compression Straps
Cut two 2.5 by 5-inch fabric straps or use ribbon. Attach to each end of the pillow. Add snaps, buttons, or domes so you can roll the pillow and secure it tightly. This makes the pillow luggage-friendly and compact for storage.
Add Handles for Adjustment
For bow-tie designs, attach 12-inch loops of 3/4-inch ribbon at the narrow center. These serve as handles to adjust tightness and improve grip. Backstitch multiple times for strength.
Personalize With Contrasting Fabrics
Use contrasting fabrics like an airplane print on one side and a solid color on the other. Add an embroidered name or fabric tag for personalization. This increases emotional value, especially for gifts.
Fill Right for Optimal Firmness
The filler determines support level and functionality.
Fiberfill for Soft Comfort
Use polyester fiberfill like Fairfield Poly-Fil. Push stuffing into corners with a pencil end. Add gradually and test firmness by draping around your neck. One bag may not be enough for two pillows.
Foam for Maximum Support
Cut memory foam to fit the U-shape. Wrap in fiberfill for a softer outer layer. This combination suits long-haul travelers needing rigid support. It costs more but lasts longer.
Rice for Heat or Cool Therapy
Fill rice pillows only two-thirds full so they remain flexible. Microwave for 1 to 2 minutes, testing temperature first. Use for sinus pressure, migraines, or neck stiffness. Shake before heating to distribute warmth evenly.
Never overheat rice pillows, as this risks burning the rice or fabric. Always test temperature on your inner wrist first.
Finish Like a Pro
Professional finishing techniques elevate your DIY pillow.
Clip Curves for Smooth Edges
After sewing, clip V-shaped notches into the seam allowance on curved areas. This reduces bulk and allows fabric to lay flat when turned. Cut close to the stitching but not through it.
Press for a Polished Look
Once turned, press seams with a warm iron and pressing cloth. This flattens the edge and gives a store-bought finish. Essential for cotton and sateen fabrics.
Close Gaps Seamlessly
Use a ladder stitch for invisible closure. Thread a thin needle with matching thread and knot the end. Insert needle under the fold on one side, then the other. Pull tight after each stitch. For plush fabrics like cuddle, a whip stitch with white thread blends well.
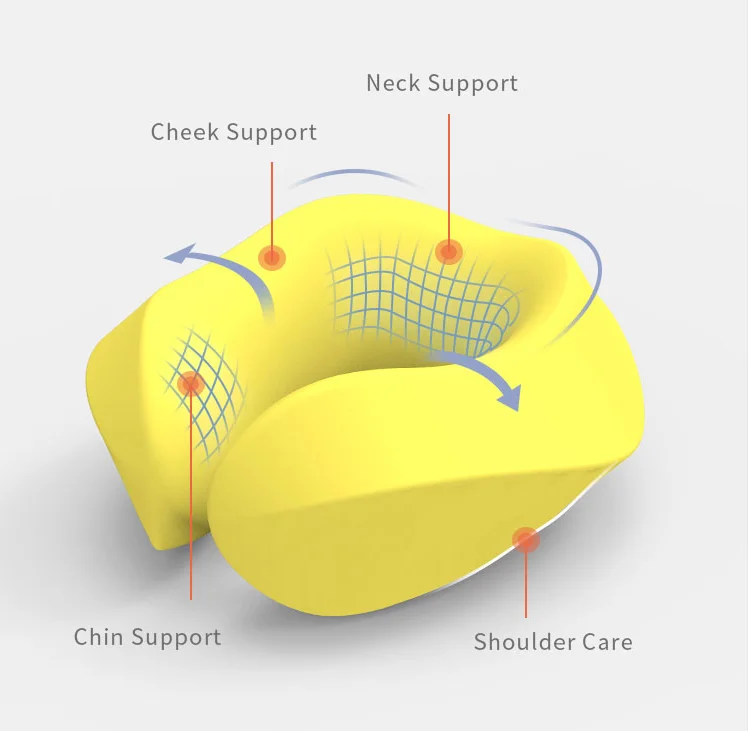
Use Your Pillow Effectively
Maximize comfort by using your pillow correctly.
On Planes and Trains
Drape the U-pillow around your neck with ends under the chin. This prevents head bobbing during sleep. Hang behind the headrest for lumbar support when seated upright.
At Home for Relaxation
Place behind your neck while lying down or sitting. Use as lower back support on couches. Bow-tie pillows work well in bed as they stay in place without slipping.
For Therapeutic Relief
Heat rice-filled pillows in 1-minute microwave bursts to soothe muscle tension and sinus congestion. Freeze for 30 minutes or longer to reduce inflammation and help with migraines. Use lavender for sleep promotion or peppermint for alertness.
Care and Maintenance Tips
Extend your pillow’s lifespan with proper care.
Washing Instructions
Machine wash fiberfill pillows on cool, gentle cycle. Tumble dry low with a bath towel to protect shape. Spot clean rice-filled pillows only, as moisture causes mold. Wash removable covers regularly to maintain hygiene.
Storage Best Practices
Store in a dry, pest-free area. Keep rice pillows sealed in a cotton bag. Roll with straps secured to prevent creasing. Avoid damp basements or hot attics.
Extend Lifespan
Reinforce seams with double stitching. Use high-quality thread. Label fill type and care instructions. Add a laundry tag for gifted pillows. With proper care, expect 1 to 3 years of use.
Fix Common Problems Fast
Address issues quickly to preserve your pillow.
Pillow Flattens After Use
Under-stuffing or low-density filler causes flattening. Add more fiberfill or switch to a foam core wrapped in polyfill for better structure.
Corners Won’t Turn Out
Tight curves or thick fabric cause this issue. Use a chopstick or knitting needle and push gently from both sides to extend corners.
Filler Leaks Through Seams
Large stitches or thin fabric allow leakage. Use a smaller stitch length of 2.0 or less. Double-stitch or add a lining for reinforcement.
Uneven Shape
Lumpy or uneven stuffing creates imbalance. Distribute filling evenly before closing. Press and reshape after stuffing.
Seams Splitting
Stress from firm filler or weak thread causes splitting. Sew a second reinforcing line just inside the first seam.
Choose the Best Method for Your Skill Level
Select a method matching your time and experience.
| Method | Time | Skill Level | Best For |
|---|---|---|---|
| Two-Piece Sewn | 30 to 60 minutes | Beginner | Custom travel support |
| Three-Piece Structured | 45 to 75 minutes | Beginner | Clean, durable finish |
| Sock Pillow | 15 to 30 minutes | No-sew | Fast therapy solution |
| Towel Pillow | 30 to 50 minutes | Minimal Sew | Repurposing household items |
| Fleece U-Pillow | 30 to 45 minutes | Beginner | Gifts, kids, quick builds |
| Cuddle Fabric Pillow | 60 minutes | Intermediate | Luxury feel, gifting |
Frequently Asked Questions About Making a Neck Pillow at Home
What is the easiest way to make a neck pillow without sewing?
The sock method is the simplest no-sew option. Fill a clean crew or knee-high sock with 2 to 3 cups of rice, add optional lavender or essential oils, fold the top down twice, and sew or tie it shut. This takes 5 to 15 minutes and requires minimal supplies.
Which fabric is best for a travel neck pillow?
Cotton jersey or fleece works well for travel pillows. Cotton jersey offers stretch and comfort against skin. Fleece provides warmth and doesn’t fray, making it beginner-friendly. For a premium feel, consider cuddle fabric which is luxuriously soft.
How do I make my neck pillow firm enough for support?
Use memory foam as the core filler for maximum firmness. Alternatively, pack fiberfill tightly and add more than you initially think necessary. A foam core wrapped in fiberfill combines support with softness.
Can I wash a rice-filled neck pillow?
Rice-filled pillows should be spot cleaned only. Moisture can cause mold or attract pests. If your pillow gets dirty, wipe the surface with a damp cloth and mild soap. Always label rice pillows “Do Not Wash.”
How long does it take to make a fleece neck pillow?
A fleece U-pillow takes approximately 30 to 45 minutes from start to finish. Fleece doesn’t require hemming or seam finishing since it doesn’t fray, significantly speeding up the process.
What filler should I use for a heating or cooling neck pillow?
Uncooked rice works best for temperature therapy. It holds heat and cold effectively. Fill only two-thirds full to maintain flexibility. Microwave in 1-minute intervals or refrigerate for 30 minutes or longer before use.
Key Takeaways for Making Your Own Neck Pillow
Making a neck pillow at home gives you complete control over comfort, materials, and design. Choose a U-shaped design for travel support or a bow-tie shape for adjustable bedtime comfort. Use cotton or fleece for everyday pillows, and consider cuddle fabric for premium gifts. Select polyester fiberfill for washable softness, memory foam for firm support, or rice for therapeutic heating and cooling options.
Start with the sock method for a quick 5-minute project, or commit to a sewn two-piece pillow for lasting travel comfort. Double-stitch seams for durability, label care instructions clearly, and store rice-filled pillows in dry areas. With savings of 50 to 70 percent compared to store-bought versions and full customization ability, your homemade neck pillow becomes a practical wellness investment.
Begin with a simple sock and rice pillow tonight to experience immediate relief, or gather materials for a full sewn project this weekend. Either way, you are creating something that supports your comfort, health, and creativity.


