
Tired of stiff, generic travel pillows that never quite fit your carry-on? A handmade travel pillow case gives you comfort, style, and personal flair all in one project. Whether you are sewing for yourself, creating a thoughtful gift, or participating in the 1 Million Pillowcase Challenge for charity, learning how to make a travel pillow case is a rewarding skill that takes just an afternoon. This guide covers five construction methods, from beginner-friendly envelope styles to professional French seams, so you can choose the approach that fits your skill level and style preferences.
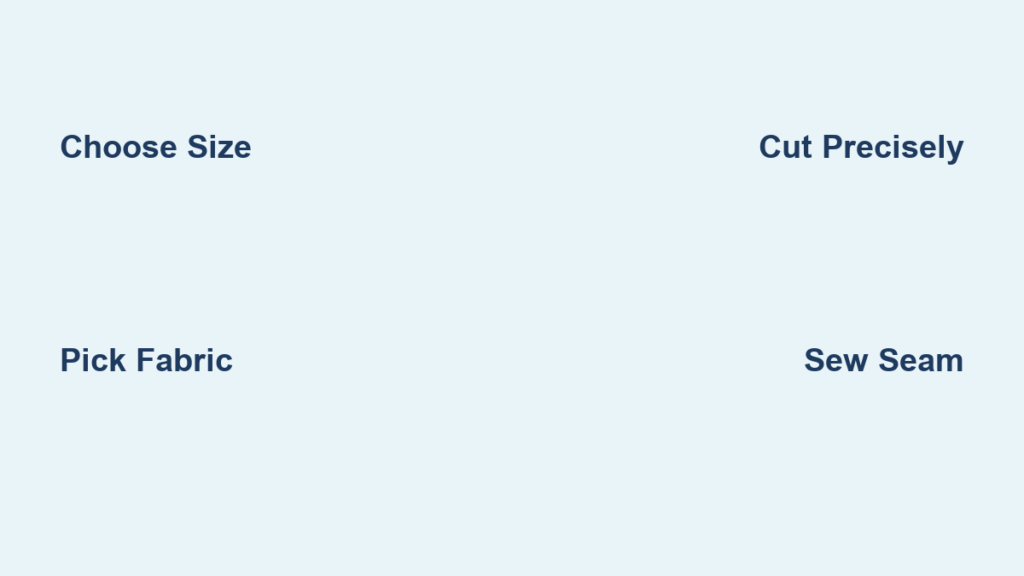
Choose the Right Pillow Size for Your Case
Before you cut any fabric, you need to know exactly what size pillow insert you are working with. Travel pillows typically range from 12×16 inches to 14×20 inches, with shredded memory foam inserts like the popular Coop brand measuring right around 14×20 inches. Your finished case should be 0.5 to 1 inch larger than the insert to allow easy insertion and removal without stretching the fabric.
For standard travel pillow sizes, aim for these finished dimensions. A 12×16 inch insert works best with a 13×18 inch case. A 14×20 inch insert fits nicely in a 24×30 inch envelope-style case. If you are making a custom size, simply add 1 inch to both the length and width of your pillow insert, then add an additional 3 inches to one length if using an envelope closure.
Pick Durable, Washable Fabric
The best fabric for travel pillow cases is 100 percent quilting cotton. It is sturdy, easy to sew, and holds up beautifully to repeated washing. You can also use cotton blends labeled as washable, but avoid stretchy knits unless you plan to interface them, as they can distort during use and make assembly frustrating.
Quilting cotton comes in endless prints and themes to match any preference. Holiday fabrics work well for seasonal gifts, while patriotic designs with stars and plaids appeal to many travelers. For donation projects, bright cheerful prints like rainbows, animals, and nature scenes are always welcome at hospitals and treatment centers.
When calculating yardage, remember that half a yard yields one 15×35 inch piece using the burrito method. If you work with striped fabrics running parallel to the selvage, one yard can produce up to three pillow cases. Directional prints require more careful alignment, so you may need extra fabric to match the pattern.
Gather Essential Sewing Tools
You do not need a professional sewing studio to make a beautiful travel pillow case. A few key tools will give you clean, durable results every time.
You will need a sewing machine with straight and zigzag stitch capabilities. A rotary cutter with a cutting mat and clear ruler ensures precise cuts. An iron and ironing board are critical for pressing seams at every step. A point turner or simple chopstick helps you turn cuffs and corners neatly. Use an 80/12 universal needle for cotton fabric and 100 percent polyester all-purpose thread for strength and colorfastness. Pins or Clover clips keep layers from slipping during assembly.
Optional but helpful tools include a serger for finishing seams, a Schmetz topstitch needle for decorative stitching, and a cordless iron for pressing on the go.
Cut Fabric to Exact Dimensions
Precision cutting is the foundation of a well-fitting pillow case. The exact dimensions depend on which construction method you choose, but the principle remains the same.
For the burrito method, cut your main fabric to 15×35 inches. You can also join two 15-inch strips at the selvage to reach this length. Cut two cuff pieces at 6×15 inches and two accent strips at 2×15 inches. Remove the selvage from all pieces before cutting.
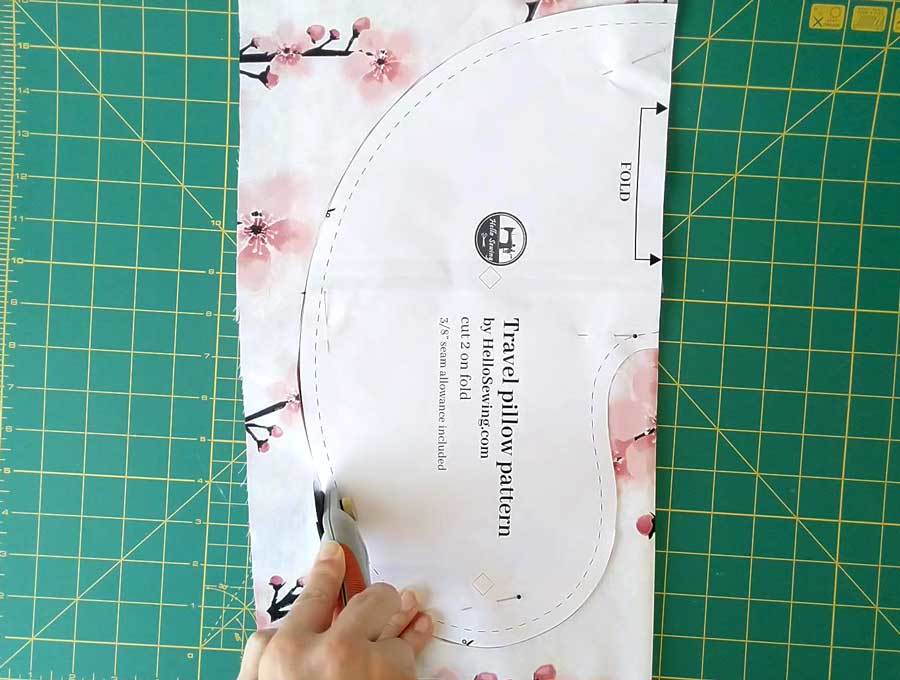
For envelope-style construction, cut a single 24×30 inch rectangle. This method requires no cuff pieces and uses a hemmed flap for closure instead.
For the piping method with a cuff, cut the main body at 16.5×27 inches, the cuff band at 6×27 inches, and a piping strip at 2×27 inches.
When cutting directional prints like animals or text, align the design vertically and cut 13.5×33 inches perpendicular to the selvage. Non-directional prints like florals and geometrics can be cut freely in any orientation.
Assemble with the Burrito Method
The burrito method creates a fully enclosed interior with no raw edges visible, making it ideal for gifts and donations. This technique is named for the way you roll the fabric layers together like a burrito before sewing.
Start by laying your 15×35 inch main fabric right side down on your work surface. Fold one 2×15 inch accent strip in half lengthwise with right sides together and press. Place the folded accent along the top edge of the main fabric. Add one 6×15 inch cuff piece on top, right side down, aligning all the 15-inch edges. Pin through all four layers to secure.
Now roll the entire assembly like a burrito. Fold the cuff over the top, then roll the main fabric inward toward you. Flip the whole thing so the cuff faces outward and re-pin to hold everything in place.
Sew down the full length using a 3/8-inch seam allowance, backstitching firmly at both ends. This single seam attaches the cuff, folds it over neatly, and creates a clean interior edge. Carefully unroll the burrito and press the seam flat.
Create Clean Side Seams with French Seams
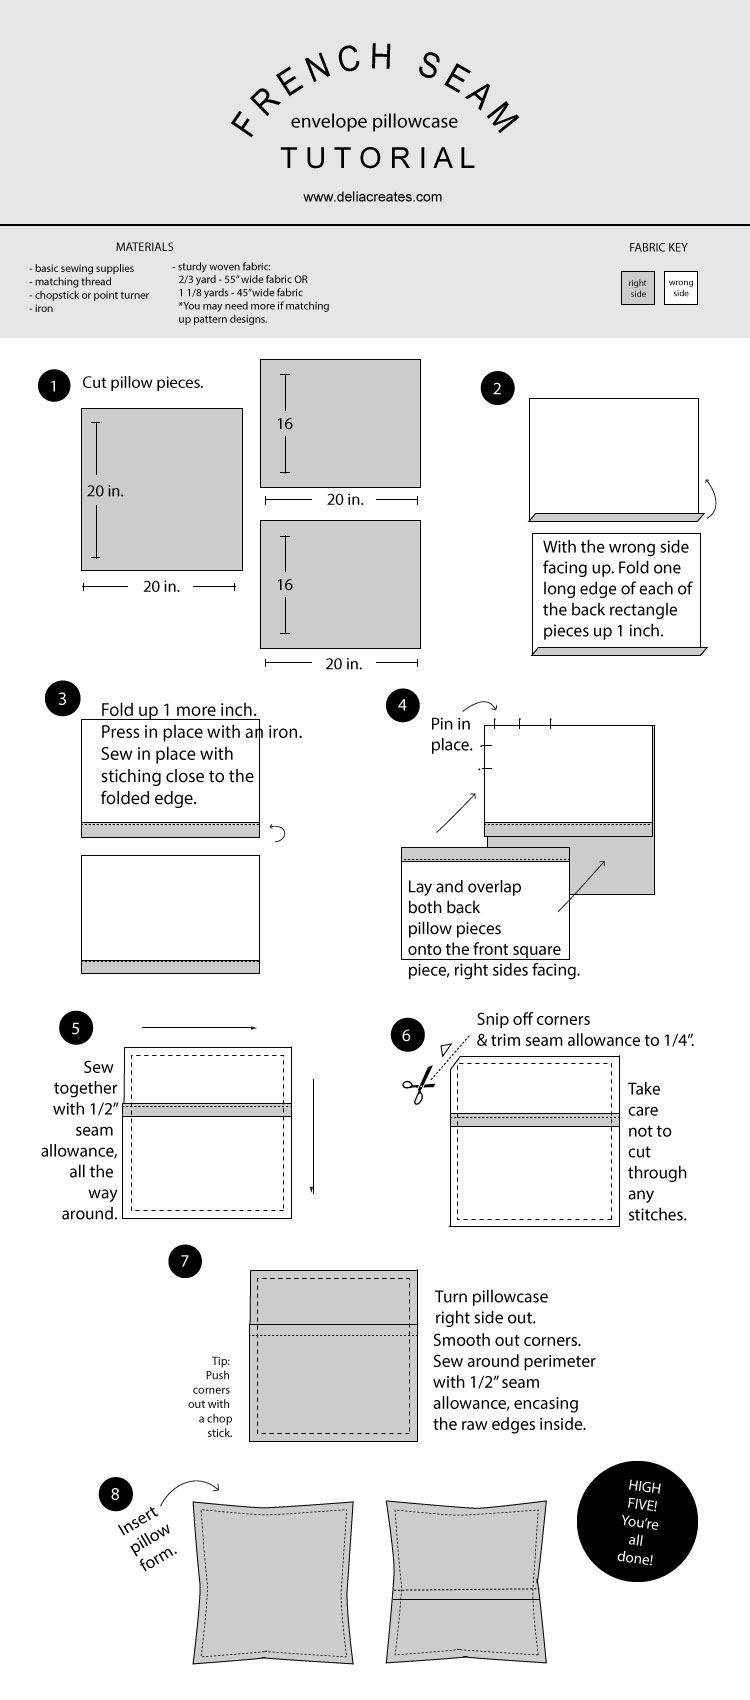
French seams encase all raw edges for a professional, fray-resistant finish that withstands 50 or more wash cycles. After using the burrito method, your tube will have two open ends that need finishing.
Turn the tube right side out and press the cuff seam flat. Pin the side edges with wrong sides together. Sew both sides with a 1/4-inch seam allowance. Trim the seam allowance to 1/8 inch, being careful not to cut into the stitching.
Turn the case wrong side out and press the seam flat. Sew a second seam with approximately 3/8-inch allowance to fully enclose the raw edges. Use a chopstick or bamboo skewer to push out the corners completely.
Turn right side out and press thoroughly. Check that no raw fabric is visible anywhere inside the case. The result is a clean, boutique-quality interior that looks professional on both sides.
Try the Envelope Style for Simplicity
If French seams feel intimidating, the envelope method is beginner-friendly and produces a clean result without any complex rolling techniques. This style works especially well for children’s nap pillows and donation projects.
Cut a 24×30 inch rectangle of fabric. On one 30-inch edge, press under 1/4 inch on the wrong side, then press under another 3 inches to form a hemmed flap. Edgestitch along the inner fold to secure.
Fold the fabric in half right sides together, aligning the 24-inch edges. Sew the side seam with a 1/4-inch seam allowance. Finish the seam with a zigzag stitch or serger to prevent fraying. Turn right side out and press flat.
Slide in a 14×20 inch pillow insert. The 3-inch hemmed flap keeps the pillow securely inside while allowing easy removal for washing.
Add Piping for a Boutique Finish
Piping adds a crisp, decorative border that elevates your pillow case from simple to professional. This technique is used in the 1 Million Pillowcase Challenge and creates a polished look that stands out.
Cut a 2×27 inch strip for the piping and fold it in half wrong sides together. Baste this to the top edge of your 16.5×27 inch body piece using a long basting stitch about 1/4 inch from the edge.
Fold the body right sides together and sew the side and bottom seams with a 1/2-inch allowance. Finish these seams with a serger or zigzag stitch. Turn the body right side out.
Slide the 6×27 inch cuff over the top opening, aligning raw edges so the piping is sandwiched between the cuff and body. Sew around the top edge with a 1/2-inch seam, enclosing the piping completely.
Turn the cuff right side out and press the seam downward toward the body. Topstitch along the edge of the cuff to secure everything in place and add visual definition.
Build a Handle-Equipped Case for Portability
Travelers who carry their pillow separately will appreciate a built-in handle for easy grabbing. This design works especially well with lightweight shredded memory foam inserts.
Cut two 15×3 inch strips for the handle. Place them right sides together and sew both long edges with a 1/4-inch seam. Use a point turner to flip right side out, press flat, and topstitch both edges.
Cut two 21×15.5 inch pieces for the main case. Place one piece right side up and position the handle ends near the top edge, centered. Baste the handle in place. Place the second piece on top, right sides together, and pin all edges. Leave a 3 to 4 inch gap on one side for turning.
Sew all edges with a 1/2-inch seam, backstitching firmly at the handle attachment points. Clip the corners, turn right side out, and press. Fold the gap edges inward and topstitch 1/8 inch from the edge around the entire perimeter to close the opening and add structure.
Customize Design and Closure Style
Once you master the basic construction, personalize your pillow case with simple upgrades. The closure type affects both function and appearance.
The envelope hem uses a 3-inch folded flap and is the simplest option. A roll-up cuff creates a tubular band that feels secure and adds decorative interest. An open top relies on friction alone and works best with handle-equipped models.
Add visual interest with accent strips in contrasting colors, typically 2 to 2.5 inches wide. Color blocking with different fabrics for the cuff and body creates striking dimension. Topstitching along hems adds both strength and visual definition. You can even sew in a fabric label with your name or care instructions.
Wash and Care for Long Life
Proper care keeps your handmade case looking fresh through years of use. Machine wash in cold or warm water with similar colors. Tumble dry on low heat or line dry for best results. Iron on the cotton setting if needed to remove wrinkles.
Avoid bleach and fabric softener, as these can break down the fibers over time. French seams and serged edges naturally prevent fraying, so your case will hold up beautifully even after frequent washing.
Donate to a Meaningful Cause
Handmade travel pillow cases make a real difference when donated to hospitals and treatment centers. The 1 Million Pillowcase Challenge accepts travel-sized cases alongside standard pillowcases. Contact local facilities to confirm their guidelines before donating.
Use washable cotton with bright, uplifting prints. Think rainbows, stars, animals, and cheerful nature themes. Hospitals specifically request cheerful prints to brighten patients’ days.
Your simple pillow case can bring comfort to a child undergoing treatment or an adult recovering from travel fatigue. It is a meaningful way to share your craft skills with those who need it most.
Key Takeaways for Making Travel Pillow Cases
Making a travel pillow case is a satisfying project that produces something truly useful. Choose quilting cotton for durability and easy care. Pick your construction method based on your skill level: envelope for beginners, burrito with French seams for intermediate sewers, and piping for advanced finishing.
Always cut precisely and press every seam for professional results. Add a handle for portability or piping for visual appeal. Most importantly, consider donating your creations to bring comfort to others through the 1 Million Pillowcase Challenge.
With just half a yard of fabric and a few hours, you can craft a travel pillow case that fits perfectly, washes easily, and lasts for years.
Frequently Asked Questions About Making Travel Pillow Cases
What is the best fabric for travel pillow cases?
Quilting cotton is the best choice because it is sturdy, easy to sew, and washable. It comes in endless prints and holds up to repeated laundering. Cotton blends labeled as washable also work well.
How do I know what size to make?
Measure your pillow insert and add 0.5 to 1 inch to both dimensions for the finished case size. For envelope styles, add an extra 3 inches to one length for the hemmed flap.
Can I make a travel pillow case without a sewing machine?
While possible, a sewing machine produces much more durable results. Hand-sewing works for simple envelope styles but struggles with French seams and piping.
What is the burrito method for pillow cases?
The burrito method involves rolling fabric layers together like a burrito before sewing. This technique creates a fully enclosed interior with no raw edges visible, ideal for gifts and donations.
How do I care for my handmade travel pillow case?
Machine wash in cold or warm water, tumble dry low, and iron on cotton setting if needed. Avoid bleach and fabric softener to extend the life of your case.
Can I donate travel pillow cases to charity?
Yes, many hospitals and treatment centers accept handmade travel pillow cases. The 1 Million Pillowcase Challenge specifically welcomes travel-sized donations. Use bright, cheerful prints and washable cotton.


